Websites usually contains pages like About, Terms & Conditions, Privacy Policy, Contact Us, etc. Ecommerce sites will contain Pages like Delivery Info, Shipping Details. Designing pages can be done easier in Output Books Ecommerce module.
Page Contents
How to create a New Page in Ecommerce website?
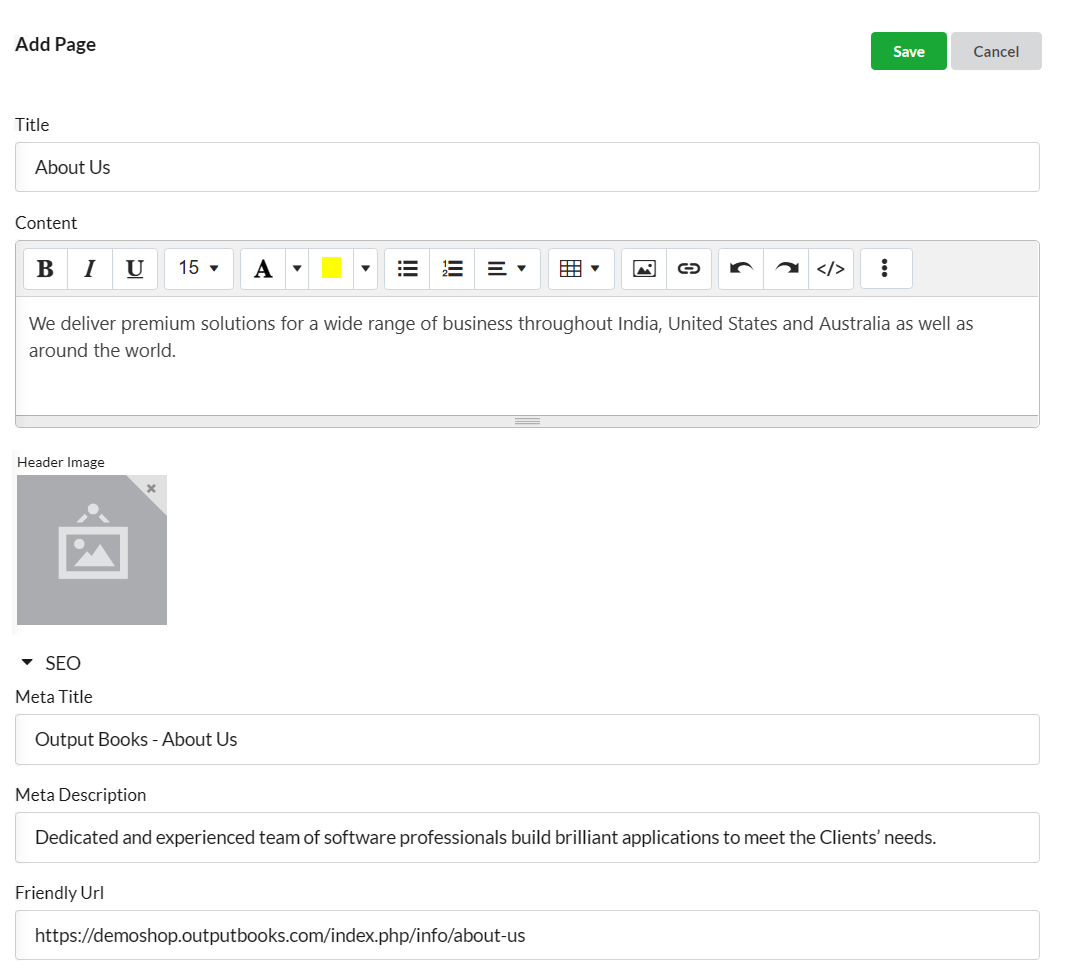
Open Configuration > Pages and click on the Add New Page button. Enter title & content of the page in the content box.
Set header image for the page if needed.
In the content editor, enter your content as usual & format text using various options available there.
Formatting Options available are:
- Bold, Italic, Underlined
- Text Size, Text Color, Background Color
- Unordered & Ordered List
- Paragraph Alignment
- Insert Table, Image, Link
You can enter the content in HTML code too by enabling Code View present there in editor. You can also add Contact Form, Contact Address in content block which will display the default contact form we provide. Add Custom Contact Form & customize our default contact form.
Page SEO
Click on the SEO option. Enter Meta Title, Meta Description & friendly URL for this page. This will boost your page on search engines.
How to Add Custom Scripts in Ecommerce website?
If you wish to add additional custom scripts to the header, body, or footer, you can use the Custom Scripts option.
Open Configuration > Pages and click on the Custom Scripts icon ![]() on the right side.
on the right side.
You can add custom styles and scripts there.
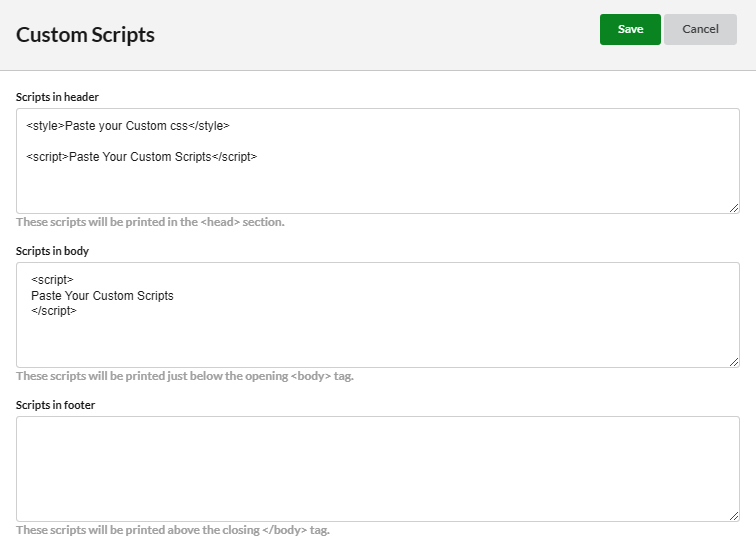
- Scripts in the header: These scripts will be inserted into the <head> section.
- Scripts in the body: These scripts will be inserted right after the opening <body> tag.
- Scripts in the footer: These scripts will be inserted just before the closing </body> tag.
How to create a New Menu in Ecommerce website?
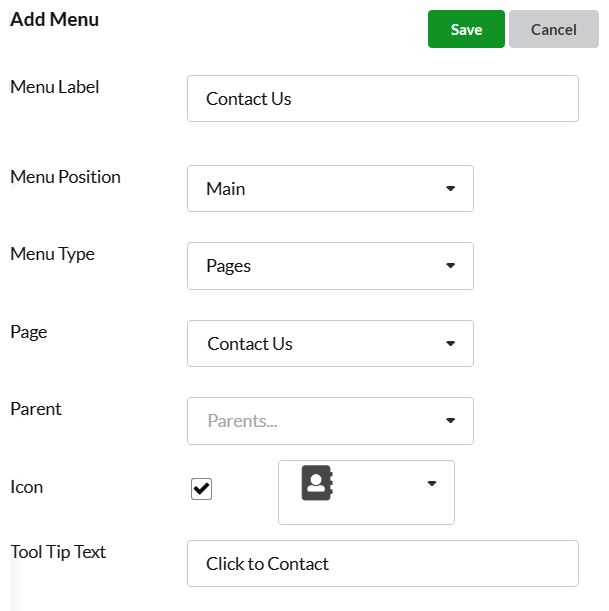
Open Configuration > Menus & click Add Menu.
1. Menu Label – Enter the name or label for the menu.
2. Menu Position – Choose Menu position as Bottom Center/Main/Bottom Right/Top.
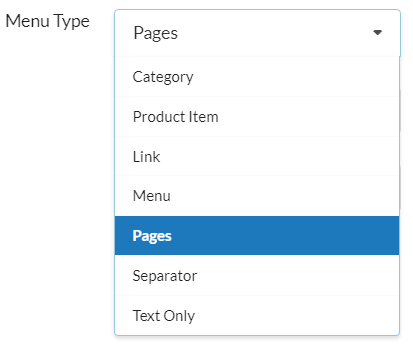
3. Menu Type – Menu can be of any type like:
- Category – Display a category as menu. Choose category, parent category(optional) from categories drop-down. Set icon for the menu, as well as provide tool tip text (optional).
- Product Item – Display an item as menu. Select the Item from Item drop down. Set icon for the menu, as well as provide tool tip text (optional).
- Link – Create a link as a menu. Clicking on the Menu will redirect it to the link provided.
- Menu – Create a new menu & assign it as Sub menu for the existing menus. Select the existing menus from the menus drop.
- Pages – Display an existing page as a menu. Pick the page to be displayed as a menu. Choose Parent page(if any).
- Separator – Display separators like “|”, “*”, etc. between menus.
- Text Only – Display a simple Text as a Menu. Choose icon & enter tool tip text if needed.
Quick way to upload Media
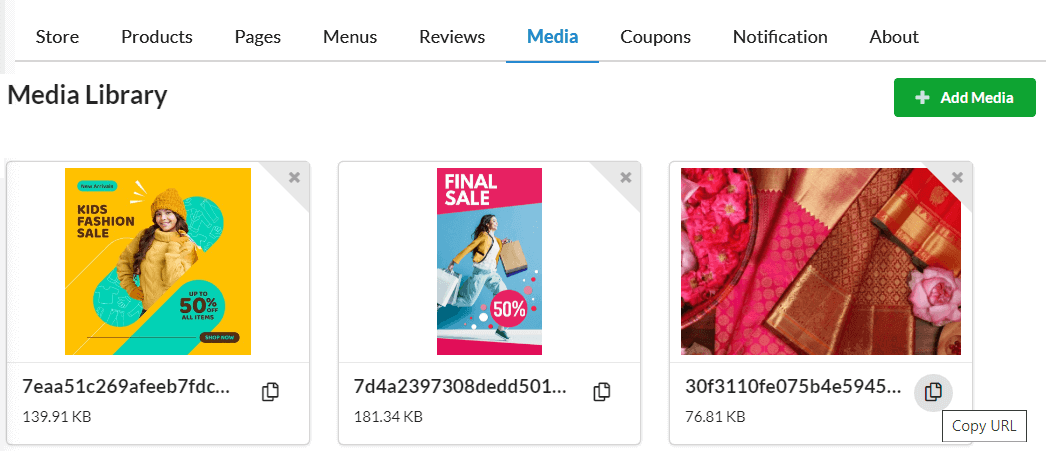
You can quickly upload/access the media of your site in Configuration > Media. Click on the Add Media button, browse your system & import media into Output Books.
After uploading, just click on the Copy icon associated with each image & copy the Image URL. You can use this image URL in any page which will add the image in that page.
