Barcode generation in Output Books helps you to make your billing and inventory management simple and easy. You can assign barcodes to your items at the retail outlet and scan the items whenever you need to sell them.
The items already present in your inventory with barcodes can be imported into Output Books and you can also generate barcodes for new items from Output Books.
First of all, you have to create Templates for Barcode.
Page Contents
How to create barcode templates?
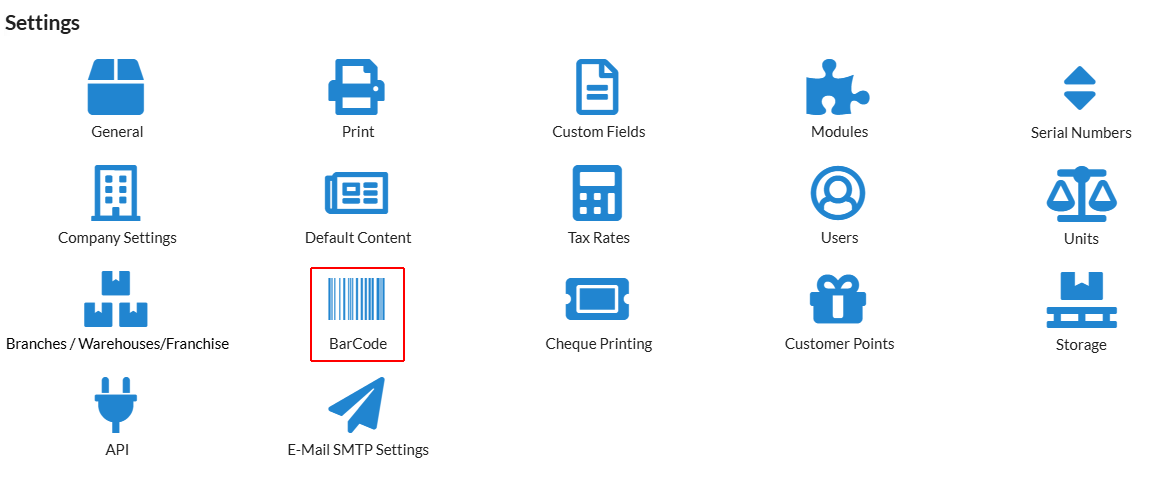
- Go to Settings in the left panel and select “Barcode” option.
- Click the Add button.
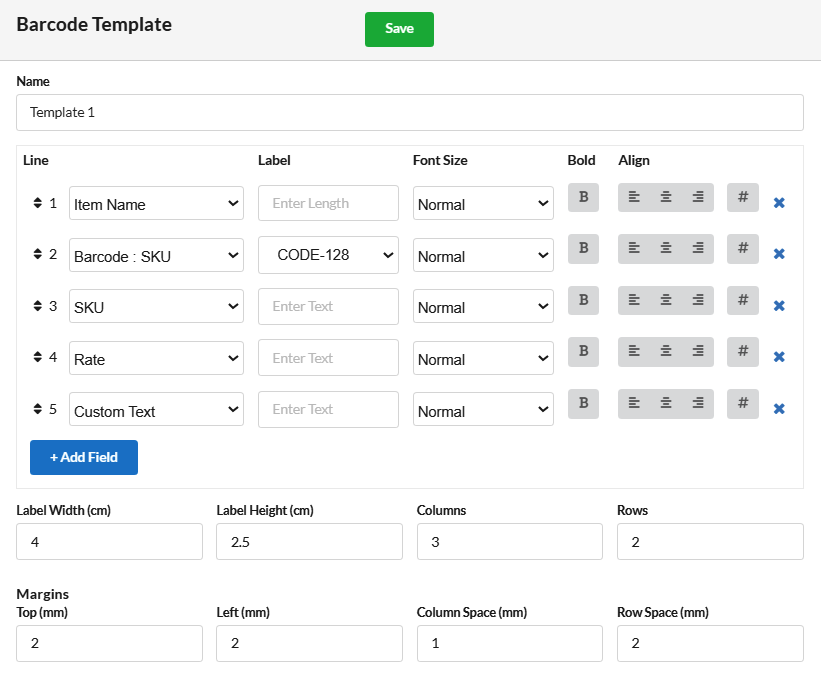
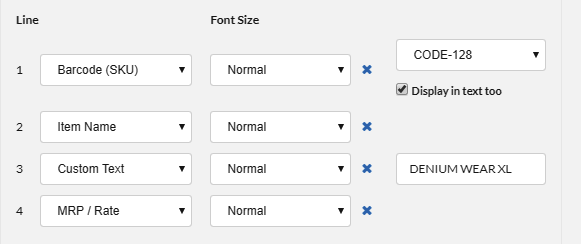
- On the Barcode Template pop-up, enter the name of the barcode template and fill the below fields to generate barcode of any type.
- Item Name – Display Item name at the top if chosen as first line.
- BCR/QR – Displays Barcode.
- SKU/Barcode – Displays SKU code.
- MRP/Rate – Display MRP / Rate as third in barcode generation if chosen as third line
- Custom Text – Display Custom Text as fourth in barcode generation if chosen as fourth line.
- Print Date – Automatically displays the current system date during barcode generation. To customize the format, click the ‘#’ icon and enter your preferred date format in the input field. Refer to the table below for supported date formats.
| Format String | Example |
|---|---|
| Y-m-d | 2025-05-14 |
| d-m-Y | 14-05-2025 |
| m/d/Y | 05/14/2025 |
| d/m/Y | 14/05/2025 |
| F j, Y | May 14, 2025 |
| jS F Y | 14th May 2025 |
| D, M j, Y | Wed, May 14, 2025 |
| l, F j, Y | Wednesday, May 14, 2025 |
| Fields | Description |
|---|---|
| Line | Select the Line Name which you want to display in the Barcode as first, second, third and fourth. You can choose any order as your wish. |
| Label | Choose the type of Code – CODE-128, Code-39, EAN-13, EAN-8, QR Code, UPC-A and UPC-E. |
| Font Size | Choose the Font Size as Normal / Medium / Big for the Item Name / Barcode / MRP or rate / Custom Text |
| Bold & Align | You can bold any line in barcode & align it accordingly. |
| Label Width & Height | Set width & height for barcode label/type in the respective boxes given. |
| Margins | Choose / set the specifications for Margin mentioned below in mm Top Left Row Space Column Space |
Likewise, any number of barcode templates can be created in Output Books with unique template names. For instance, we can create barcode template with template name as “Template 1” , “Standard”, etc.
Steps to auto-generate Barcode:
You can generate Barcode using auto generate Serial numbers by following these steps.
- Create Categories
- Create Attributes and associate to Categories
- Assign Category for Items
- Record Purchase
- Print Barcode
- Create Invoice
1. Create Categories
- Go to Manage > Items
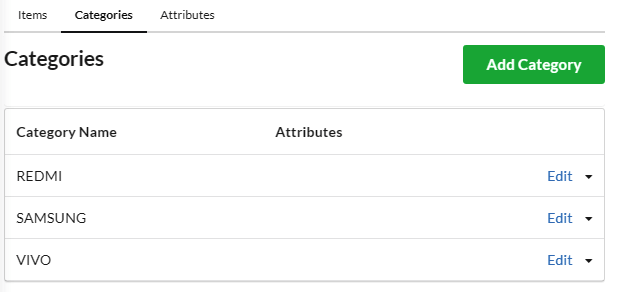
- Click Categories tab
- Click Add Category button and create required categories
2. Create Attribute and associate to Categories
- Go to Manage > Items
- Click Attributes tab
- Click Add Attribute button
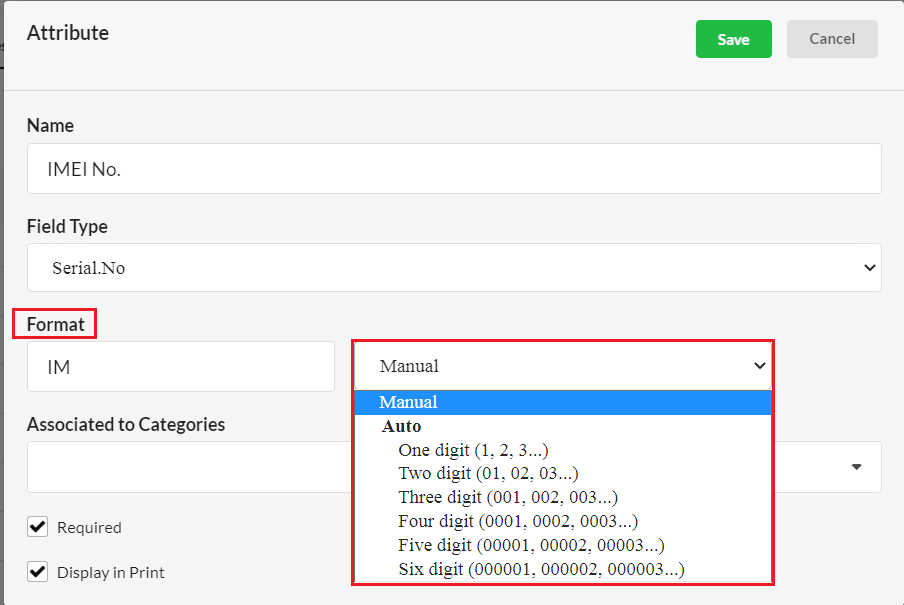
- Type S. No. in Name and select Serial No. in Field Type
- Enter the serial format(prefix for serial). Is is optional.
- Choose the mode of serial number generation as Auto mode and choose one digit/two digit, three digit/four digit, etc as per your desire.
- Select all associated categories
- Click Save
3. Assign Category for Items
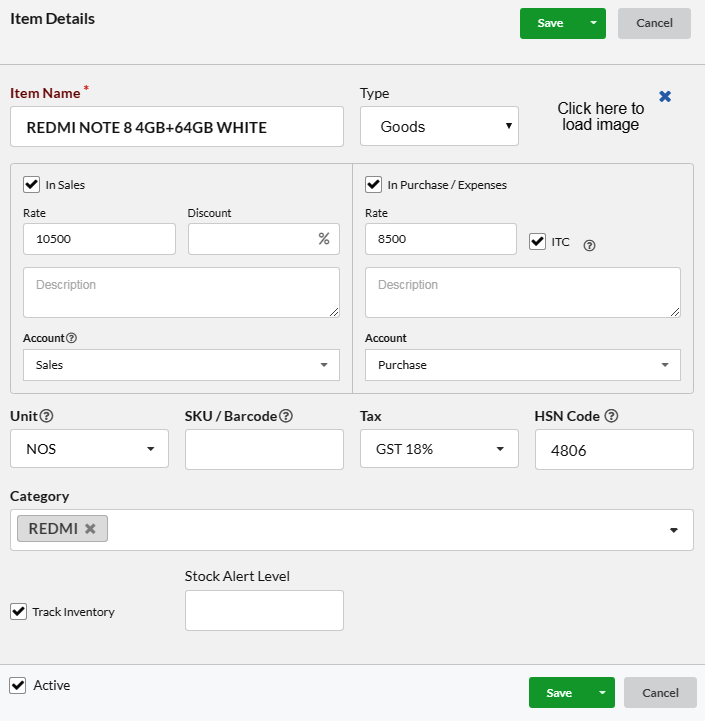
While creating items, assign the corresponding categories to that item. Doing so, the serial number is automatically assigned to that item.
4. Record Purchase
To create purchase bill,
- Go to Purchase > Purchase Bill
- Click New Purchase Bill
- Select Supplier from the Supplier dropdown.
- Select an item and provide quantity.
- Click Save
5. Print Barcode
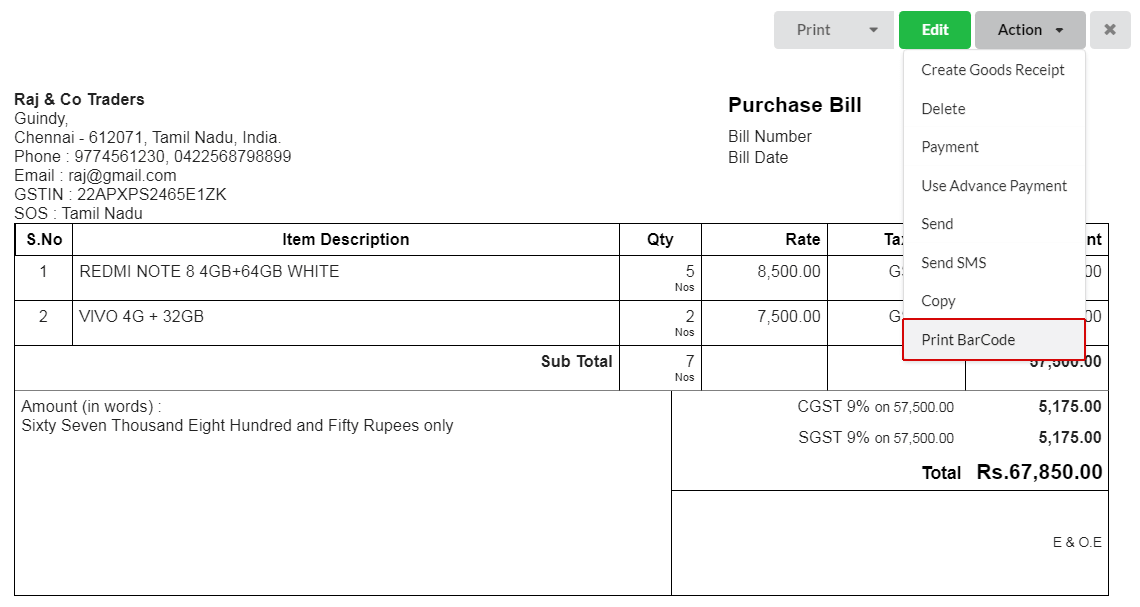
In the preview of the purchase bill, click the dropdown near Action button and select Print Barcode
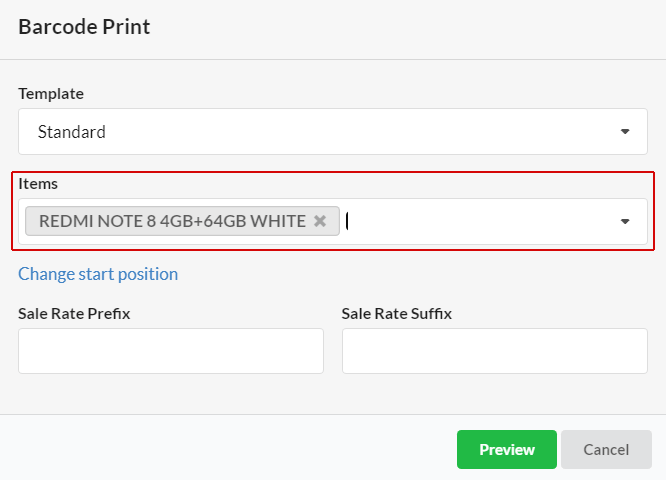
Select the desired barcode template and Items in the pop-up and click Preview. Here we are choosing barcode Template “Standard”.
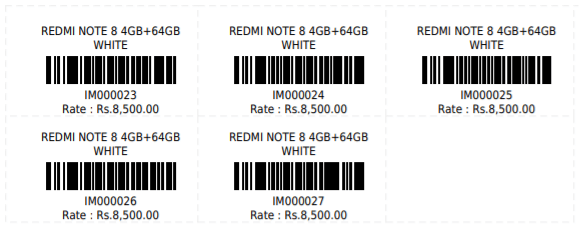
Based on the quantity given in the purchase bill, unique barcodes will be generated for the selected Item. You can print these barcodes in your stickers and paste in each items.
6. Create Invoice
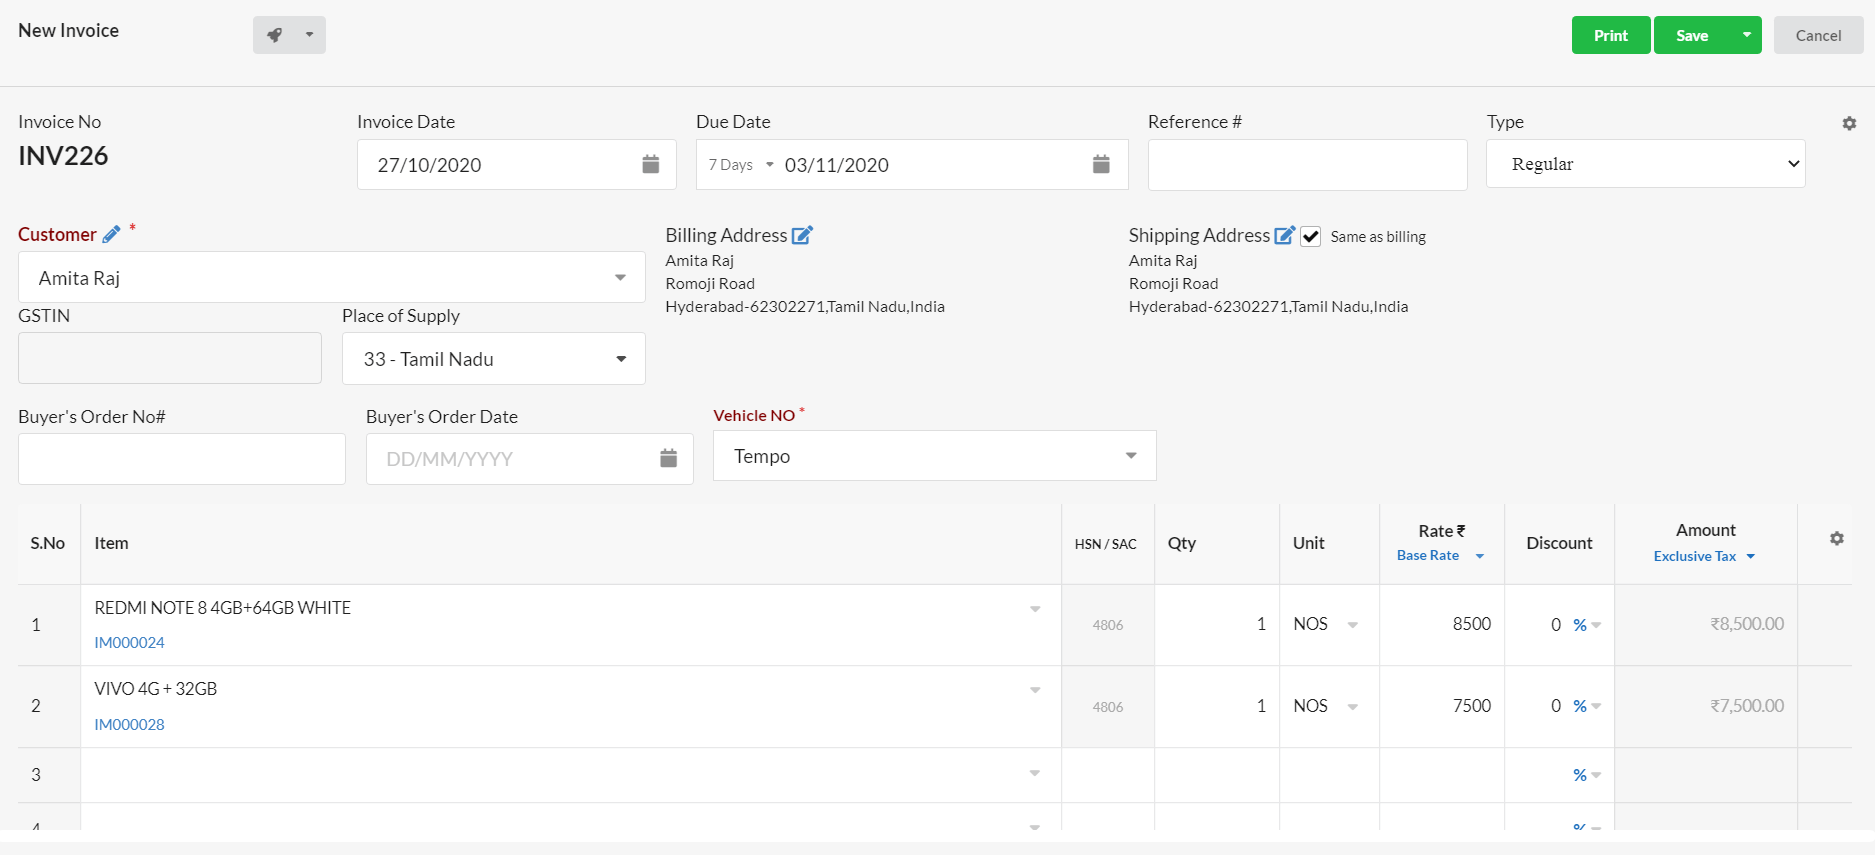
Using barcode scanner, you can scan the barcodes affixed in the Items and generate invoice within seconds. To create invoice,
- Go to Sales > Invoice
- Click New Invoice
- Select customer from the Customer drop down
- Place cursor in the Item Column and scan the barcode
- It will populate all other details automatically.
- Click Save.
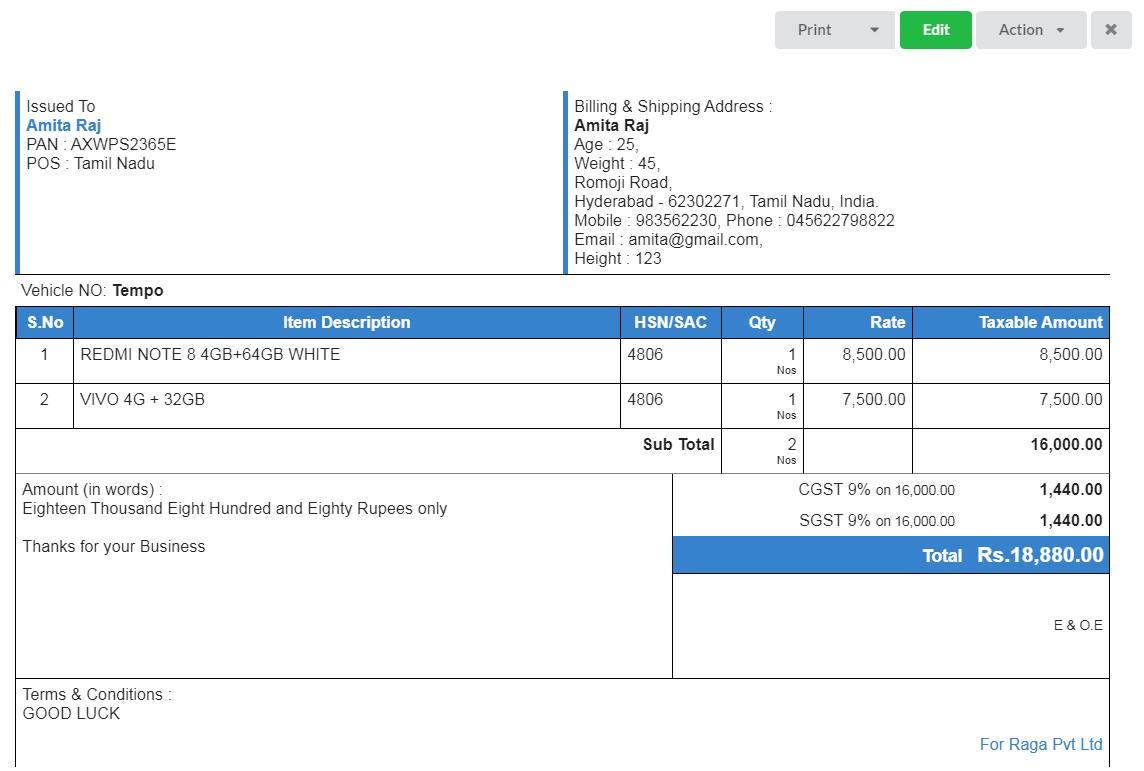
In Invoice, we can print item name along with or without the serial number as below.
Now, let us see what are the other ways to print barcode easily.
How to print Barcodes for Items?
To print the barcode, you can use any of the below options
Option 1:
- Under Settings > Barcode, click the “Edit” option associated with the desired barcode template.
- And click the “Print” option at the top of the template.
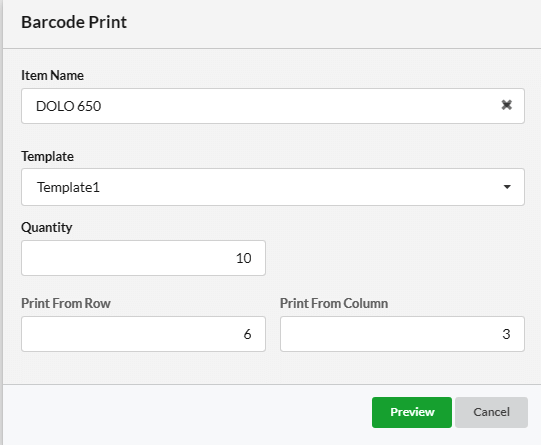
- On the Barcode Print pop-up that appears, choose the Item for which you want to generate barcode.
- Choose the Barcode template
- Enter the Quantity of Items
- If you wish to change the start position of the barcode, click the Change Start Position option.
- Then, fill up the “Print from row” and “Print from Column” field to change the barcode position.
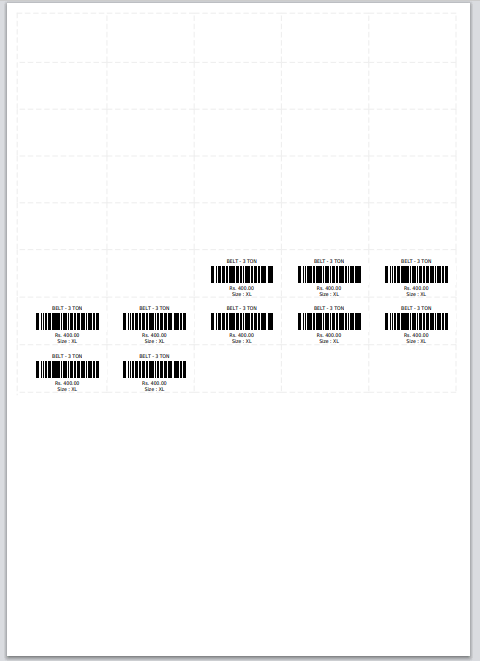
The barcode will be printed from the row and column number that you mentioned.Eg : If you have entered the start position row number as 6 and column number as 3 and item quantity as 10, the print preview will be as below:
Option 2:
Go to Manage > Items and click the three dots option at the right top of Items list and select the Print Barcode option. You can see that the same Barcode Print pop-up appearing. Fill the required details such as Item name, quantity and print your barcode.
BCR Line Reorder and Remove
You can reorder or remove any line while creating barcode template as you wish. It is mandatory to have BCR/QR line. It cannot be removed.
Preview of Sample Printed Barcodes
A sample of printed barcodes of various types is shown here:
