E-invoice (or) Electronic Invoice is a system in which all B2B invoices are uploaded electronically & then authenticated online through the designated portal.
After authentication, unique Invoice Reference Number (IRN) is generated for each invoice by IRP. Along with IRN, each invoice will be digitally signed & inserted with a barcode. This is E-Invoicing under GST.
Let us how to setup E-Invoicing in Output Books.
How to setup E-Invoice?
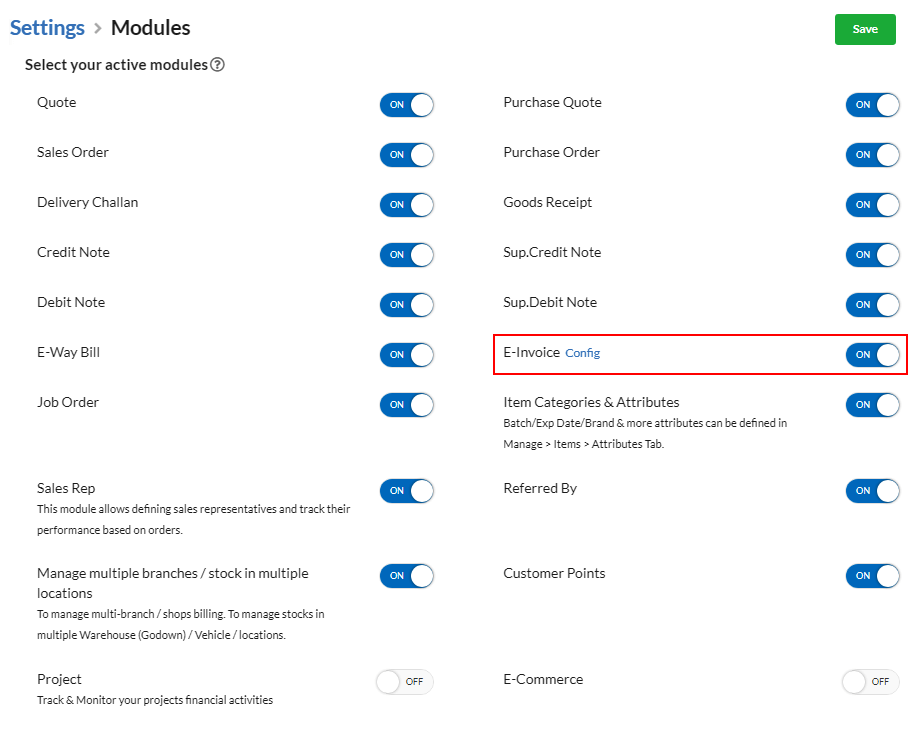
- In your Output books environment, open Settings > Modules & enable the E-Invoice toggle ON.
- Now, click on the Config option present near the E-Invoice option in Settings.
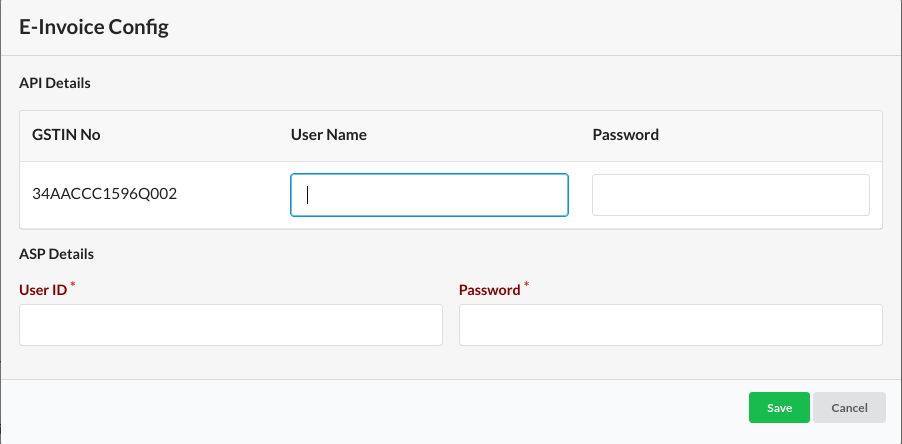
- On the config screen that pops-up, provide the E-Invoice Configuration details:
- Username & Password: – Create new API Username & password for E-invoice by following the steps mentioned here – Create E-Invoice Username & Password
*Note: Do not enter your GST username & password in E- invoice config pop up shown below. Follow the steps mentioned in the above link & create new API username & password.
- GST ASP Details – Username & Password – Kindly contact support@srimax.com
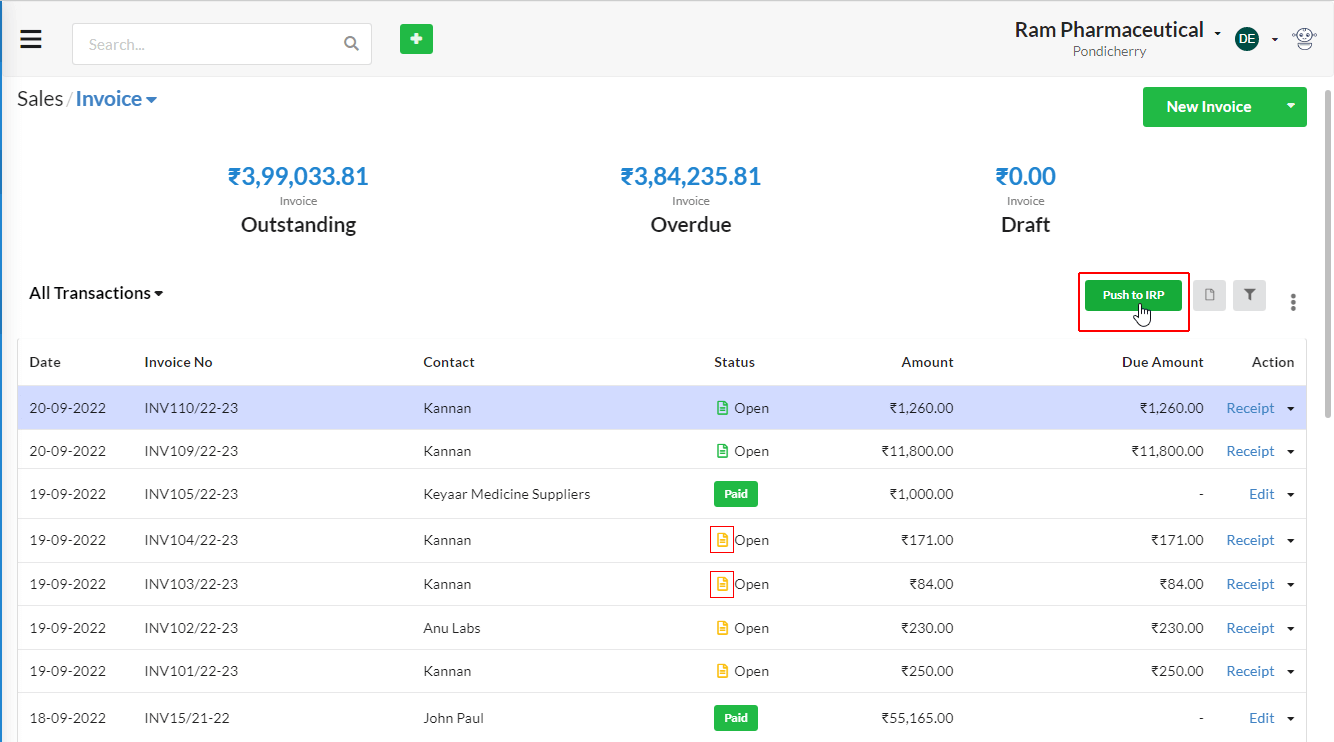
- Now, we shall create a normal Invoice for the B2B customer asusual.
- To convert our invoice to E-Invoice, click on “Push to IRP” option available in each invoice. You can also bulk push, using the option available in Invoice List.
 If you want to manually enter the Invoice Reference Number (IRN), please click Apply IRN & enter the needed ACK details.

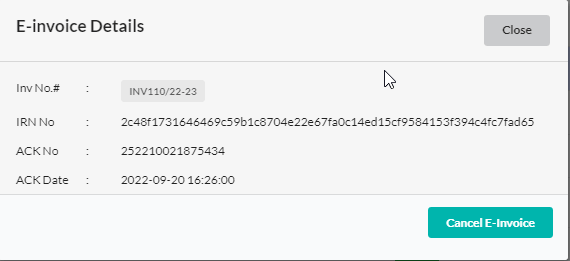
E-Invoice is created now. You can cancel E-Invoice if needed.
Once e-invoice successfully posted, we will get the IRN details & it will be displayed in Invoice.
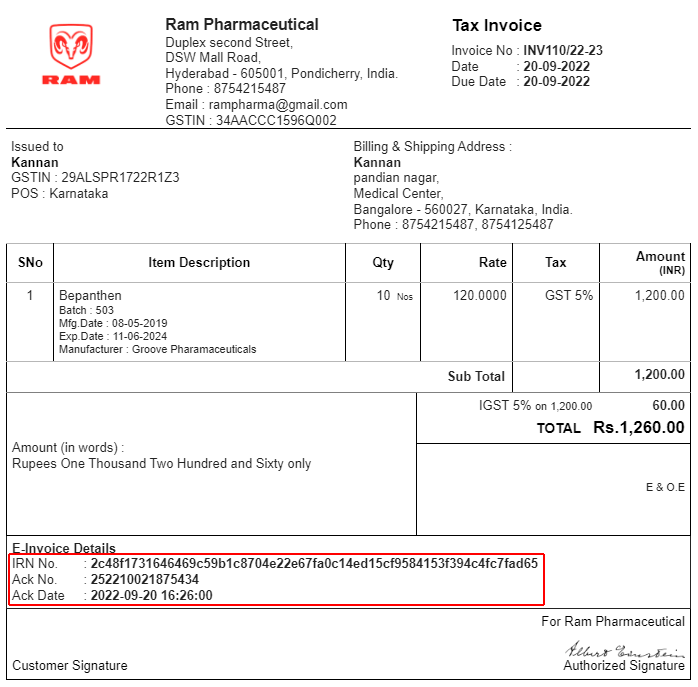
Print E-Invoice details in Invoice
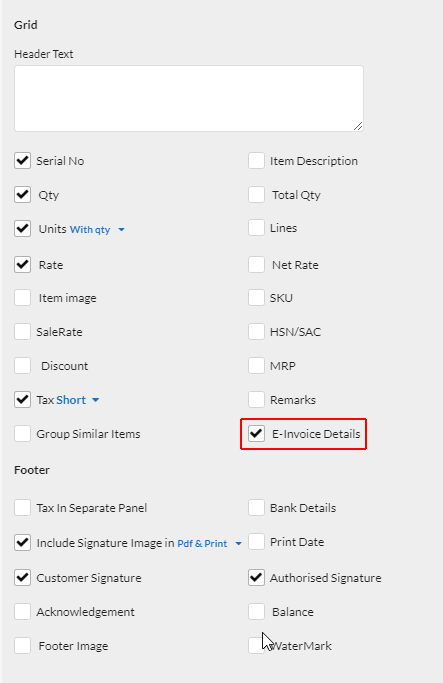
Open Settings > Print & enable E-Invoice Details. This will display the E-Invoice details in Invoice print.
