Adding purchase charges to purchase bills is crucial for accurately calculating the cost price of items. Purchase charges include expenses such as freight, handling fees, customs duties, etc. This help document will guide you through the process of adding purchase charges to purchase bills and ensuring they are counted in the cost price of the items. This outlines two main scenarios where purchase charges must be accounted for in stock valuation
CASE 1 : When the Supplier directly imposes any expenses for the purchase.
CASE 2 : When other parties impose any charges for the purchase.
Case 1 – When the Supplier directly imposes any expenses for the purchase
STEP 1 – CREATE EXPENSE ACCOUNT
- Go to Accounting > Chart of Accounts.
- There are predefined system accounts available. If necessary, proceed to create a new account.
- Click on New Account
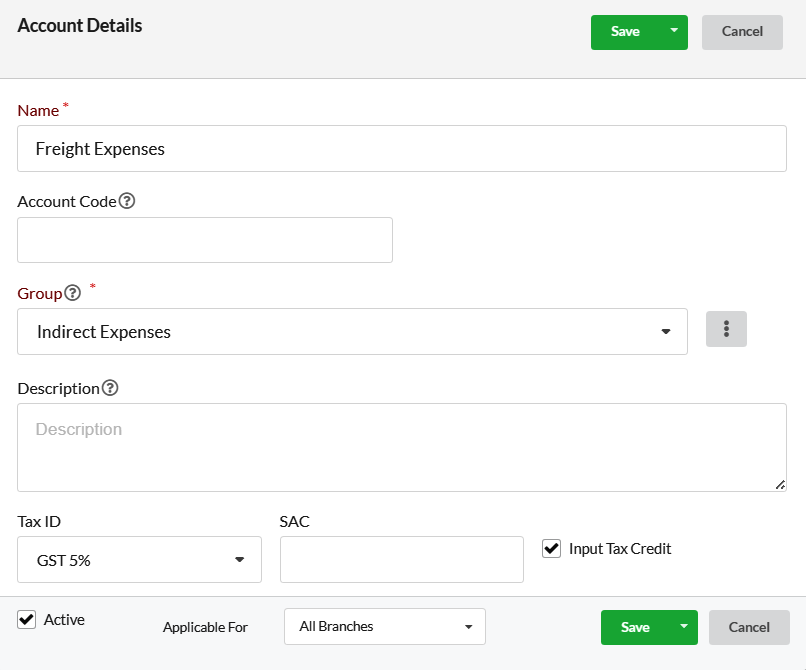
- Provide a descriptive name for the expense account, such as “Freight Expenses” or “Additional Costs.”
- Select the appropriate account Group
- If applicable, specify any tax-related settings or input tax credit (ITC) options for the expense account.
- Click Save.
STEP 2 – CONFIGURE PURCHASE CHARGE SETTINGS
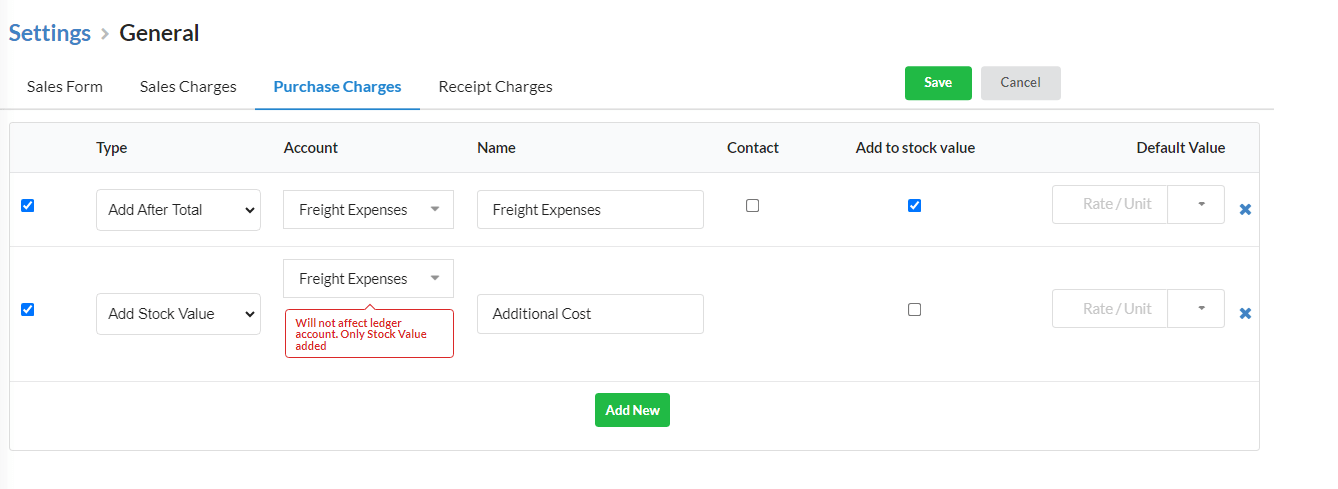
- Go to Settings > General > Purchase Charges Tab.
- Click Edit.
- Enable Check Box
- Choose Add After Total / Add Before Tax / Add After Tax in the Type dropdown.
- Select the required account.
- Specify a name for the Purchase Charge(Freight Expenses).
- Enable Add to Stock Value check box
- Click Save.
STEP 3 – ADD PURCHASE CHARGES TO PURCHASE BILL
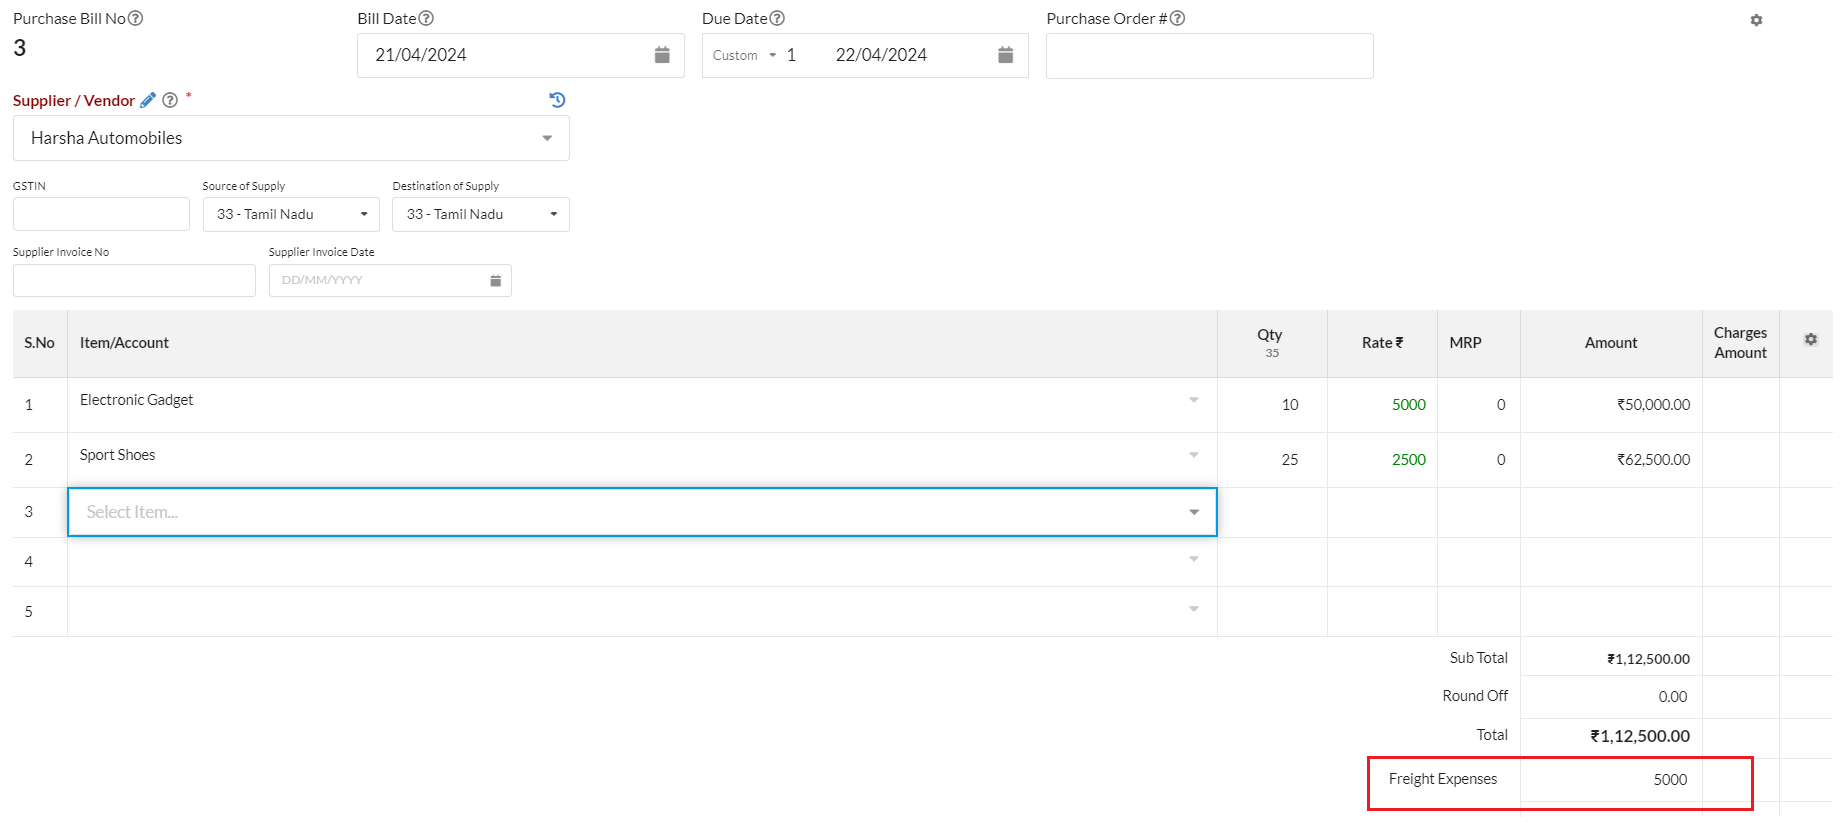
- Go to Purchase > Purchase Bill
- Create a new purchase bill or open an existing one where you need to add purchase charges.
- In Item grid you can input details of the purchased items.
- Add additional charges or expenses associated with the purchase.
STEP 4 – PURCHASE CHARGE ADDED IN COST RATE CALCULATION
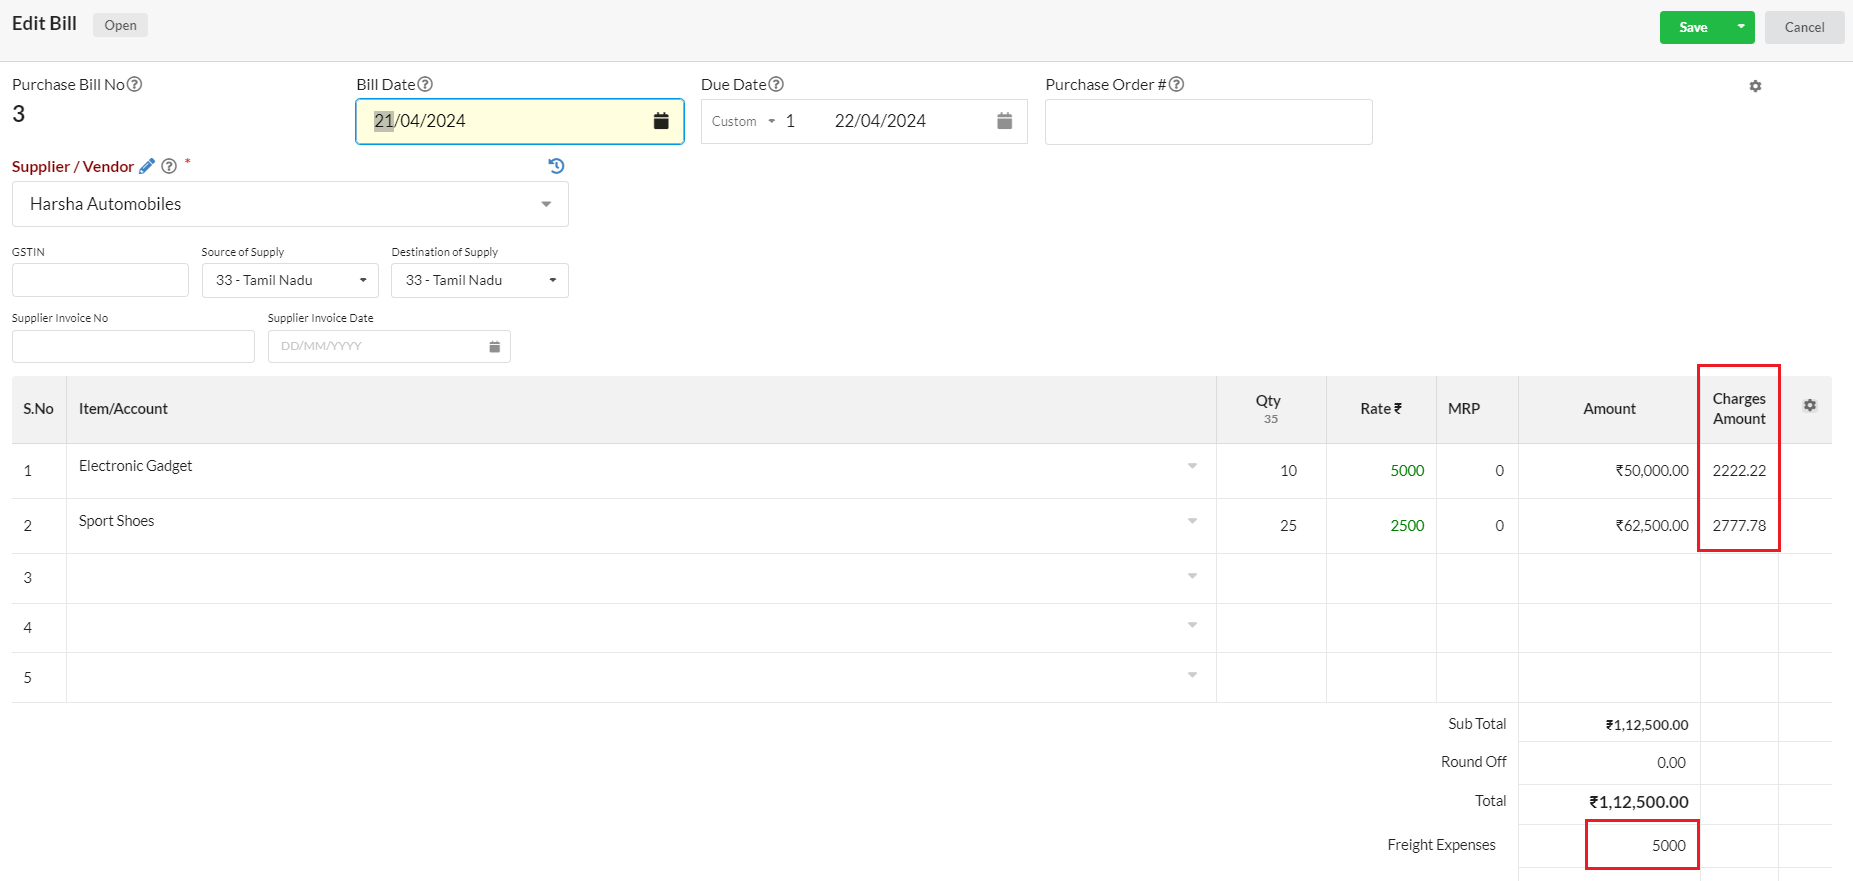
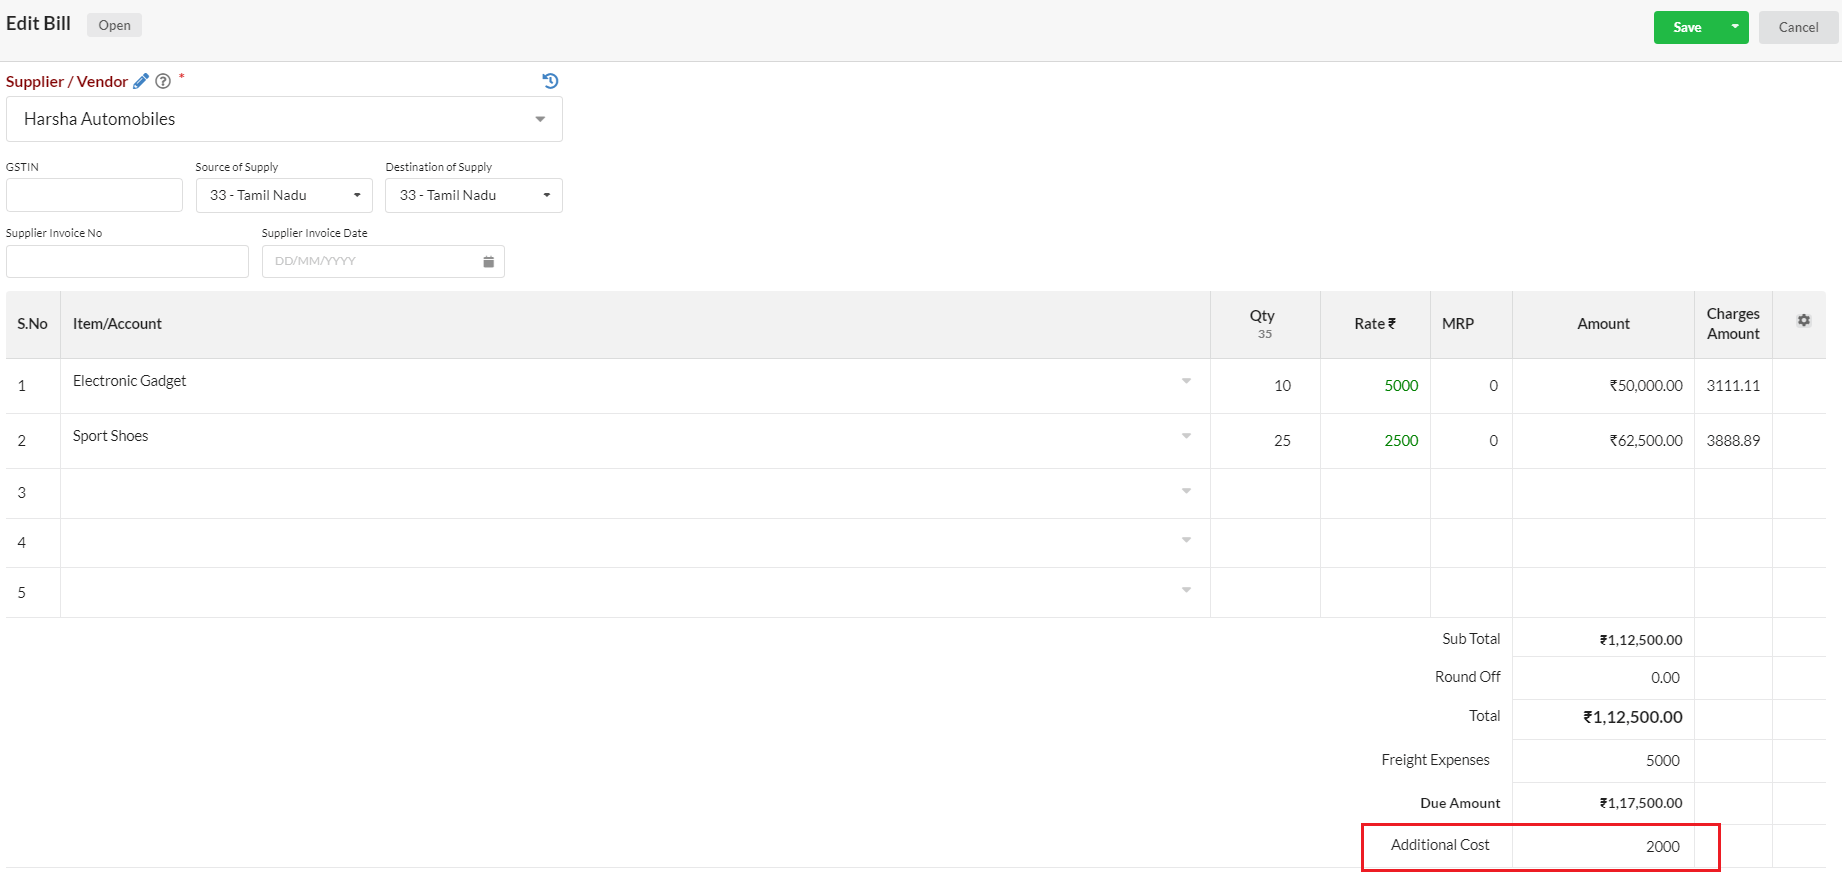
- When you edit the purchase bill, the charges amount column in the item grid indicates that purchase charges are counted towards the cost price.
- You can also verify this in the Stock Summary report.
CASE 2 – When other parties impose any charges for the purchase
STEP 1 – CREATE EXPENSE ACCOUNT
You can use existing expense account or create new account in Accounting > Chart of Accounts as above.
STEP 2 – CONFIGURE PURCHASE CHARGE SETTINGS
- Go to Settings > General > Purchase Charges Tab.
- Click Edit.
- Enable Check Box
- Choose Add Stock Value in the Type dropdown.
- Select the required account.
- Specify a name for the Purchase Charge(Additional Cost).
- Click Save.
STEP 3 – RECORD EXPENSE
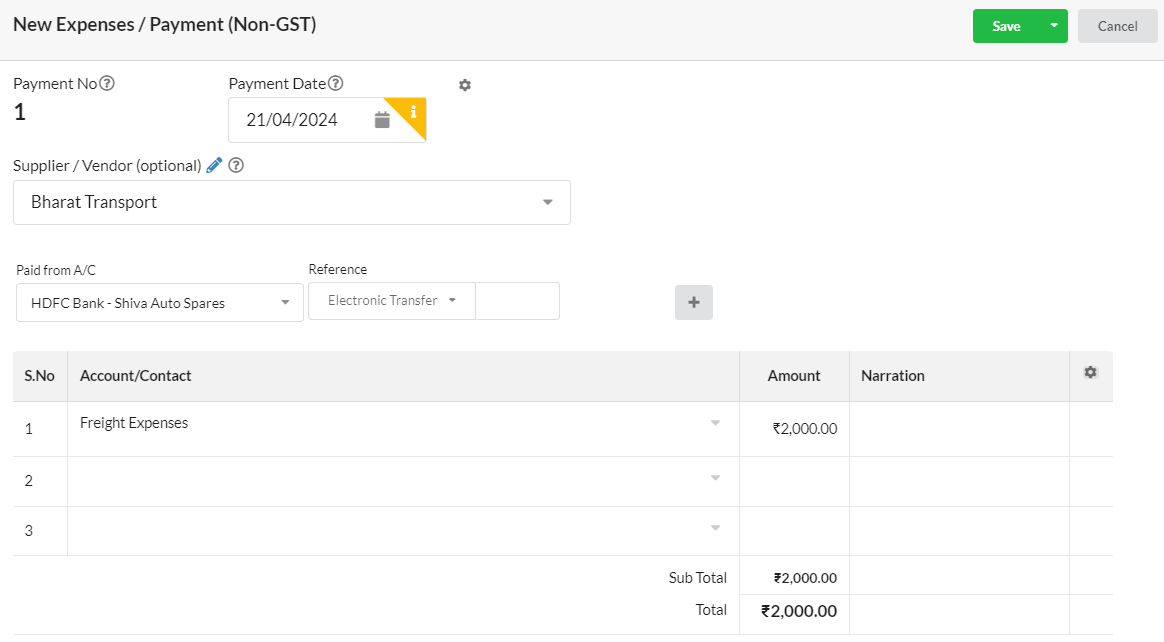
You have to record the expense made for the third party as Expense/Payment or under Purchase Bill.
- Go to Purchase > Expense/Payment.
- Click New Expense/Payment.
- Choose the account which we used in Purchase Charge Settings of Type Add Stock Value.
- Record the amount.
- Click Save.
STEP 4 – ADD PURCHASE CHARGES TO PURCHASE BILL
If you made a single expense for one or more purchase, you can split charges and mention in the corresponding purchase bill where you want to add stock value.
- Go to Purchase > Purchase Bill
- Create a new purchase bill or open an existing one where you need to add additional cost
- In Item grid you can input details of the purchased items.
- Add additional charges or expenses associated with the purchase.
STEP 5 – ADDITIONAL COST ADDED IN COST RATE CALCULATION
In purchase bill, charges amount will be updated. You can check in Stock Summary report too.
