Job Order is usually raised if you are using a different combination of products(raw materials) to produce a unique final product. A job Order is a document that is used to estimate the cost of manufacturing a product.
Page Contents
How to raise Job Order?
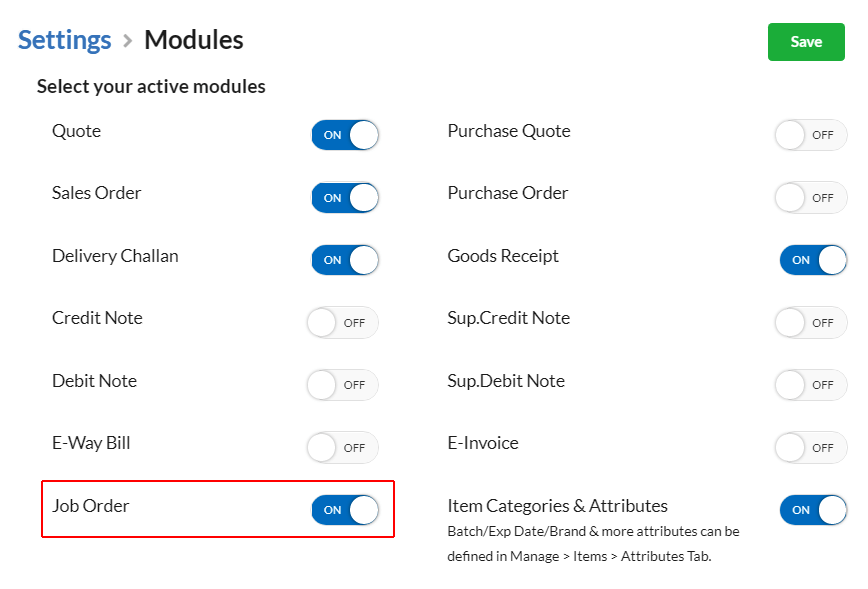
Job Order is similar to Sales Order. Job Order is a separate module available in Sales. Go to Settings > Modules & enable the Job Order module.
After enabling Job Order module, go to Settings > Serial Number, choose the year & set separate serial number for Job Order.
Initially, the serial number for Job Order will be 1.
Multiple series can be set for Job Orders too.
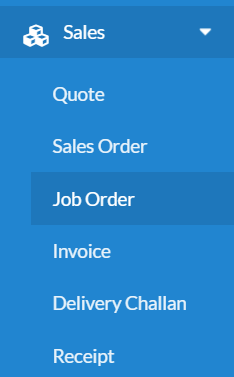
- Go to Sales > Job Order & create a New Job Order.
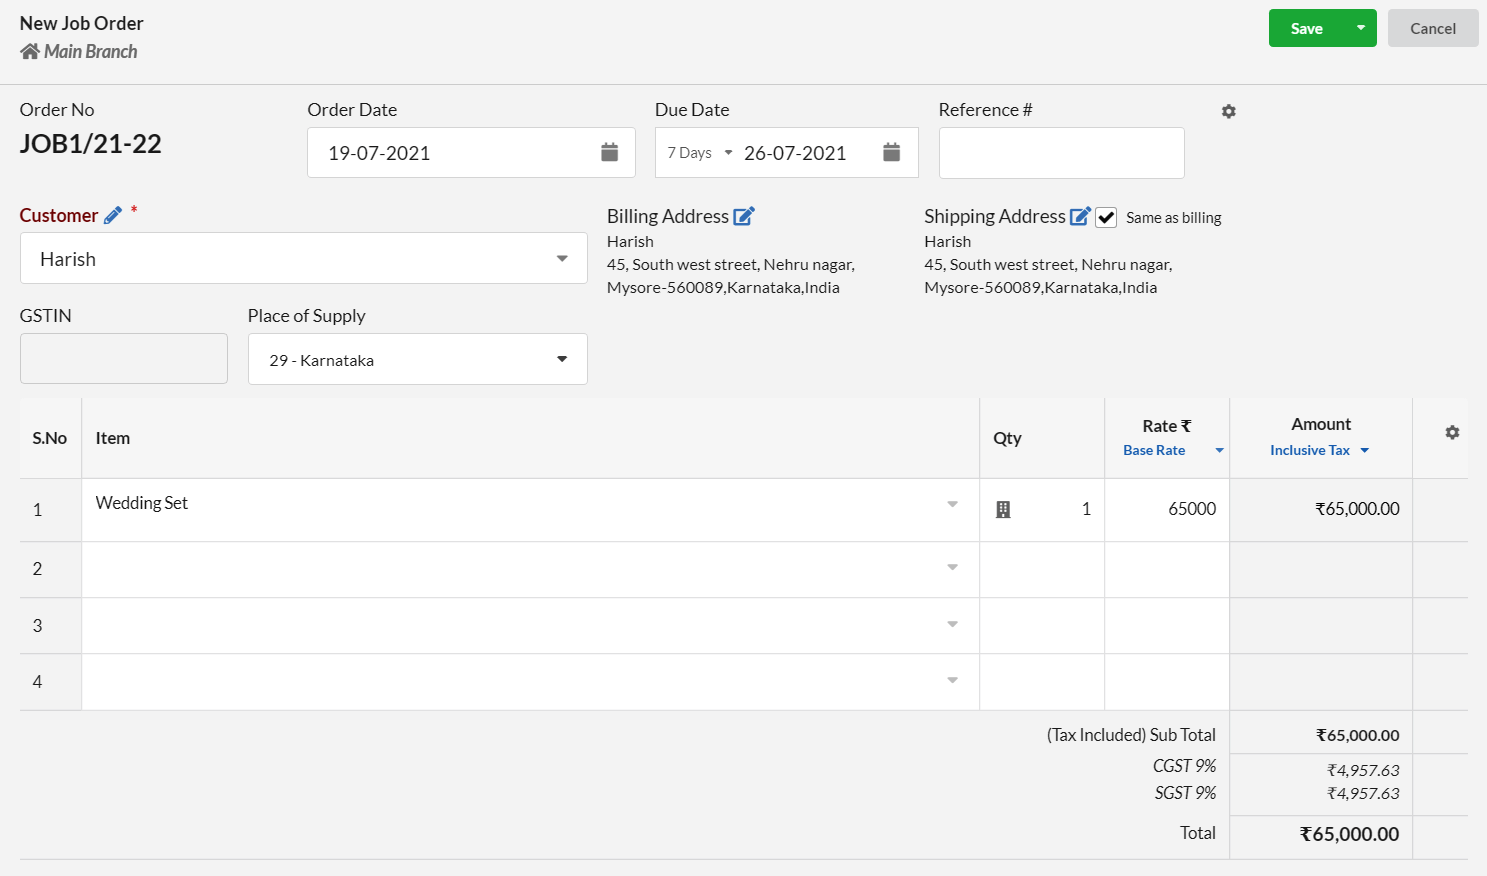
Click on the New Job Order button & start creating your Job Order.
- Set the Job Order date, due date & select the customer.
- Enter the Items that are to be manufactured along with its quantities.
Create a New Bill of Material
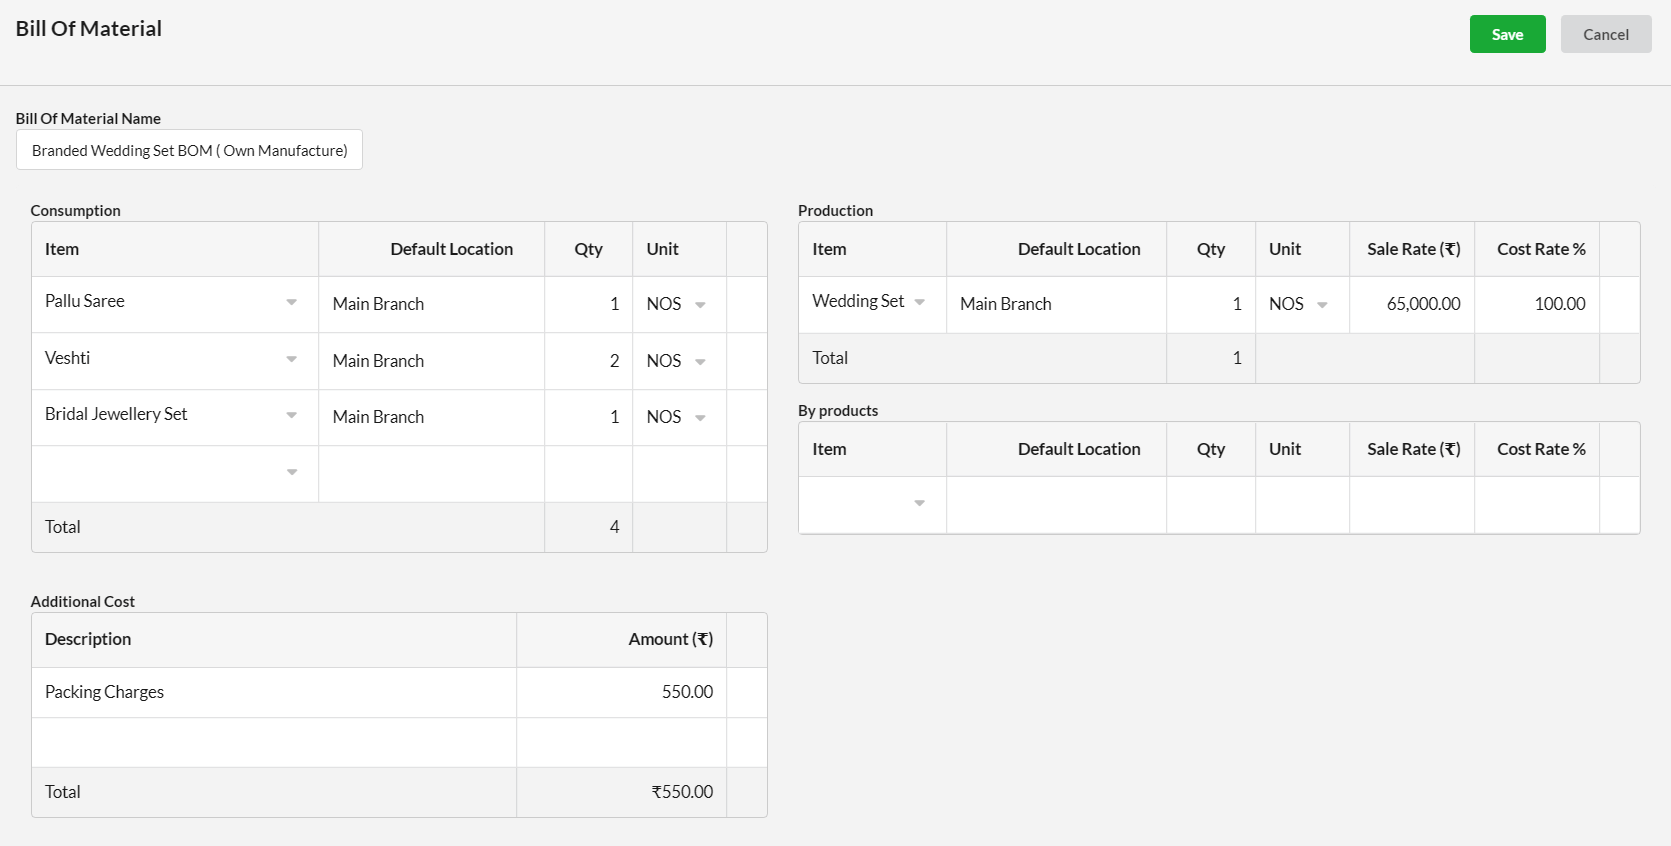
It is mandatory to have a Bill of material for each of the product that you are manufacturing. So that it will be easy to track the items that are consumed for manufacturing the product.
How to create a New Bill Of Material(BOM)?
To know how to create a new Bill Of Material, click here
Enter the consumption(raw materials) items & production items & byproducts(if any) along with its quantities.
After creating a Bill Of Material for the product to be manufactured, you will have to create a Goods Receipt for the Job Order.
Create a New Goods Receipt
To make sure that Goods Receipt module is enabled, go to Settings > Modules & check whether Goods Receipt option is toggled ON or OFF.
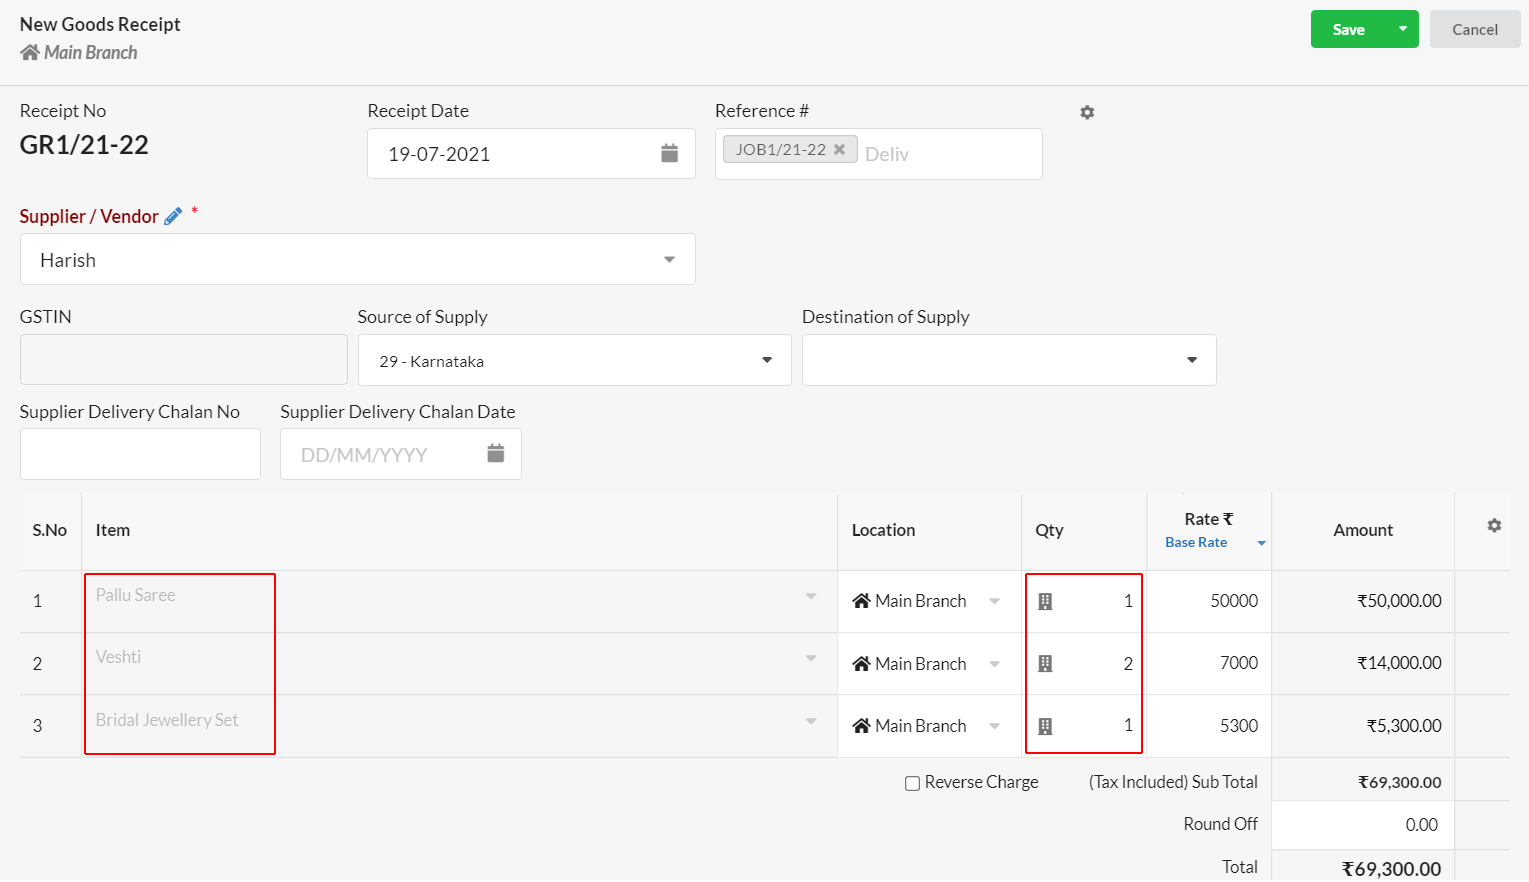
- Go to Purchase > Goods Receipt and click on the New Goods Receipt button.
- Enter the Job Order number as reference number in the Reference field.
If that Job order item is present in a Bill Of Material(BOM) as production item, then the consumption items of that Bill Of Material(BOM) will be listed in the Goods Receipt based on the Job Order quantity.
Save the Goods Receipt so that consumption items will get updated as Inward Stock. The Job order “Received” status will be updated as Done.
Create multiple Goods Receipts
You can create multiple Goods Receipt for a single Job Order. You can initially create a Goods receipt with job order reference & alter the quantity to a quantity less than the original quantity.
Next, you can create another Goods receipt, refer to the Job order number. It will list out only the remaining consumption item’s quantity.
When you complete a Job Order, you can create a Manufacturing Journal.
Create a New Manufacturing Journal
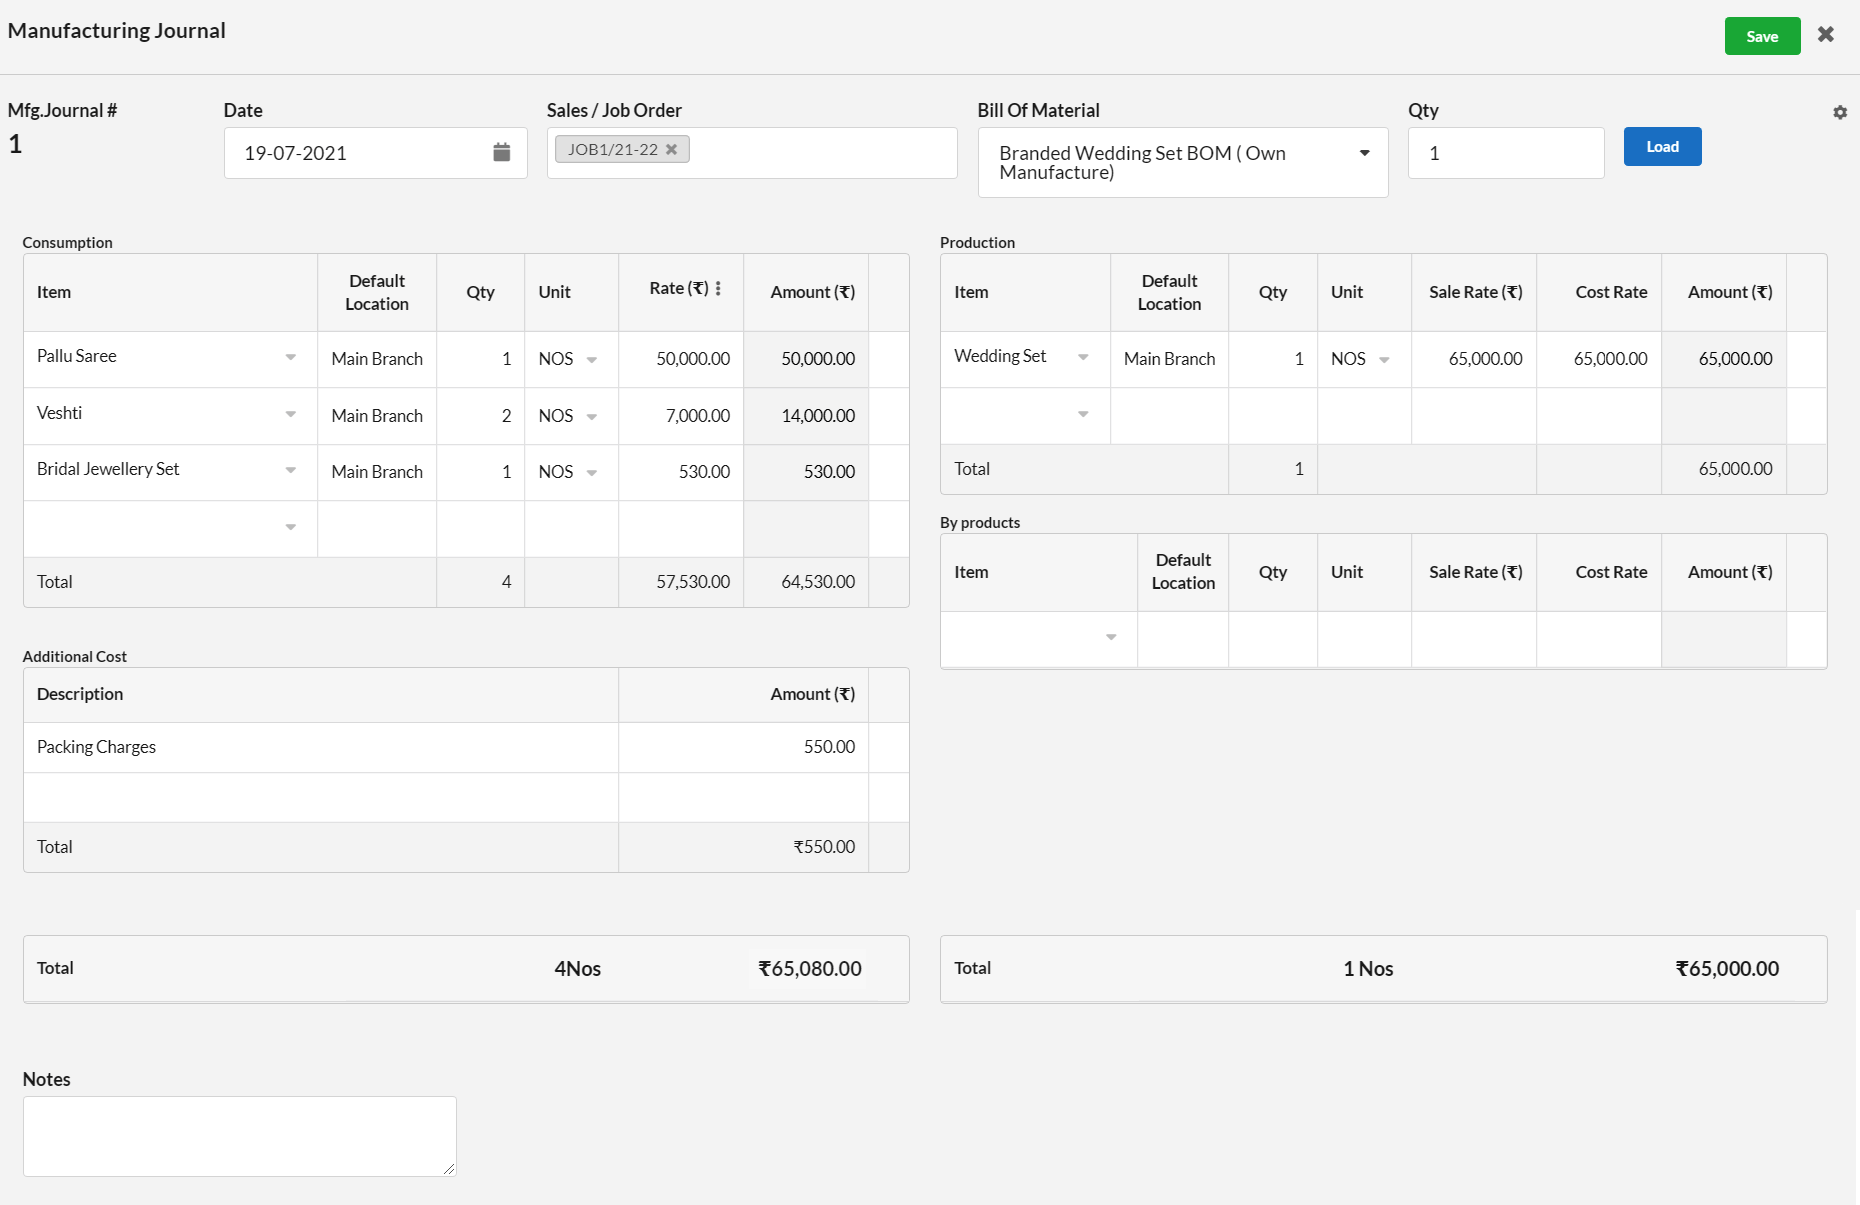
- Go to Manage > Stock Journal > Manufacturing Journal & click on the Add button.
- Click on the Settings icon present there & enable the Sales Order/Job Order option.
- Now you can view a text box named “Sales Order/Job Order”. Enter the Job Order number there.
- Choose the right Bill Of material. All the bill of materials that contains the ‘job order item’ as ‘production item’ will be displayed.
- Hit Load.
- The manufacturing journal will display its quantity, which is equal to the Job Order item quantity. Reduce the total quantity if needed. You cannot enter a quantity higher than the Job order item quantity.
After you create a manufacturing journal for the Job order, job order “Processed” status will be updated as Done.
When you deliver the manufactured product to your customer, you can create a Delivery Challan.
Create a New Delivery Challan
To make sure that Delivery Challan module is enabled, go to Settings > Modules & check whether Delivery Challan option is toggled ON or OFF.
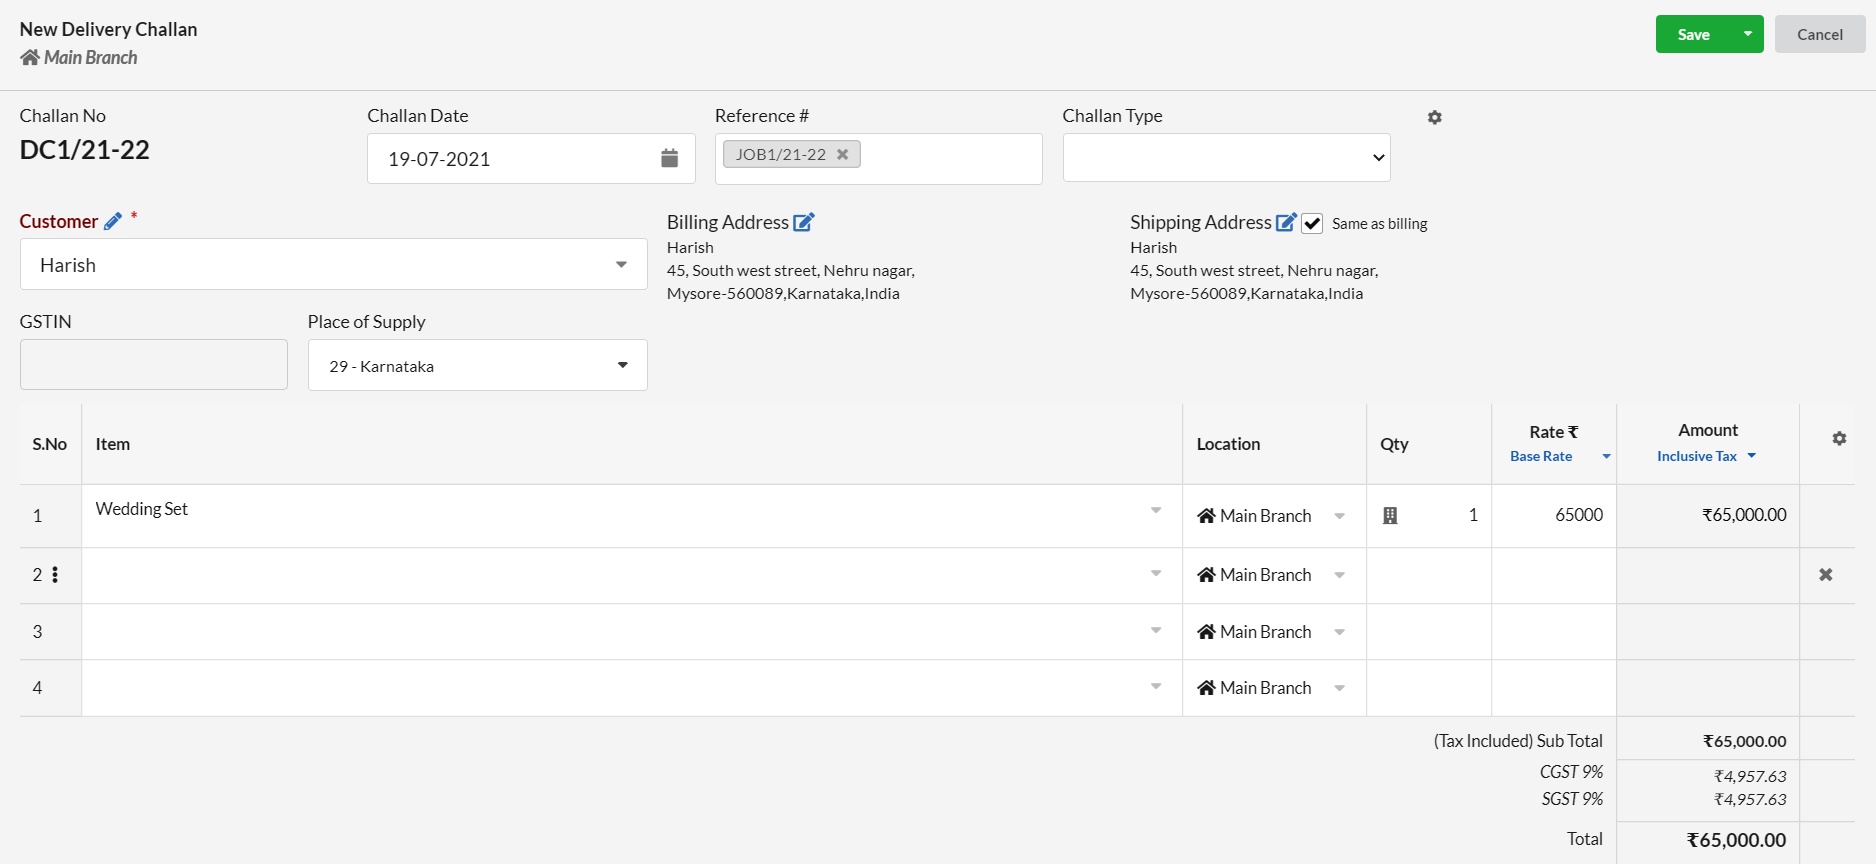
- Go to Sales > Delivery Challan & click on the New Delivery Challan button.
- Enter the Job Order number as reference in the Reference field.
If that Job order item is present in a Bill Of Material(BOM) as a production item, then the item quantities that are pending to be delivered in that Job order will be listed in delivery challan.
Save the Delivery Challan so that the items in the delivery challan will get updated as Outward Stock.
Create a New Invoice
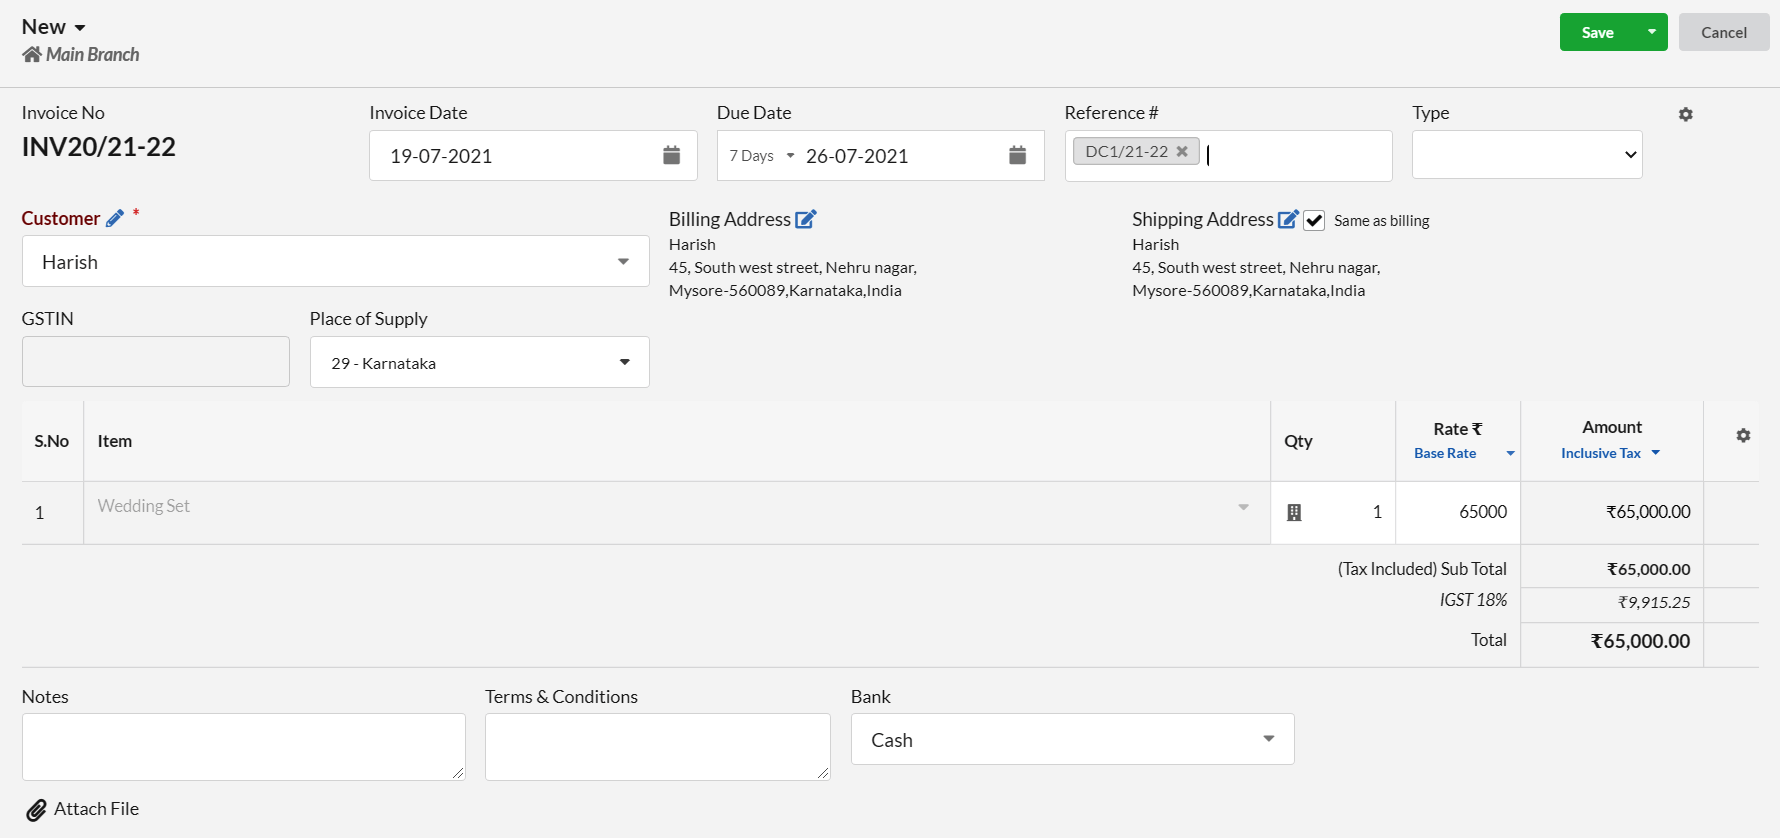
Go to Sales > Invoice and click on the New Invoice button. And enter the Job Order number as reference number & hit Save to save the Invoice.
Create a New Receipt
If you received the amount for the Invoice from the customer, create a Receipt. Go to Sales > Receipt, enter the Invoice number as reference number & hit Save.
