Page Contents
Kitchen Order Ticket
Kitchen Order Ticket(KOT) is just the order placed by an customer. The server in restaurants takes the orders using POS software(tablet/mobile app). The POS software then prints the order as Kitchen Order Ticket via configured printers. The printed KOT is sent to kitchen for the chefs to view the order details & prepare food accordingly.
Importance of Kitchen Order Ticket
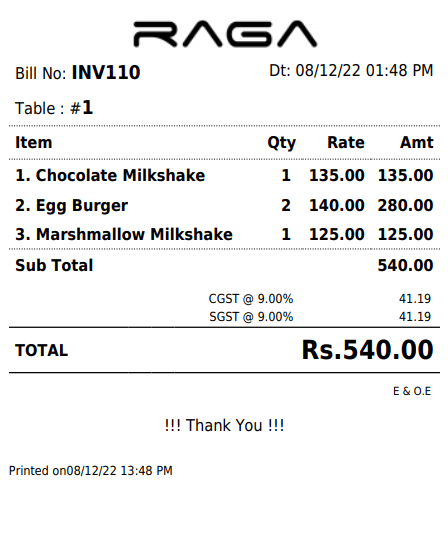
KOT contains the complete order details which includes table number, items ordered & their quantity. Also the time of order along with any cooking related specification can be printed. It helps the chefs & server to offer the exact order to the right table on time.
How to setup KOT in Output Books?
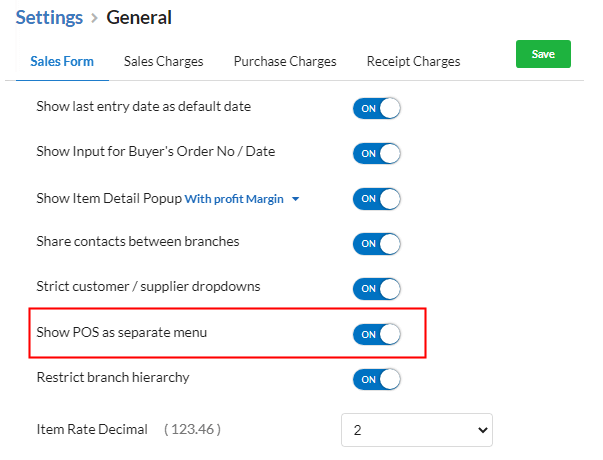
First, we shall enable the POS module. Go to Settings > General > Sales Form & enable the Show POS as separate menu. This will help us to access POS from web & mobile app as separate module. Make sure, in Settings > Company Settings, Business Type > “Restaurant (KOT/POS)” is selected.
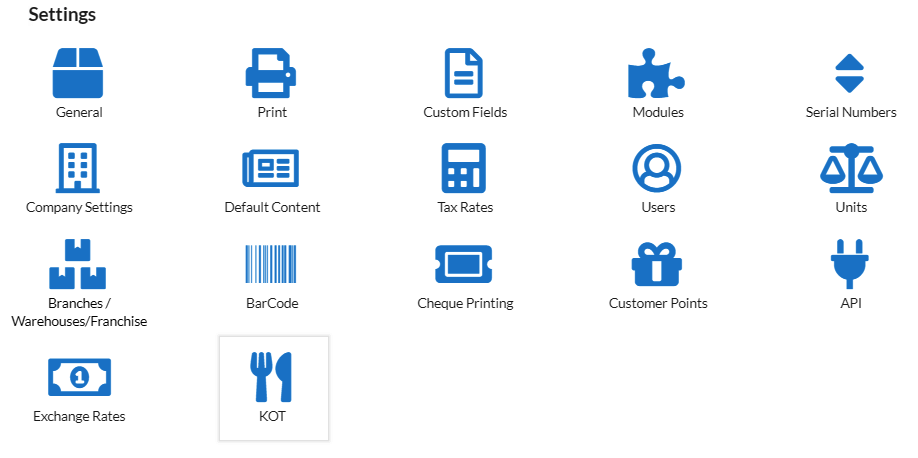
Now, we can locate the KOT module. Open Settings, there you can find the KOT option. Now, we can set up KOT according to our restaurant’s functioning model.
Basically, there are 6 sessions to be set up which are:
- Dine-in Sections
- Table
- TakeAway Types
- Waiter
- Settings
- Printers
Let use see one by one.
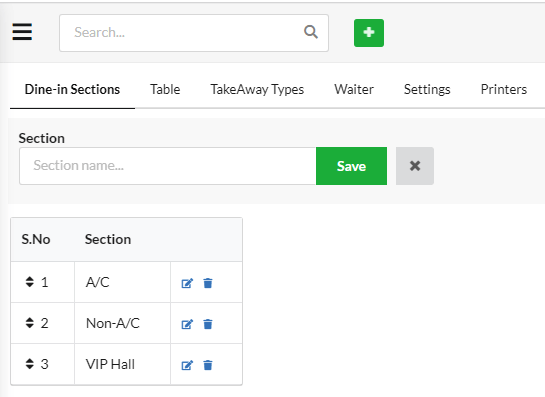
Dine-in Sections
Here, we can create the Dine-in sections available in your restaurant/hotel. For instance, we can create like:
- A/C
- Non-A/C
- VIP Hall
Table
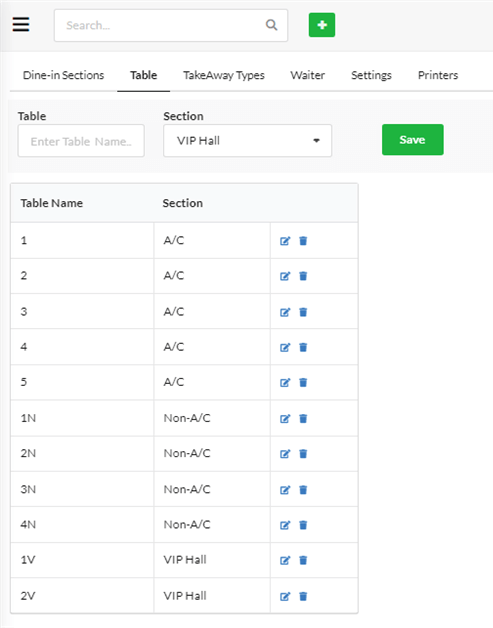
Here, we can set the tables available in each dine-in section. We can set table name as 1,2,3.. so on or your preferred name.
Takeaway Types
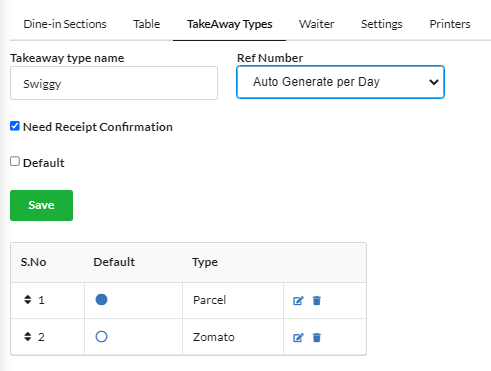
Here, we can set the takeaway types, such as parcel and online delivery apps like Zomato, Swiggy, Ubereats, etc.
- Enter the takeaway type name.
- You can generate reference number for each takeaway type as Manual/Auto generate per day or set as None.
- Need Receipt Confirmation – This option is used to indicate that Invoice is generated but amount is not yet paid by customer for takeaway.
- You can set any takeaway type as “Default“.
Waiter
Here, we can set the waiter details for each dine-in section. So that it will be easy to track each waiter’s service based on dine-in sections & tables.
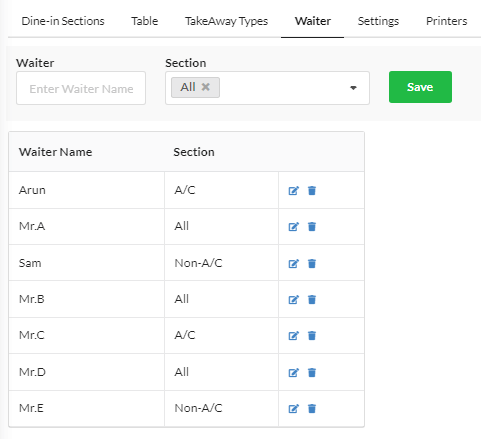
You can enter the waiter name, choose the dine-in section for that waiter & save. If a waiter handles all sections, you can set as “All”.
Settings
Let us set up the Print Settings for KOT.
KOT Print Settings
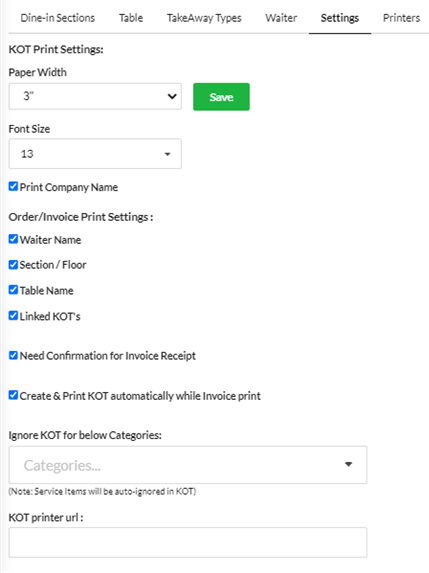
Set the paper width & font size. Also, you can print company name in KOT by enabling the Print Company Name option.
Order/Invoice Print Settings
Here, you can enable the needed options to be printed in Kitchen Order Tickets. The options are:
- Waiter Name
- Section/Floor
- Table Name
- Linked KOT’s
Other options available are:
1. Need confirmation for Invoice Receipt – Enable this option to identify invoice that are generated but amount not yet paid by customer.
2. Create & Print KOT automatically while Invoice print – Enable this option if you want to print KOT at the time of Invoice print itself.
3. Ignore KOT for below categories – Choose the item categories you want to exclude in KOT. Service items will be auto ignored in KOT.
4. KOT Printer URL – In this field, you have to enter the printer URL which is specially configured for KOT.
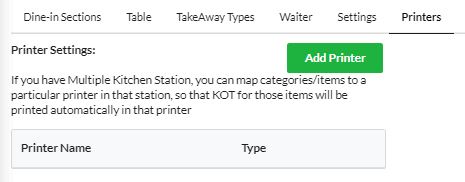
Printers
You can add any number of printers for KOT for your multiple kitchen setup. For specific items/category of items, you can set printers. So that, respective item/item category KOT will be printed in the respective KOT printer configured.
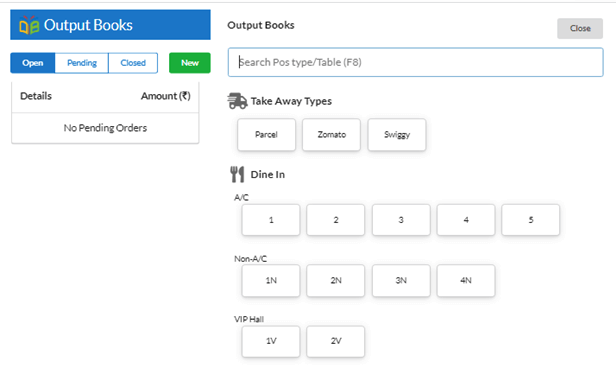
How to create a KOT for Dine-In Sections(based on tables)?
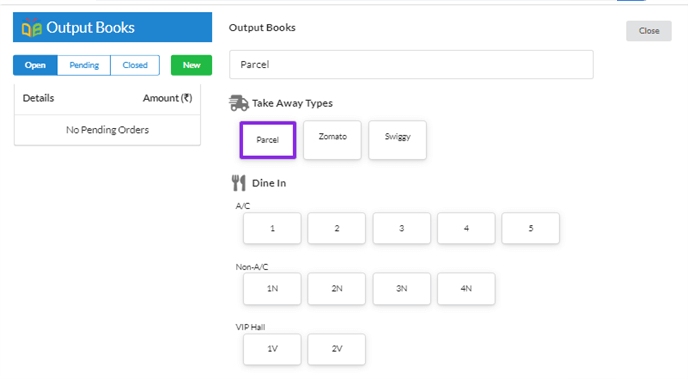
Click on the POS menu present in left panel to open the POS window. Here, we can view the Takeaway types & Dine-in sections along with the tables in each dine-in section that we have created.
To create a new KOT,
- Click on the New button present there at the left side of POS window.
- Choose the Dine-in section for placing the order.
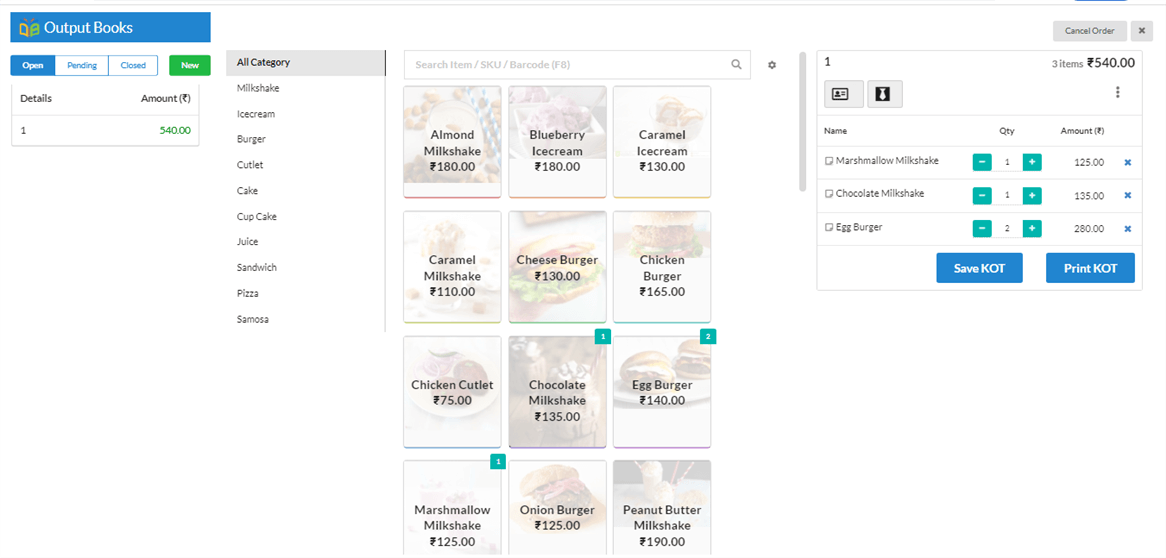
- Click upon the items to add it to the order. Click n number of items on the item to increase the quantity.
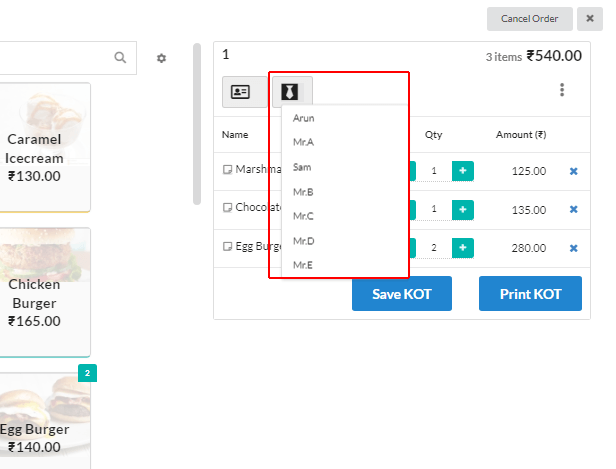
- Set waiter for the table by clicking on the Tie icon present in the order screen.
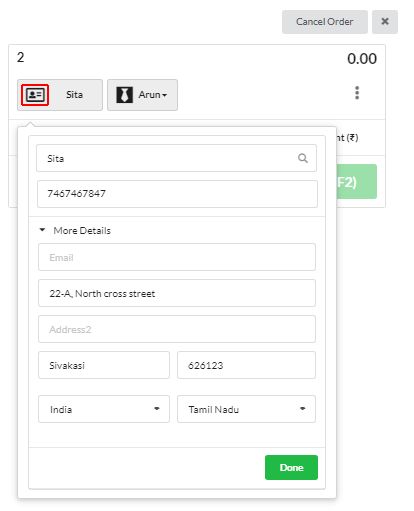
- You can save the customer data such as name & address in case of a advance order for any functions/gatherings using the Contact option present in the order screen.
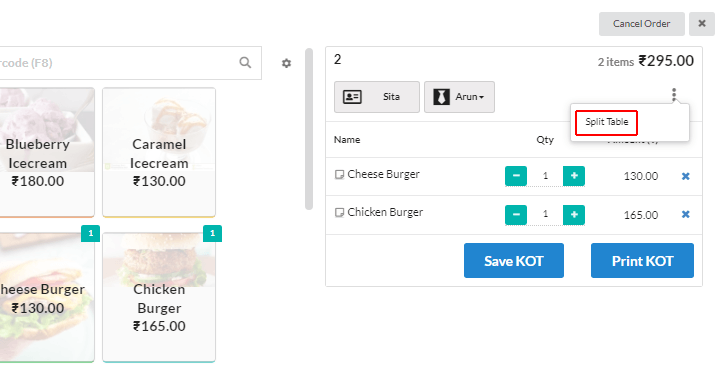
- If the customer asks for split table & bill, you can split by using the Split table option present in the order screen. You can split items based on table & bill accordingly.
- To save the KOT, just click Save KOT. To save & print KOT, click Print KOT.
- You can issue the printed KOT to kitchen for preparation.
- To cancel the order, just click on the Cancel order option. It will get completely removed from POS.
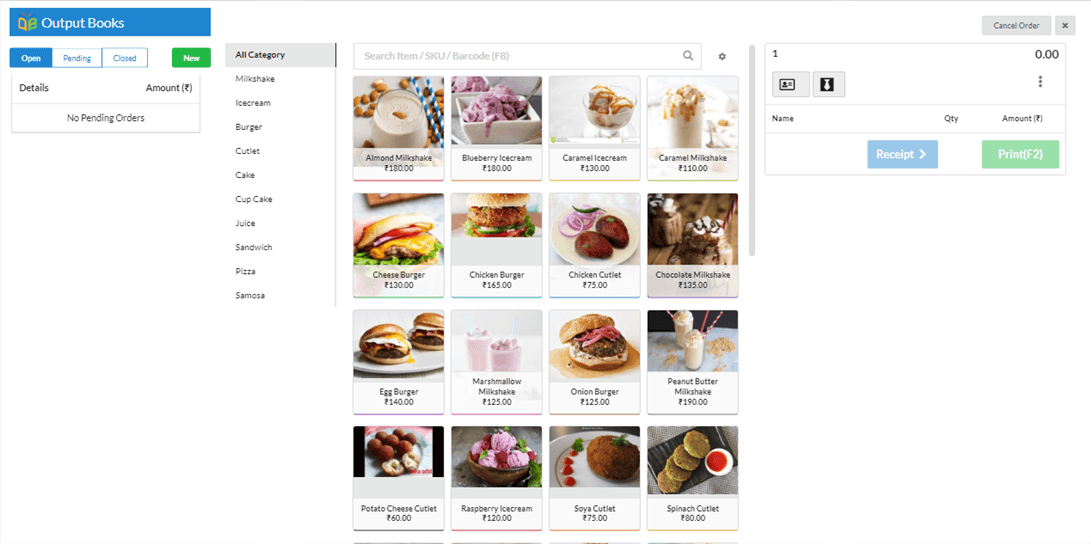
The POS window will open the New Order window now. List view of items will be displayed by default.
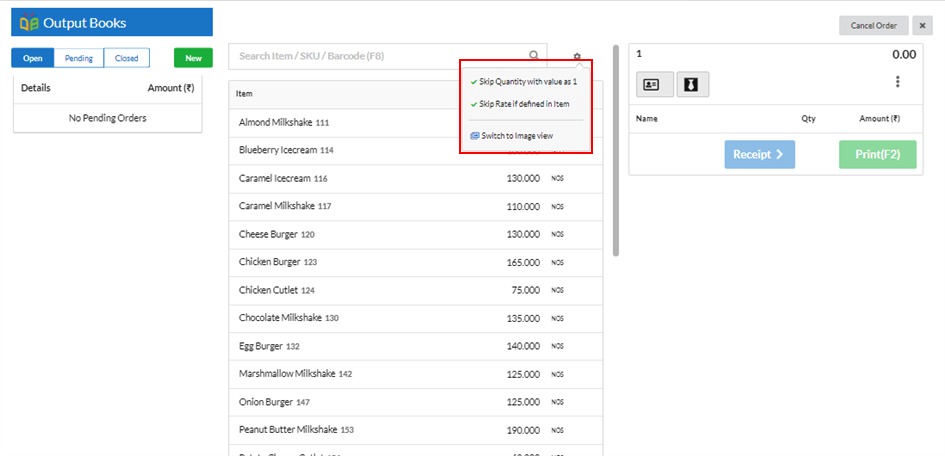
We can switch to Image view too. In Image view, we can filter items based on item category too.
We can skip quantity & rate if pre-defined using the options present above the item list.
How to bill/create receipt for KOT?
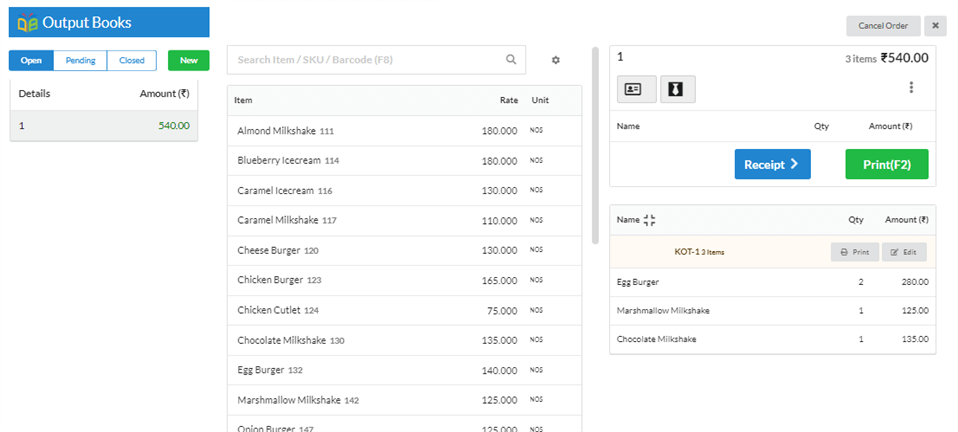
When you receive amount for the order from customer, click on their order in POS window & click:
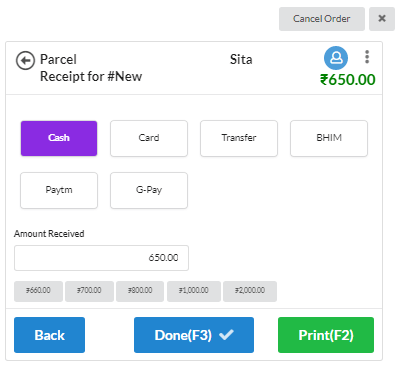
Receipt:
1.Click to create receipt for the KOT.
2.Choose payment mode, denomination, view balance & save/print the order.
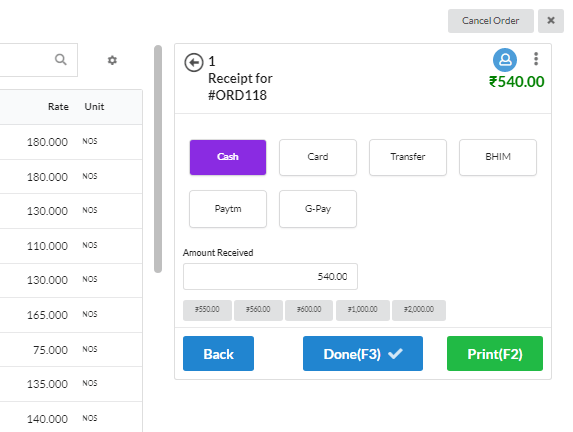
Print or press F2:
Click to save & print the bill (in case of Cash as payment method).
Order Status List
In the order history screen, there are 3 order status sessions – Open, Pending & Closed.
Open
New orders will be listed here whether KOT is printed or not.Once amount is received for an order & receipt is created, open will change automatically to closed order.
Pending
Orders that are placed as advance by paying advance receipt will be listed here.
Closed
All paid closed orders will be listed here. You can choose date & view all closed orders in that date.
You can view closed order in detail & also print them at any time.
Color Indication for Payment/Occupied Status of Orders/Tables
Orders:
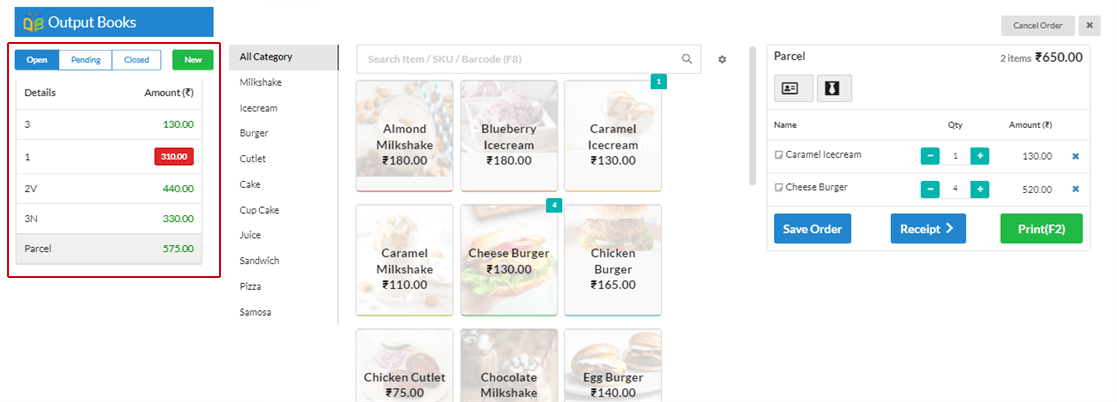
Green color – An open order with green color highlighted amount indicates that a order is just placed.
Red color -An open order with red colour highlighted amount indicates that KOT for the order is saved & printed but amount is yet to be received.
Table:
Green colour – If a table is occupied(order is open), green color will be displayed for that table.
Red colour – If table is occupied, invoice is printed but amount not yet received/receipt is not created, red colour will be displayed for that table.
How to create a KOT for Takeaway types?
- Click on the New button present there at the left side of POS window.
- Choose the Takeaway type for placing the order. Enter reference number if you have chosen as Manual in settings.
- Choose items ordered & quantity. When you receive amount for the order from customer, click on their order in POS window & click:
1. Receipt – Click to create receipt for choose payment mode, denomination, view balance & save/print the order.
2. Print or press F2 to save & print the bill (in case of Cash as payment method).

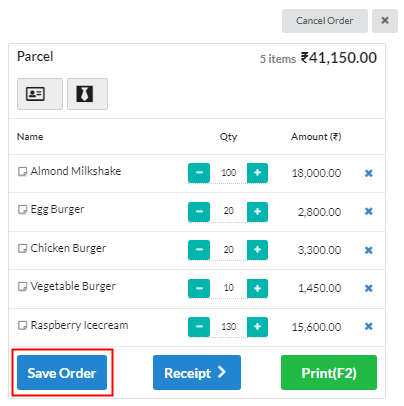
3. Save Order to save the order.

Contact/Customer details is required to save the order. Enter the contact details & click billing if full amount is received for order.
Advanced Receipt:
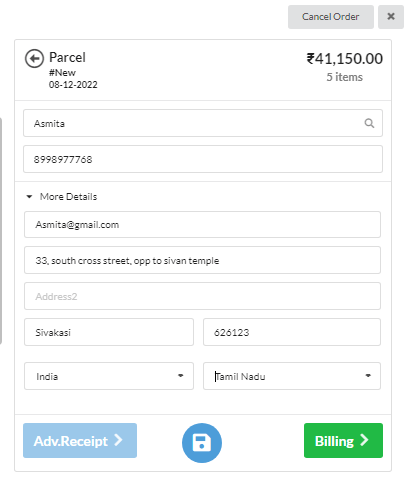
Let us see how to create a advanced receipt for a huge order like party orders.
1.Choose takeaway type as Parcel or order(anyname you have set as takeaway type) & select items.
2.Then click Save Order. Now, proceed by entering the contact details & click Save.
Now, you can find the saved order under Pending status.
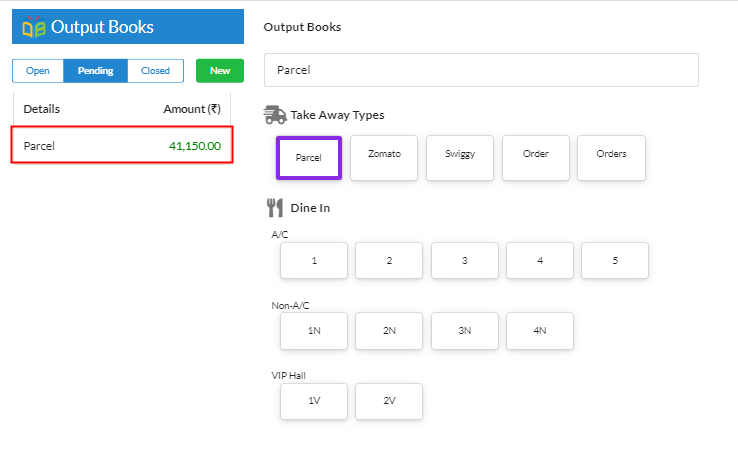
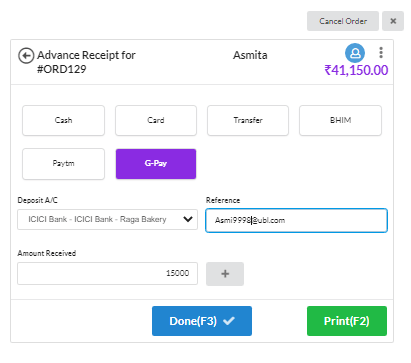
3. Click on the pending order to open it. Hit the Adv.Receipt button. You can edit & add/remove items if needed.
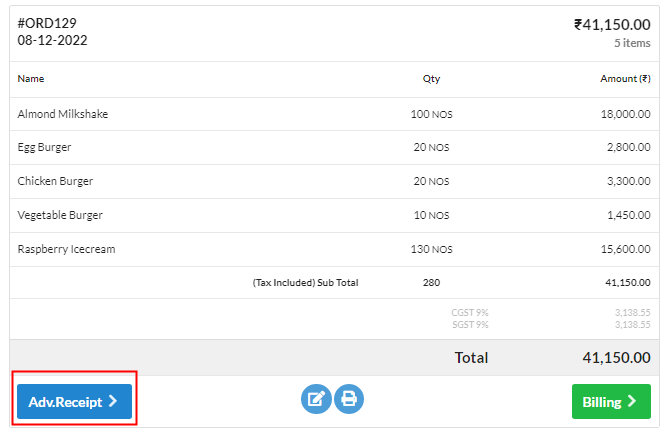
4.You can collect advance amount from customer & record as advance receipt.
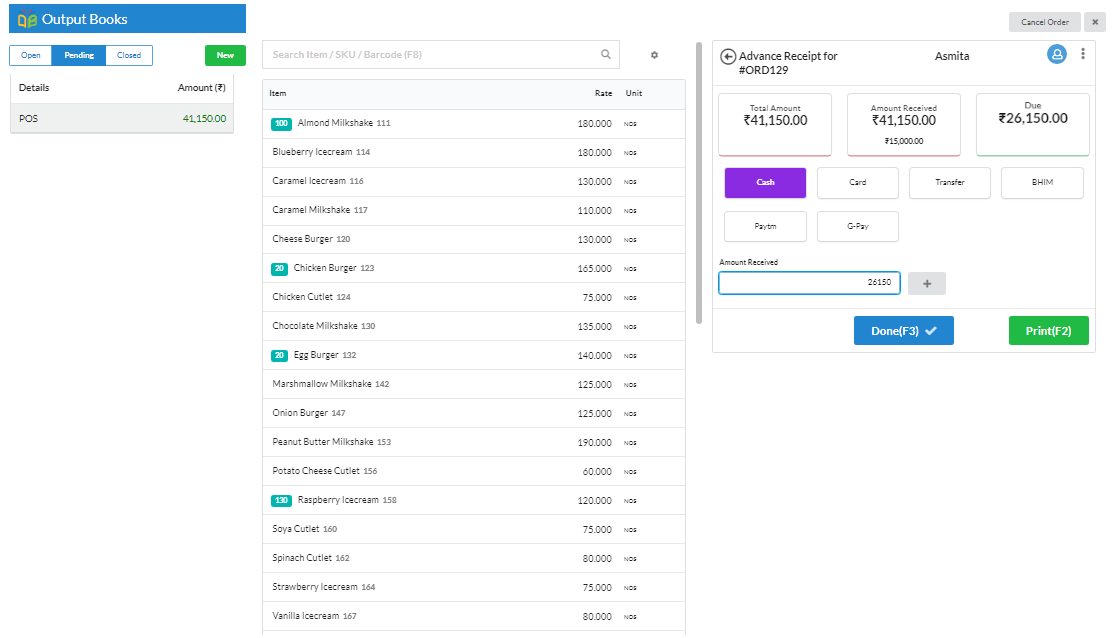
5. Finally, when you receive full amount for the order, you will be displayed with balance due amount on the order screen. You can enter amount & save.
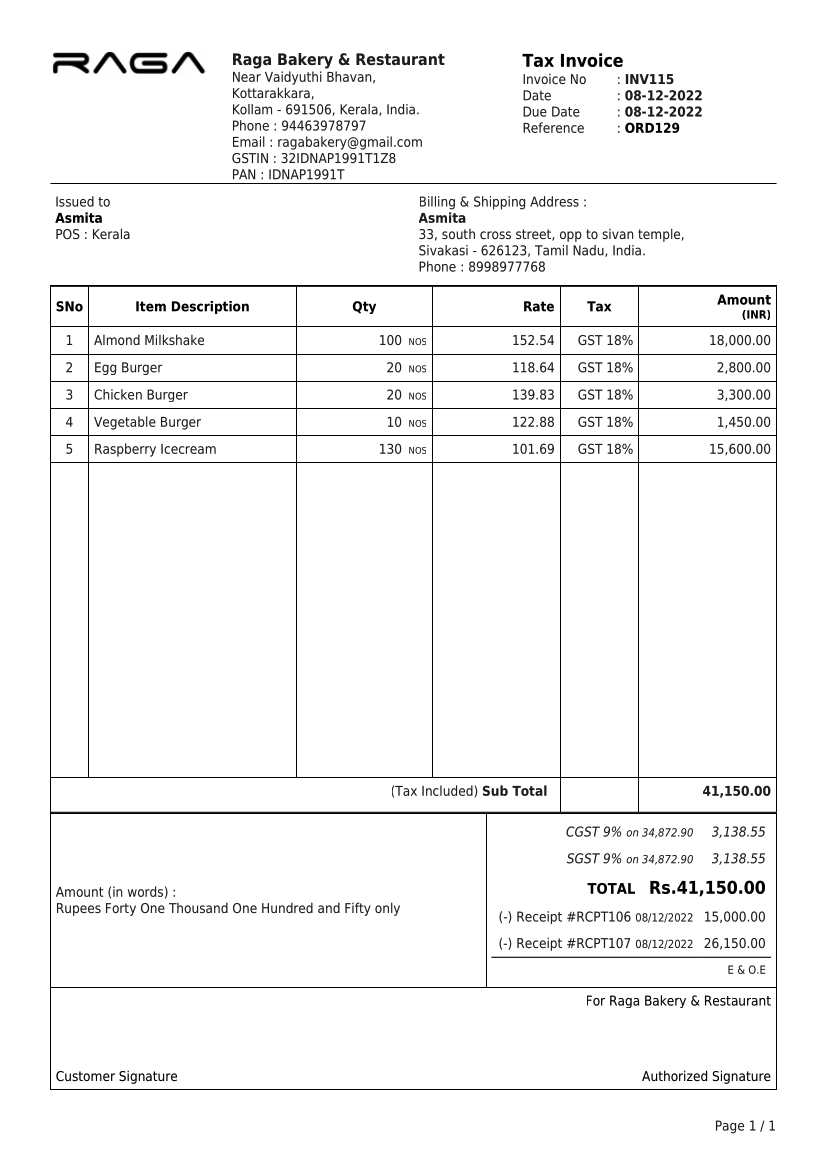
6. Now, finally, you can create Invoice for the order which displays the history of receipts too.
