Welcome to the OboEye Application! This guide will walk you through the steps of setting up and using the Item Identifier feature powered by AI to streamline your billing process. Please follow the instructions below for seamless integration and optimal performance.
Page Contents
1. Webcam Connection
- Connect a webcam to your client device securely.
2. Installation and Setup
- Download and install the OboEye Application on your high-performance network PC.
- Launch the application to begin setup.
- Extract and install the Item Identifier(oboEye) application.
- Follow the prompts in installation wizard.
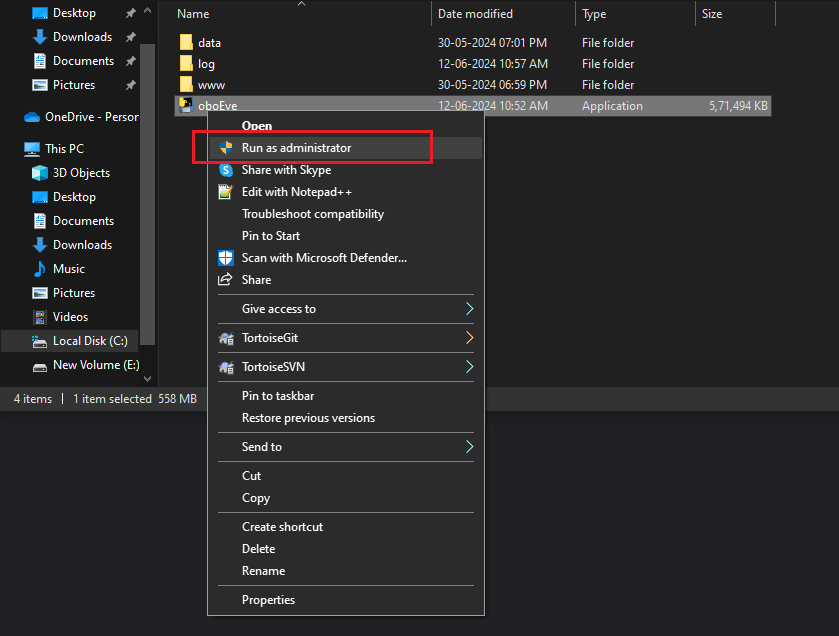
- After installation is complete, find oboEye file and Run as Administrator.
- Ensure the application runs smoothly.
3. Device Configuration
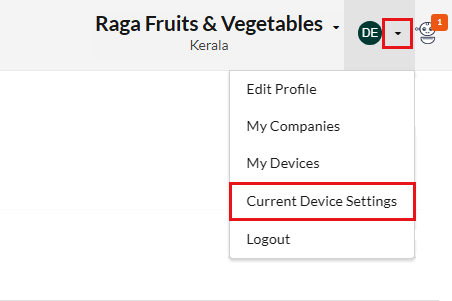
- Navigate to Output Books > User Profile > Current Device Settings.

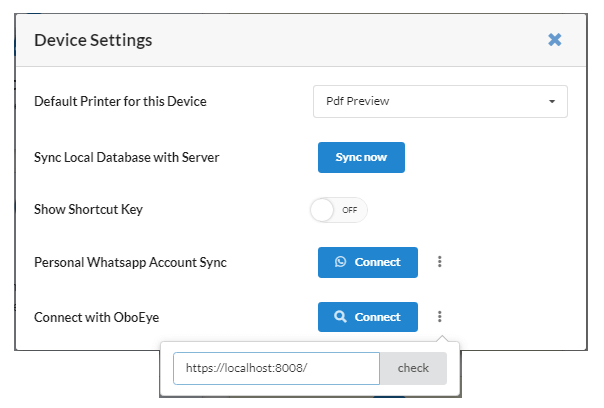
- Click three dots. Ensure the connect URL is https://localhost:8008/ and click Check

- Connect with OboEye to enable communication between the application and your webcam.
4. Training OboEye
- Before using the Item Identifier feature, OboEye needs to be trained with sample images of each item.
- Follow these steps to train OboEye
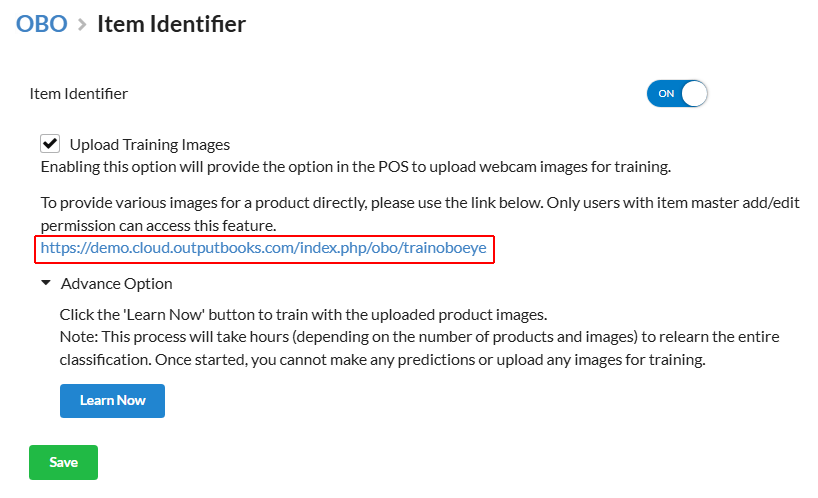
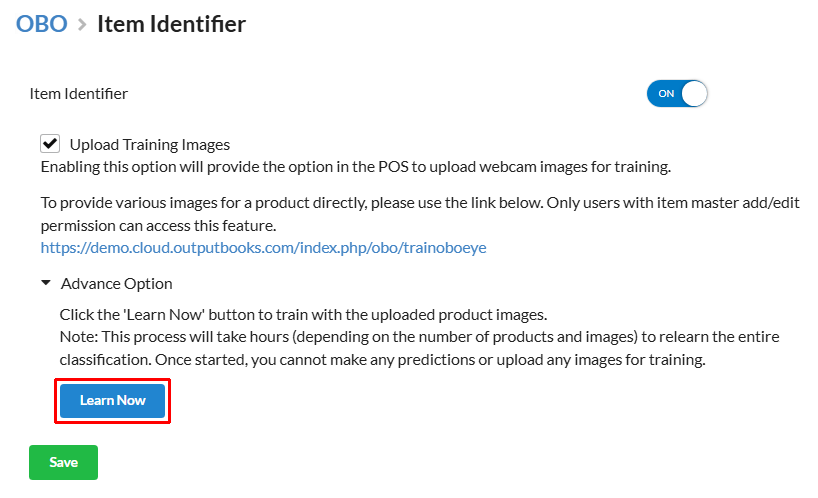
- Navigate to Obo > Item Identifier.
- Enable Item Identifier.
- Enable Upload Training Images check box and click Save
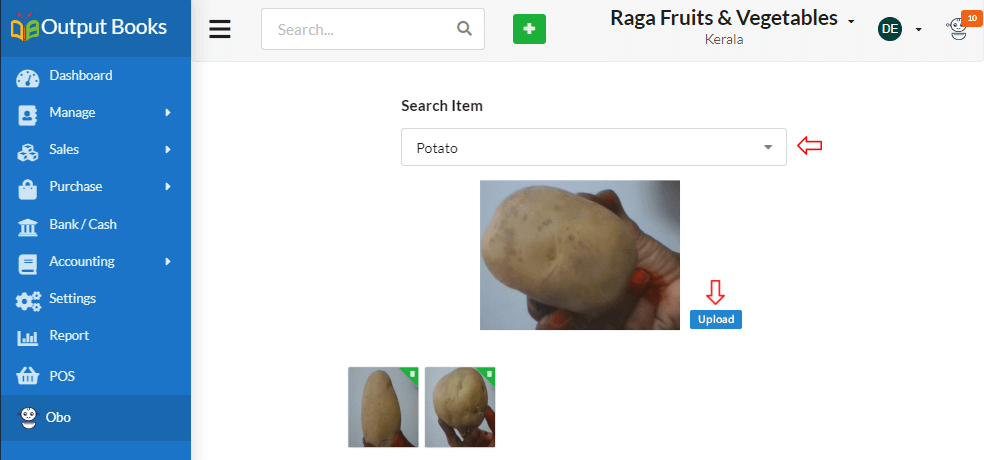
- Use the provided link to upload sample images.

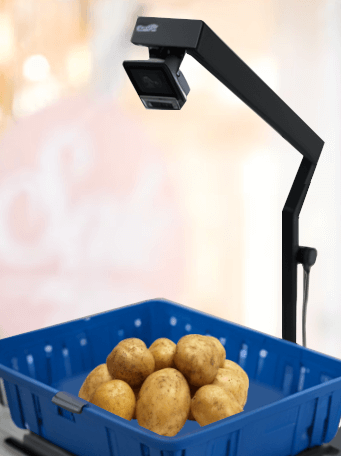
- Place the item under the webcam.

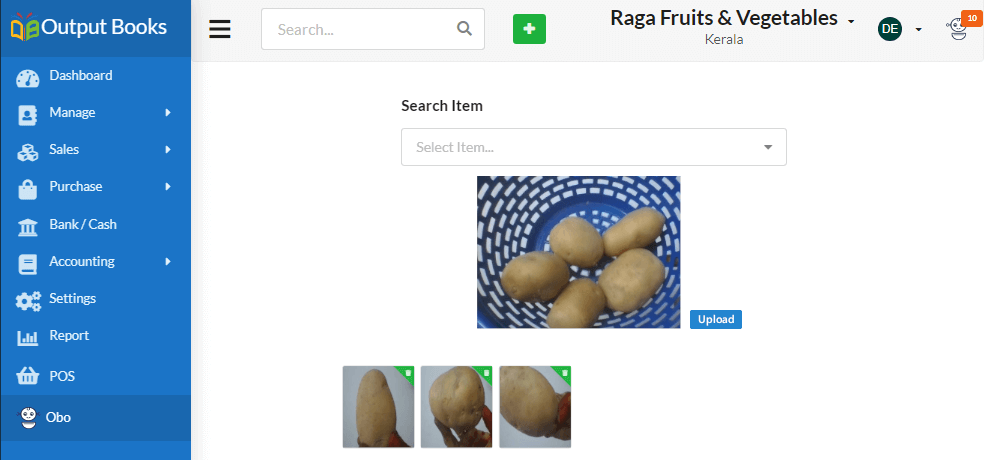
- In the image upload screen, select the corresponding product in the Search drop down.
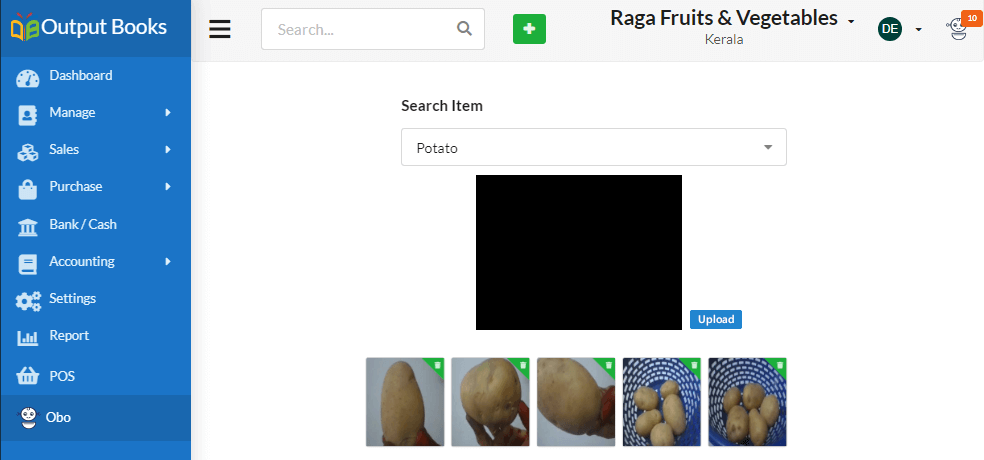
- Click Upload. Capture multiple images for each item in different angles to improve the accuracy of prediction.

- Repeat the process for all product images you wish to train.
- Once all images are uploaded, navigate to obo > Item Identifier.
- Click Advanced Option & Learn Now to initiate the learning process. This may take some time.

5. Billing Process
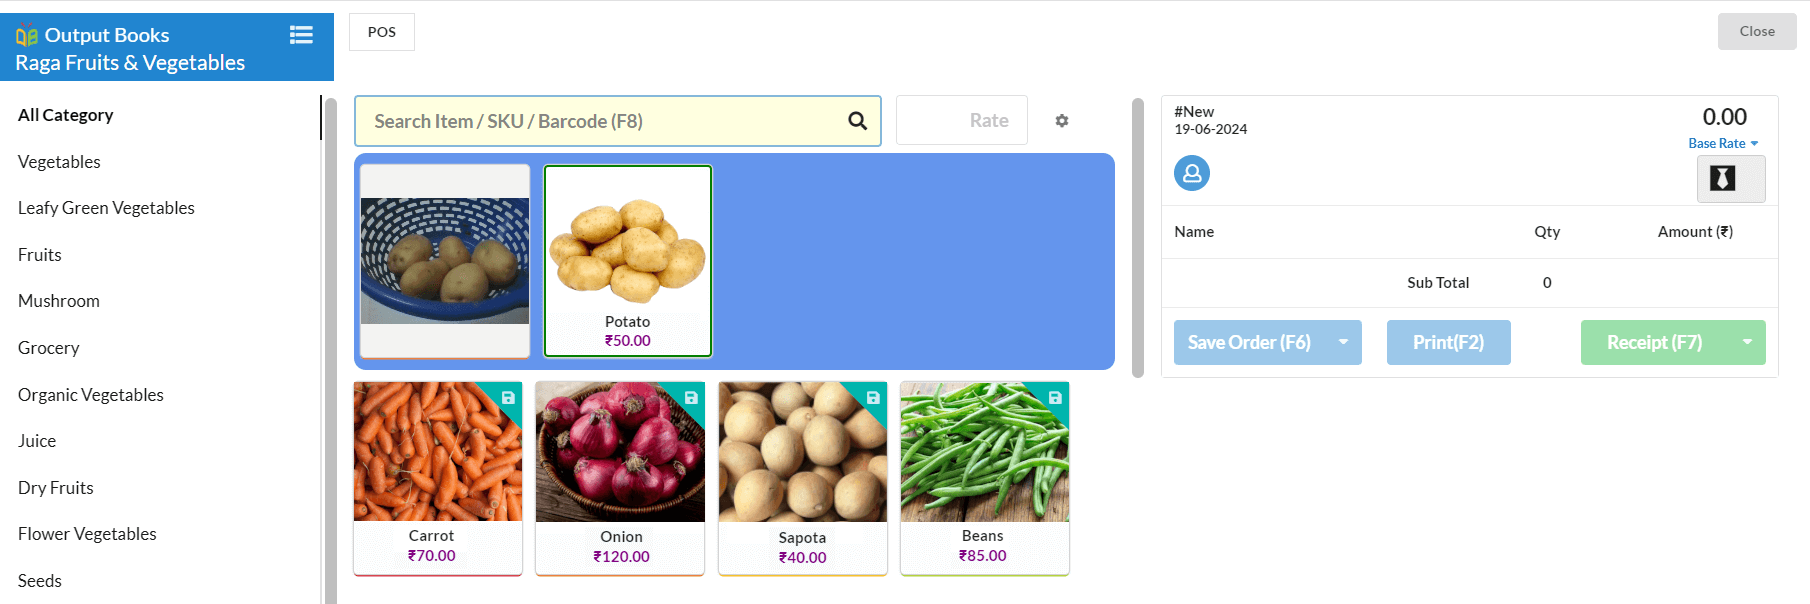
- In POS menu, place cursor in Search Item and press Space bar key.
- After completing the training process, OboEye will be ready for prediction during billing.
- Simply place items under the webcam, and OboEye will automatically identify them and fetch relevant information from the database.
- Confirm and press Enter key
- Then the item will be added in the billing list.
6. Training Mode
- If OboEye frequently makes incorrect predictions, enable Training Mode ON.
- During billing, you’ll see a Training icon in the top right corner of each POS image. Click it to upload images for additional training.
7. Learning Accuracy
- The accuracy of predictions improves with the number of training images provided.
- Ensure to upload a variety of images for each product to enhance OboEye’s learning capability.
8. Maintenance
- Regularly update the training data with new images to adapt to changes in product appearance or inventory.
9. Troubleshooting
- In case of any issues or errors, refer to the application’s documentation or contact technical support for assistance.
By following these steps, you can effectively utilize the Item Identifier feature of the OboEye Application to streamline your billing process and enhance operational efficiency. If you have any further questions or require assistance, feel free to reach out to our support team. Happy billing!
