A Post-dated cheque is the cheque that is written with the future date on it. These cheques are not payable until the date written on the cheque.
In simple words, Post-Dated cheques are nothing but advance payment from/to the customer/supplier which can be cleared when the date on the cheque arrives respectively. Post-dated cheques can be recorded and tracked in Output Books easily.
Let us see how post date cheques can be entered/recorded in Output Books.
Page Contents
How to create a Post-dated cheque for Customer?
In Output Books, create future-dated Sales Receipt for the Customer Invoice, which will be recorded as a Post dated cheque which is issued by that customer to you.
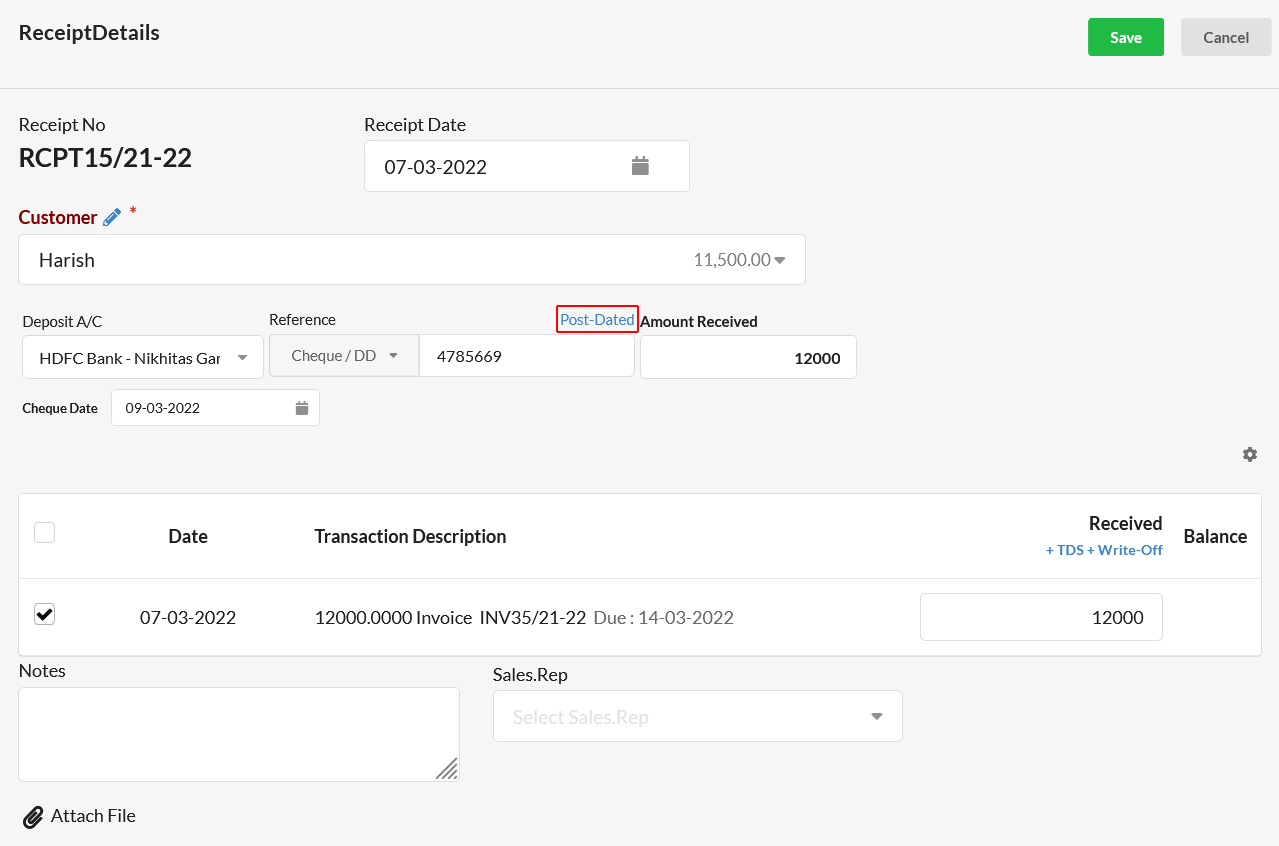
- Go to Sales > Receipt and click on the New Receipt button or click “Receipt” option associated with each Invoice under Open Status.
- In the New Receipt window, set the receipt date.
- Choose the customer who issued the Post dated cheque to you.
- Select your Bank Account in the Deposit A/C field.
- In the reference field, select Cheque/DD and provide the cheque number in the box associated there.
- Click on the Post dated link present there. Set the cheque date.
- If the cheque date is future date(not today’s date),enter the Amount mentioned in the cheque. Once you specify the amount, invoices that are unpaid by that selected customer will get auto-displayed. From the list of invoice displayed, choose the Invoice for which the post dated cheque is to be processed & Save.
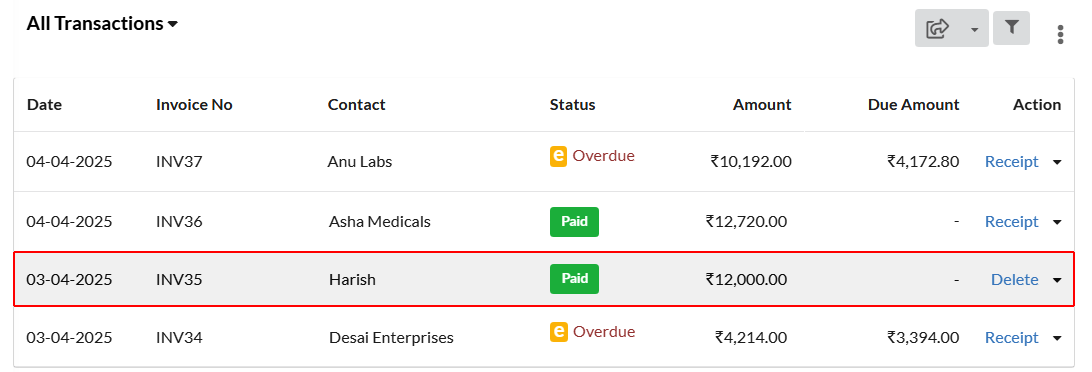
- Now, Invoice will be under “Paid” status & receipt will be under “Pending” status.
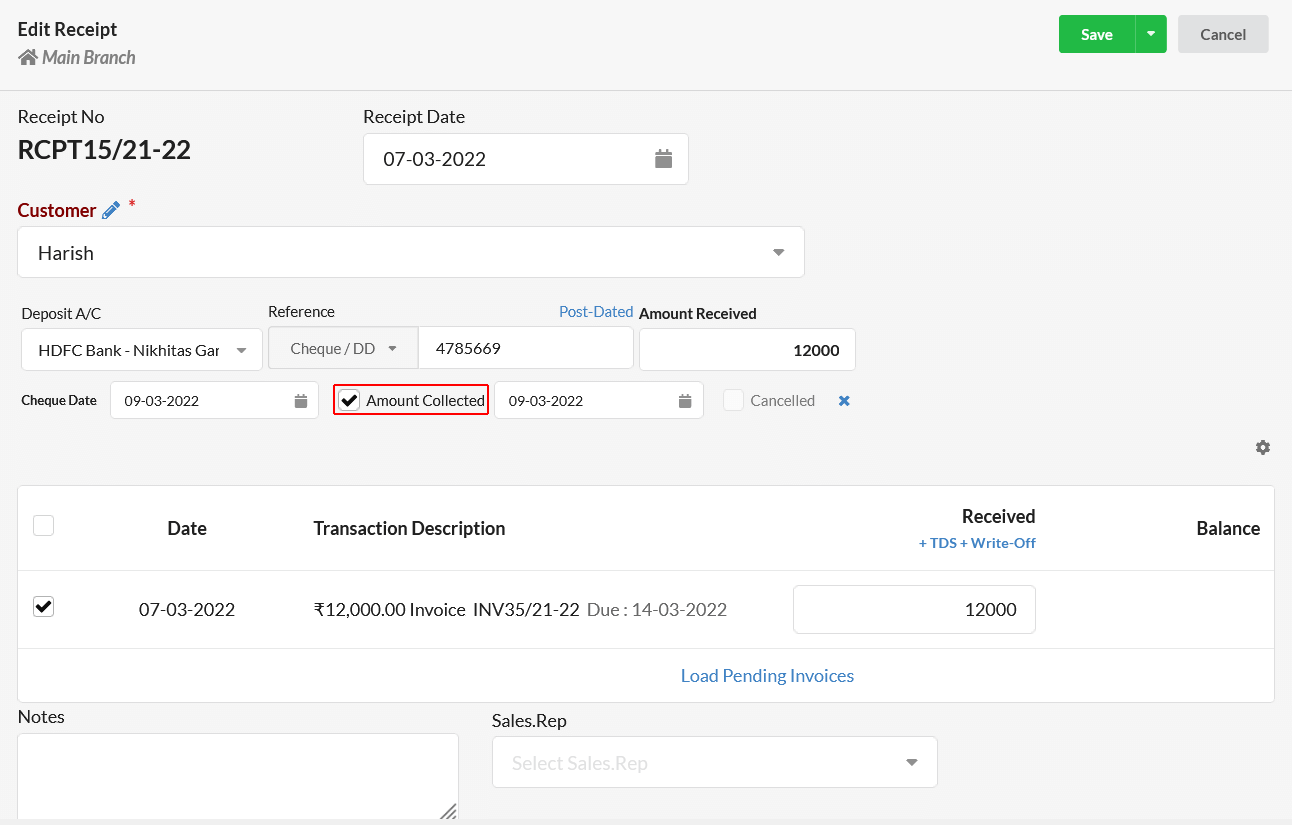
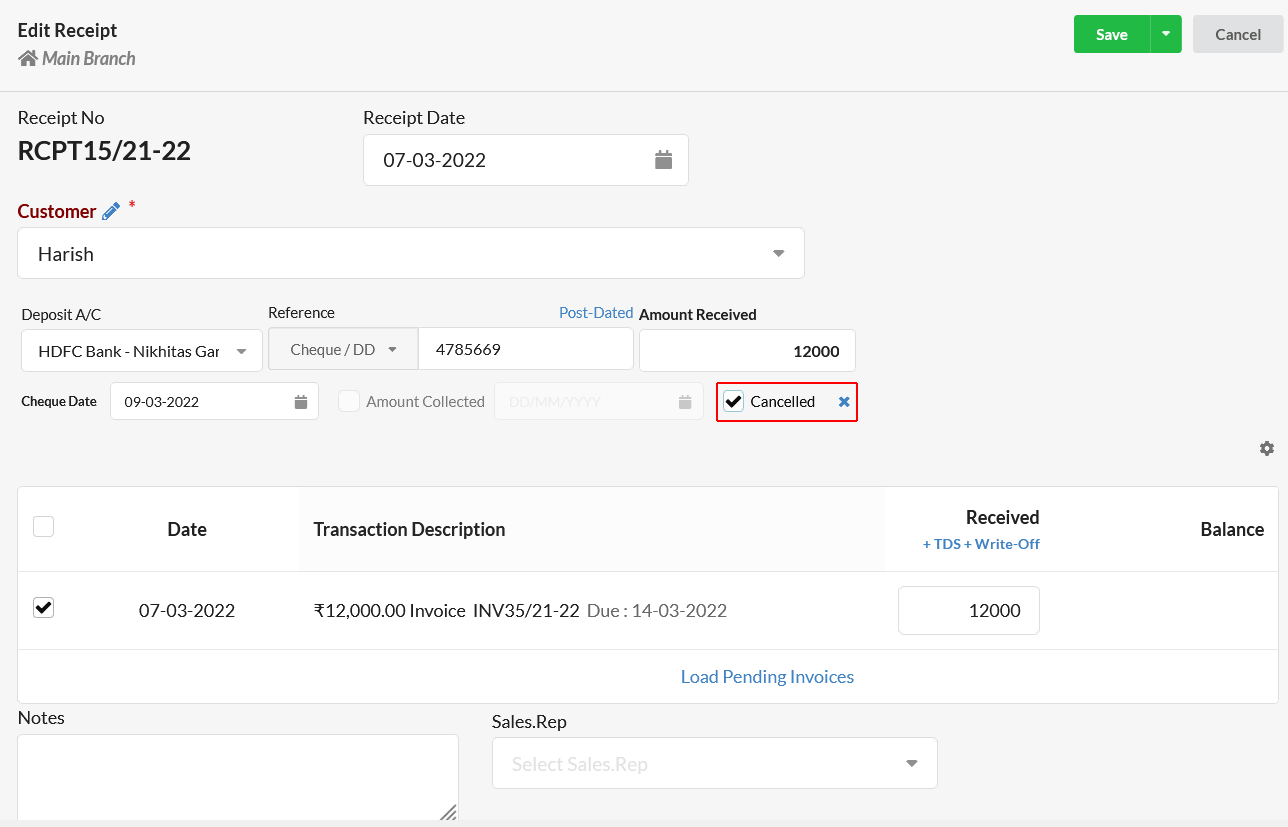
- On the cheque date, you might either receive the amount or the cheque might get cancelled. To record this, open back the Receipt again. You will find 2 options.
- Amount collected – Enable this if you have received the amount. Invoice will remain under “Paid” status.
- Cancelled – Enable this if the cheque is cancelled.
– Receipt will be changed to closed status.
– Invoice will bounce back from “Paid Status” to “Open” or “Overdue” status.
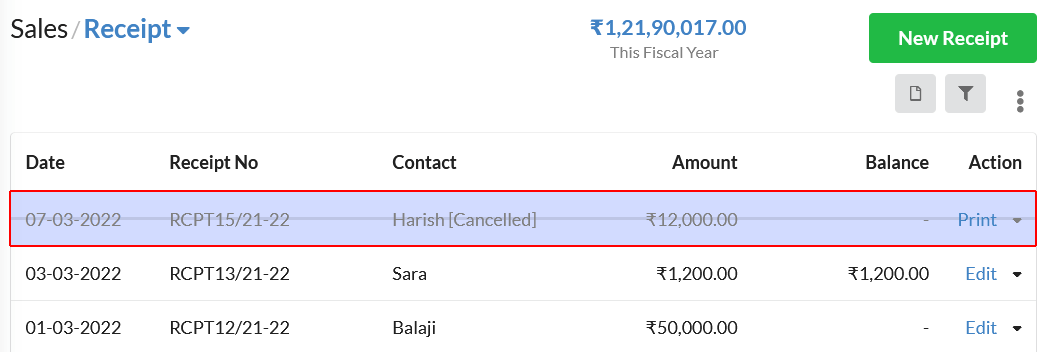
– Receipt status will be “Cancelled“.
How to create a Post-dated cheque for Supplier/Vendor?
When you issue a post dated cheque to your supplier, record it as a Bill Payment for your Supplier Purchase Bill. Just follow the same steps mentioned in Receipt & set cheque date as future date. Go to Purchase > Bill Payment or click “Payment” option associated with each Purchase Bill under Open Status.
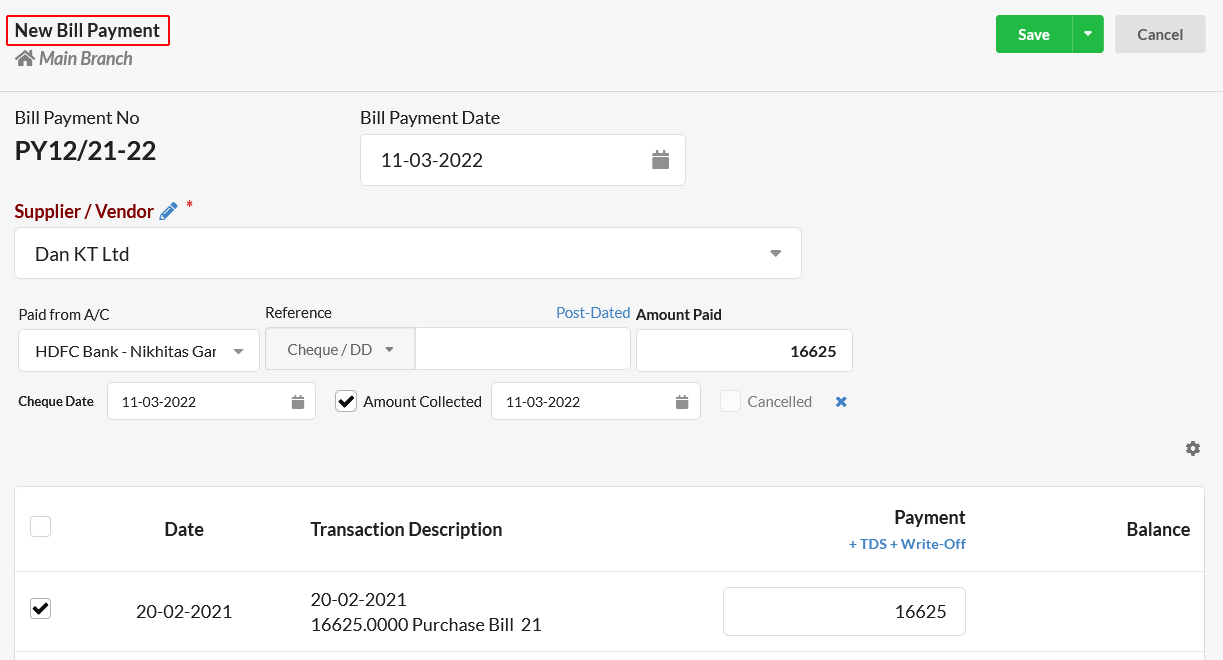
All the other working for Post-dated cheque payment to supplier is similar to post dated cheque receipt.
View Post Dated Cheques/Transactions
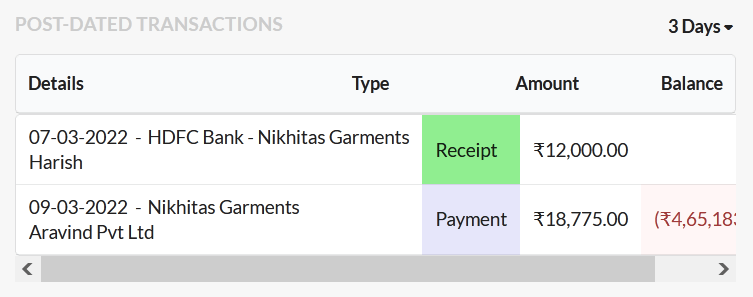
On successful completion of recording receipt/bill payment as post dated cheque, it can be viewed right away from the Dashboard. Navigate to the Dashboard window, you will find your Post Dated cheques in the Post-Dated Transactions session.
You can view the post-dated transactions/cheques by filtering them with the number of days between the date of cheque issue and cheque payment process date. Filter your post dated cheques with 3 days/7 days/ 14 days.
Post-Dated Cheques Reports
Go to Reports > Transactions and click on the Post Dated Cheques Report. It will display all your post-dated cheques(receipts & bill payments) with necessary details.
Print/Export PDC(Post Dated Cheques) reports
Print or Export your Post-Dated Cheques in PDF/CSV/XLS format. Click on the drop-down associated near the Print button in PDC reports window to print or export your post dated cheques report.
