The company sends a proof document, known as a receipt, to the customer, acknowledging their payment for the product.
Page Contents
1. Receipt Listing
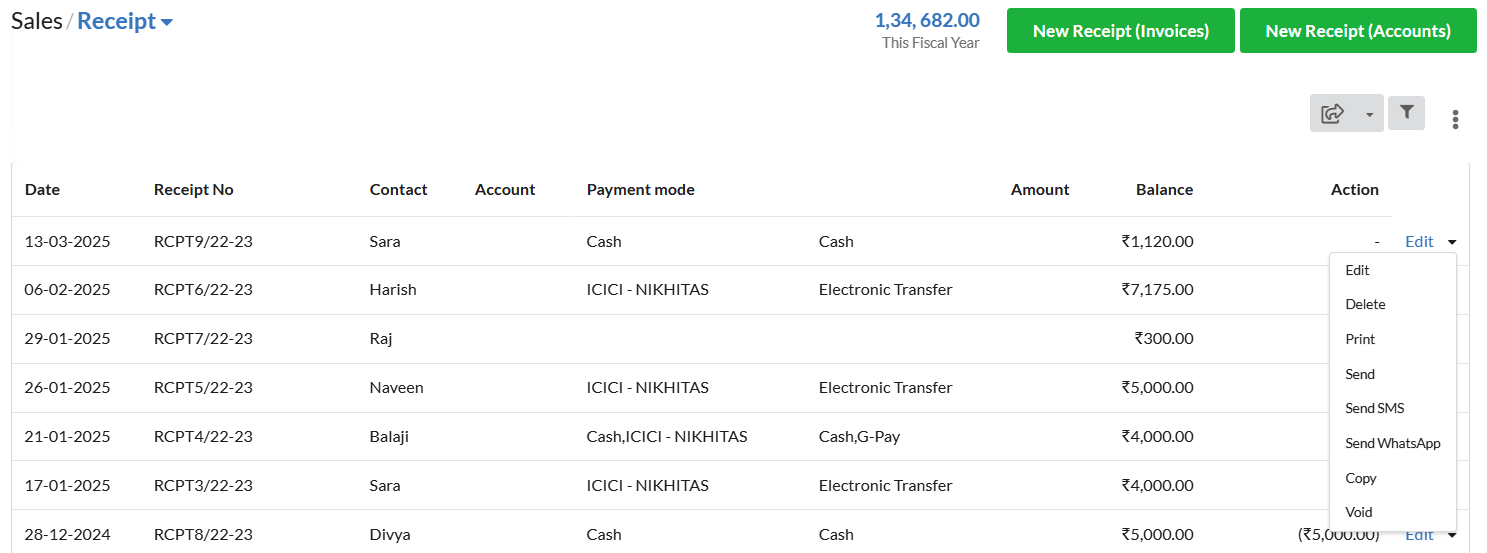
The receipt will list the Date, Receipt Number, Contact Information, Deposit Account, and Amount.
How to do modification in the listing of receipt?
You can rearrange the receipt list according to these column headers. Additionally, you’ll have the filtering option to search invoices by name, status, and date range.
2. Creating Receipt
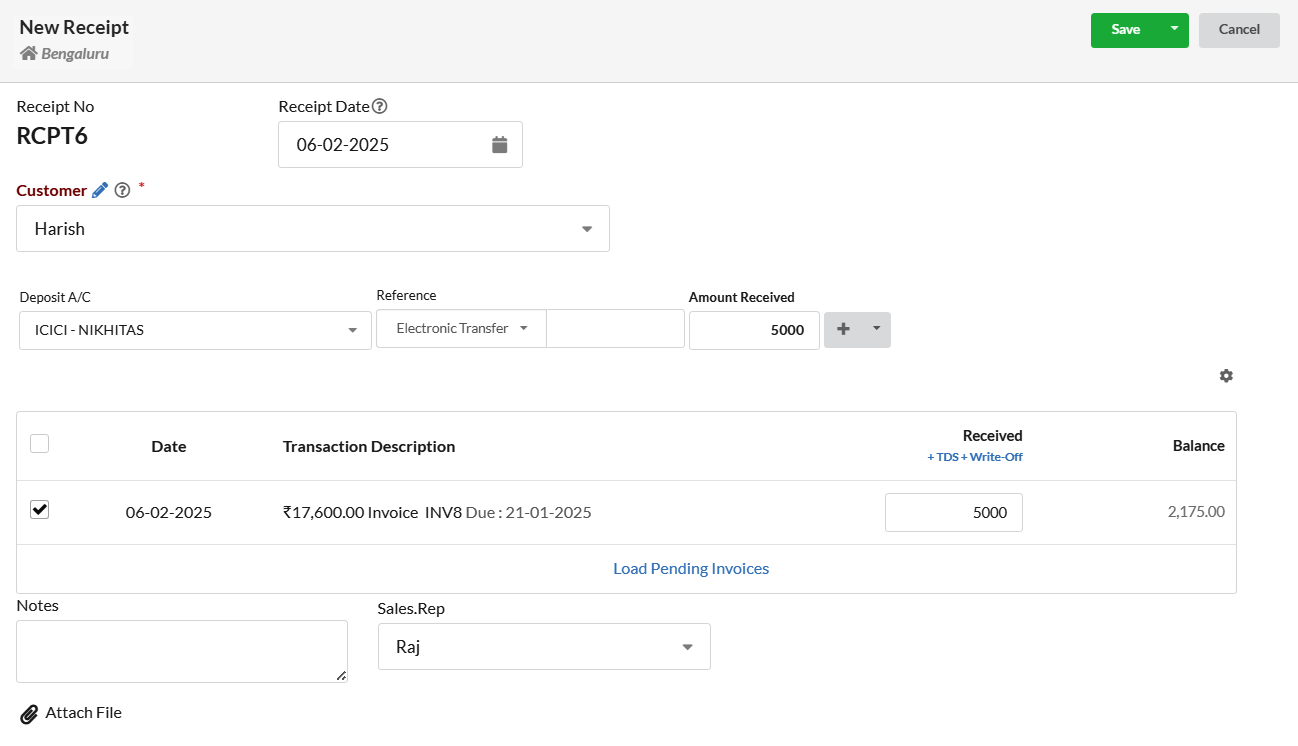
To add a New Receipt :
- Click on Sales in left menu and select Receipt or Click on the Receipt link in the Invoice.
| Fields | Description |
|---|---|
| Receipt No | The next receipt number will be displayed for your convenience. You can define it Automatic or Manual in Settings > Modules. Receipt number should be unique for a financial year. |
| Receipt Date | Date of Receipt of payment |
| Customer | Choose the customer from the drop-down menu or manually enter their name. Once you’ve selected an existing customer, the total sum of all invoices, credit, and debit notes associated with them will be displayed |
| GSTIN | For existing customers, it will be displayed on selecting their name. For new customer, you can provide directly. |
| Deposit A/C | Select a Cash / Bank account, to update deposit details, which is optional. |
| Reference | Provide the Reference No for the receipt like Invoice, Debit note etc., |
| Amount Received | Please enter the amount received from the customer to update the invoice payments or any existing credit balance. If the amount exceeds the credit balance, it will be recorded as excess credit for the customer, which will be applied to future invoices to adjust the balance |
| Attachment | You can also add attachments related to the transaction |
How to Edit / Delete / Print / Send / Send SMS / Send WhatsApp / Copy a receipt?
Click on the drop-down associated with each credit/debit note under Action category and, choose the desired action.
3. Multiple Payment mode in Receipts
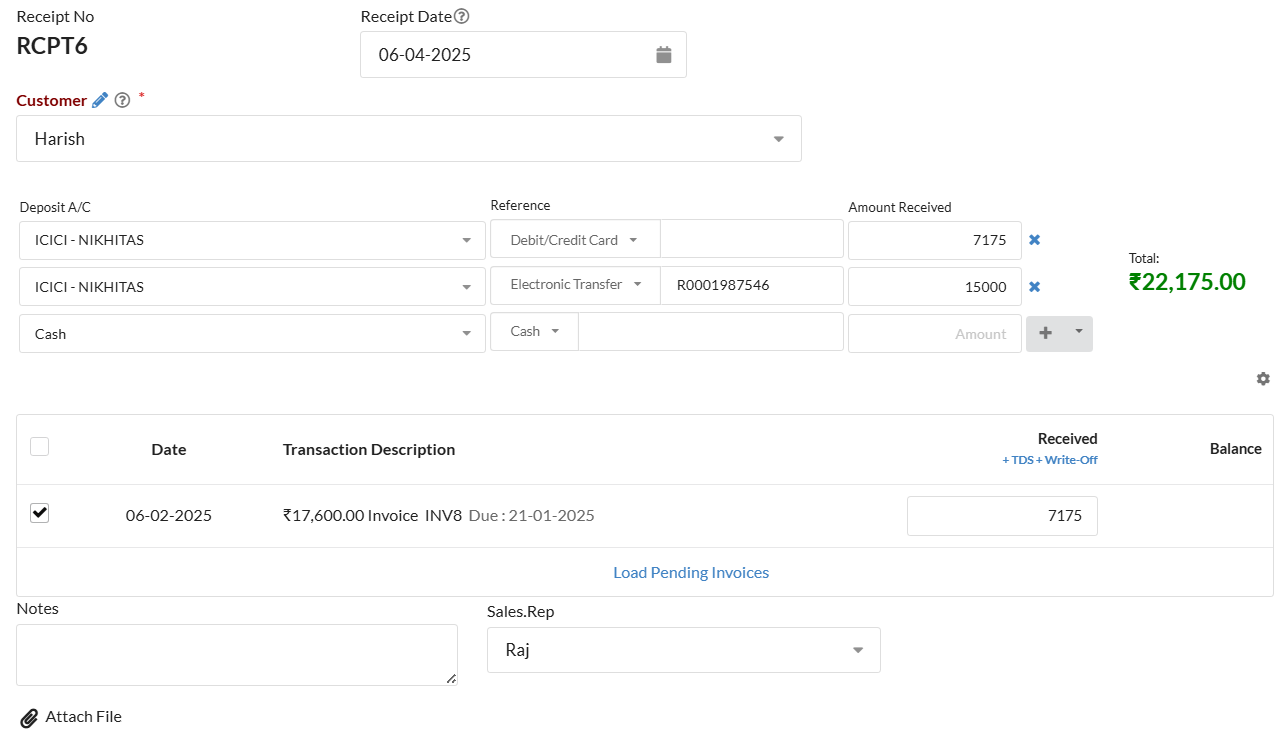
In Output Books, you have the capability to split payments across various modes and record them within a single receipt. Here are the steps to follow
- Go to Sales > Receipt
- Click on New Receipt
- Use the + icon to add another payment mode.
- Select Deposit A/c & Payment mode and enter Received amount
- If necessary, continue adding more payment modes.
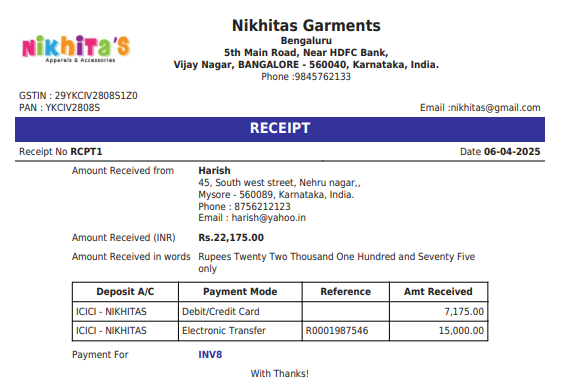
In the printed receipt, you can view the various payment modes along with their corresponding received amounts.
4. Managing bank charges in Invoice Payments
In the process of recording invoice payments, it’s essential to consider any associated bank charges. By accurately reflecting these charges in the payment records, you ensure a comprehensive representation of the total amount paid, specifically linked to the relevant invoice. Here are the steps to follow.
4.1. Add Receipt Charge
- Go to Settings > General.
- Access the “Receipt Charges” tab.
- Click on the “Edit” button. Then click Add New.
- Choose the applicable Payment mode where the bank charge applies.
- From the Account dropdown menu, select ‘Bank Charge’.
- Save your changes by clicking on the ‘Save‘ button.
4.2. Recording Receipt with Bank Charge
- Go to Sales > Receipt.
- Choose the intended Customer.
- Upon selecting the preferred Payment mode, the Bank Charge options will automatically appear.
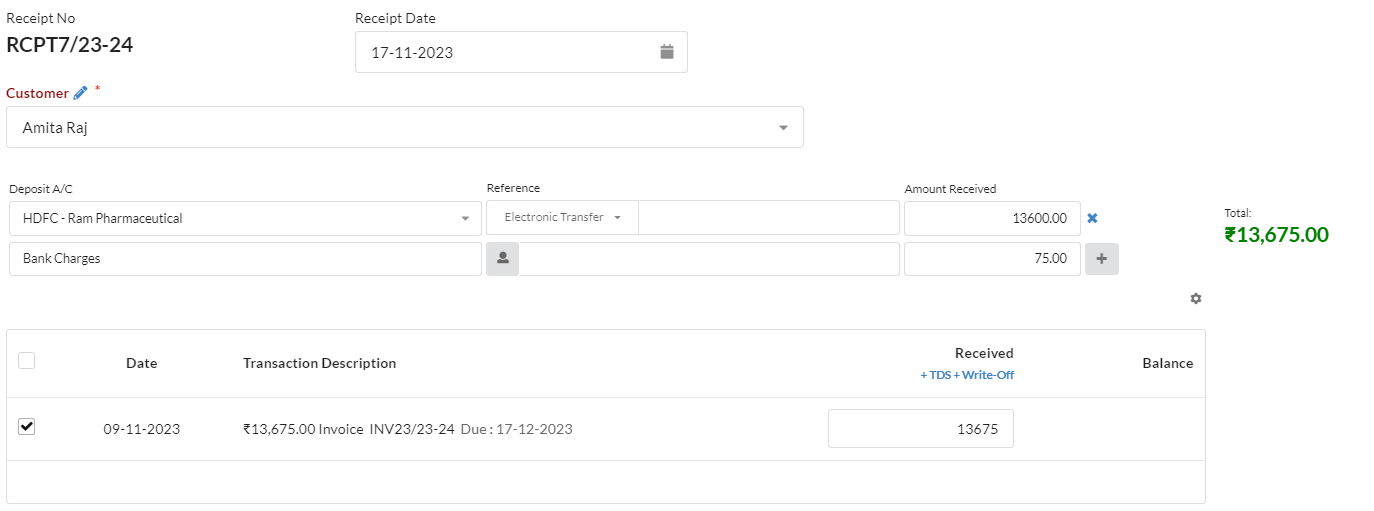
- Input the received amount and bank charges in their respective boxes.
- Select the appropriate invoice and click on ‘Save‘ to finalize.
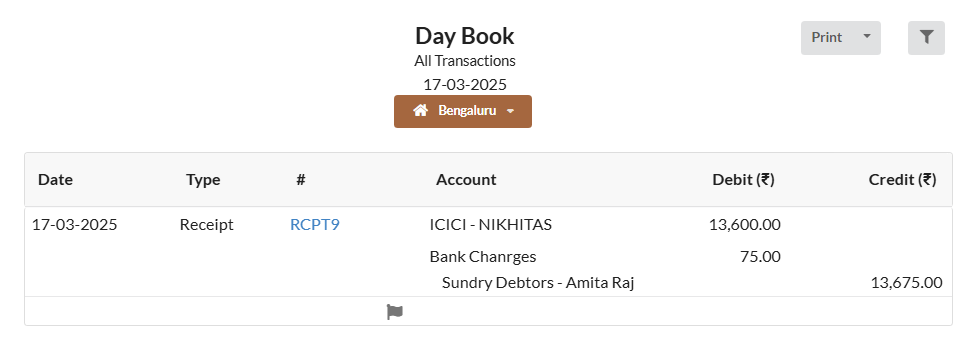
4.3. Accounting Entries
Accounting entries for the payment including bank charges will be as follows.
