Output Books have access to Sales rep integration. This will allow you to assign customer records to your individual sales reps as well as a commission rate to each sales rep. With the module, the store will also keep track and report on commissions owed to your sales rep
Steps involved to integrate Sales rep module
- Enable Sales Rep module
- Add Sales Representative
- Assign transaction for Sales Representative
- Sales Rep Reports
- Create separate login
Page Contents
1. Enable Sales Rep module
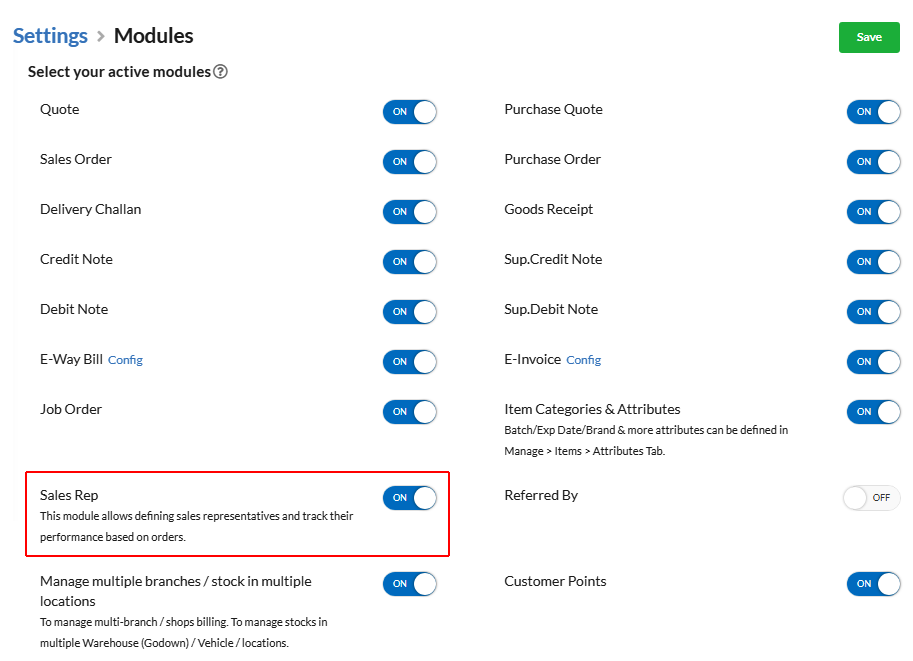
To enable Sales Rep module,
- Go to Settings > Modules.
- Click Edit
- Enable Sales Rep Check box
- Click Save
2. Add Sales Representative
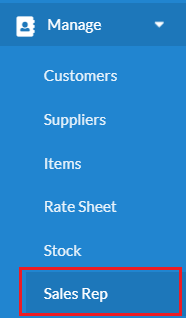
Enabling Sales Rep module, displays the Sales Rep menu in left navigation bar.
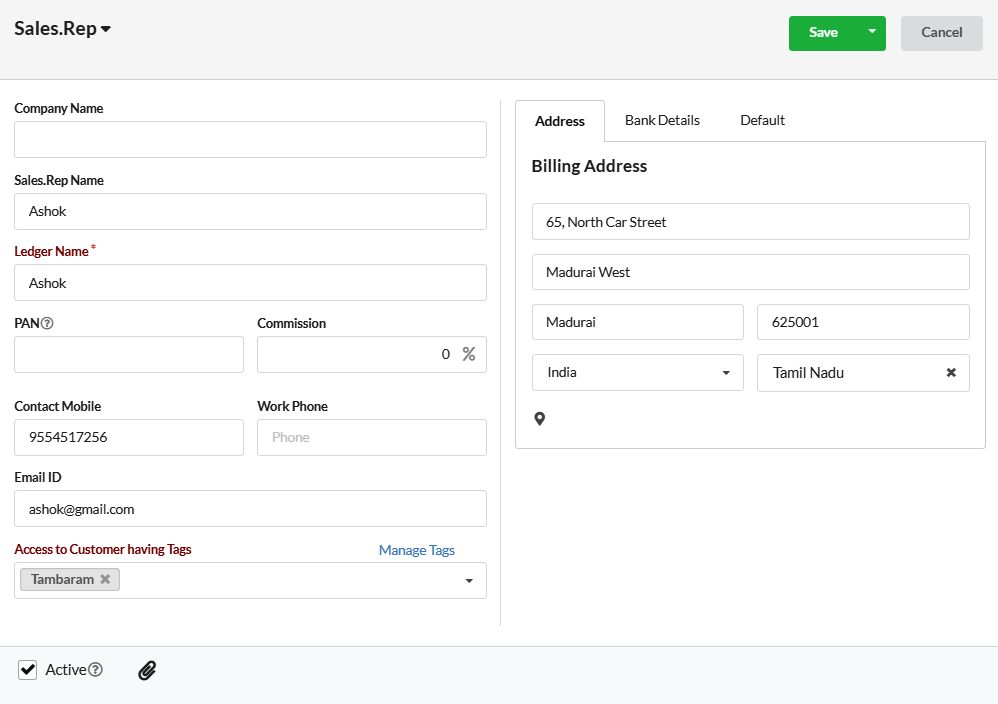
Click Add Sales Rep button and provide the details of Sales Representative. Assign tag for Sales Representative
3. Assign transactions for Sales Representative
We can assign transactions for Sales representative in two ways.
- Assign tag for Customers
- Assign Sales Rep for individual transactions
i) Assign Customer tag for Sales Rep
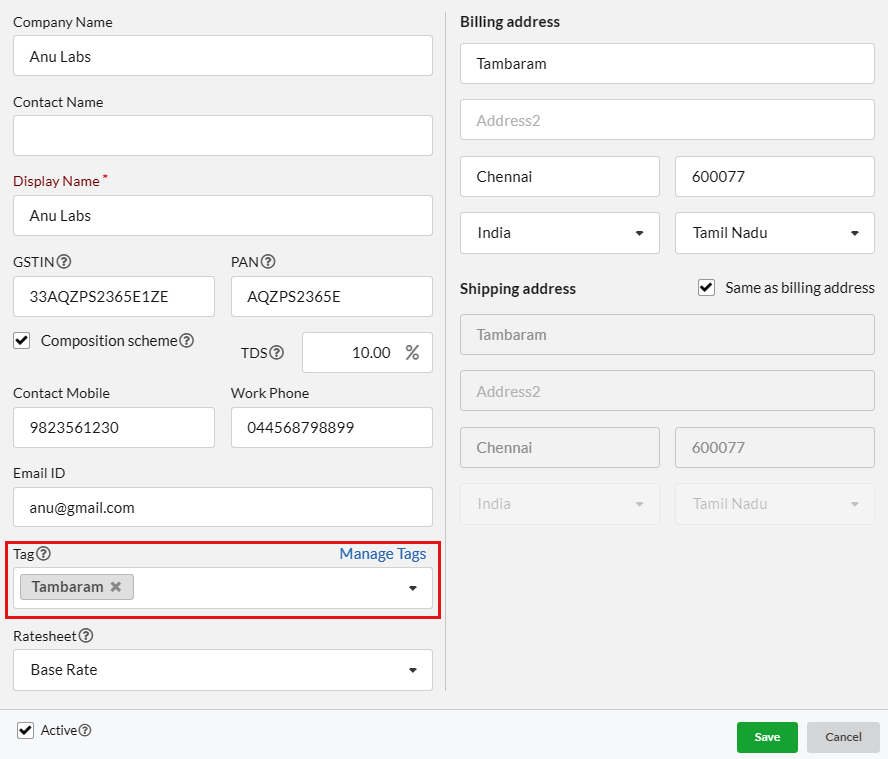
By assigning tag for customer, all subsequent orders placed for the customer will be automatically assigned to the sales representative.
To assign tag for Customer,
- Go to Manage > Customers.
- Click Edit in the Action column for the customer who’d like to assign for Sales rep
- Select the Tag which is assigned for the Sales Rep.
- Click Save.
ii) Assign Individual Order for Sales Rep
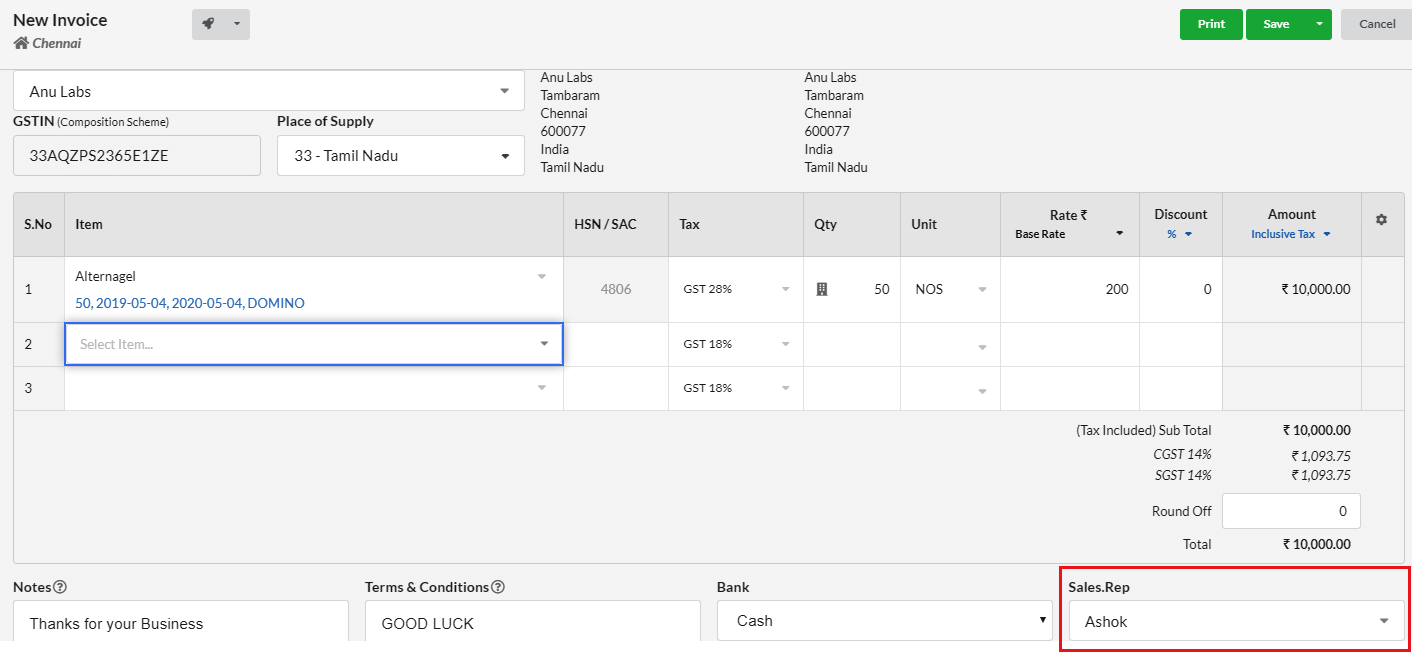
To assign particular order for Sales Representative,
- Go to Sales > Quote / Sales Order / Invoice.
- Click on the corresponding order that you want to assign Sales Rep.
- Click Edit button.
- In bottom right of the pop-up, select the Sales Representative for that order.
- Click Save.
4. Sales Rep reports
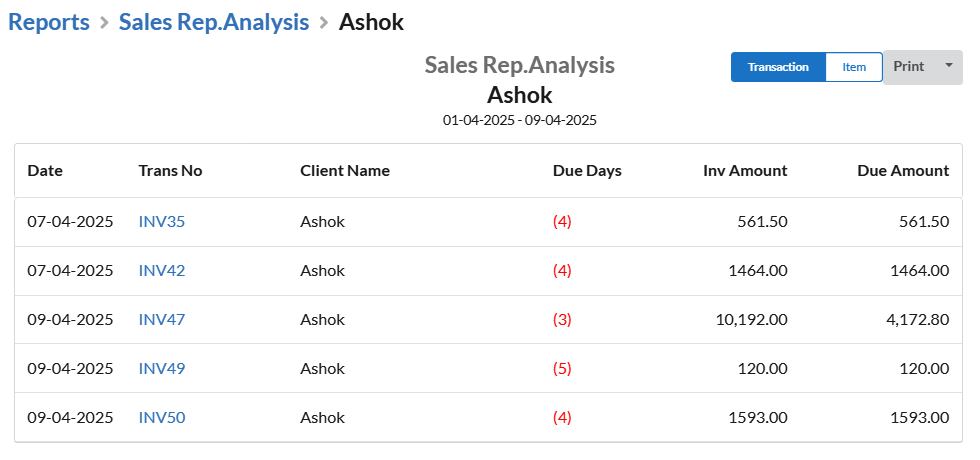
In this module, you can view the activity of the sales representatives for a given time frame. This will show each rep’s invoice count, total invoice amount and the due amount.

On Clicking the Sales Rep, their detailed records will be displayed. You can print or export these reports as needed by clicking the button at the right top of the page.
5. Create separate login
If your Sales Rep also have access to your software, you can assign separate login for them. Using this they can view, add and edit their respective customer records.
To assign separate login,
- Go to Settings > Users.
- Click Add User button.
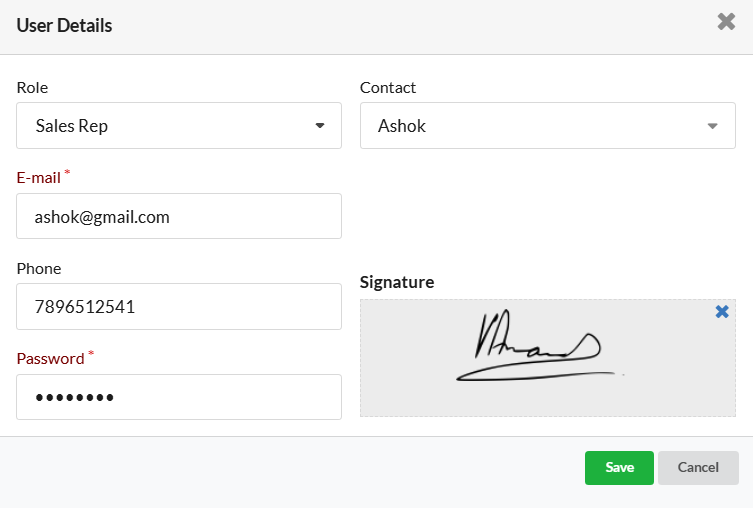
- Select Sales Rep in the Role dropdown.
- Select the Sales Rep from the Contact dropdown.
- Assign them email and password
- Click Save.
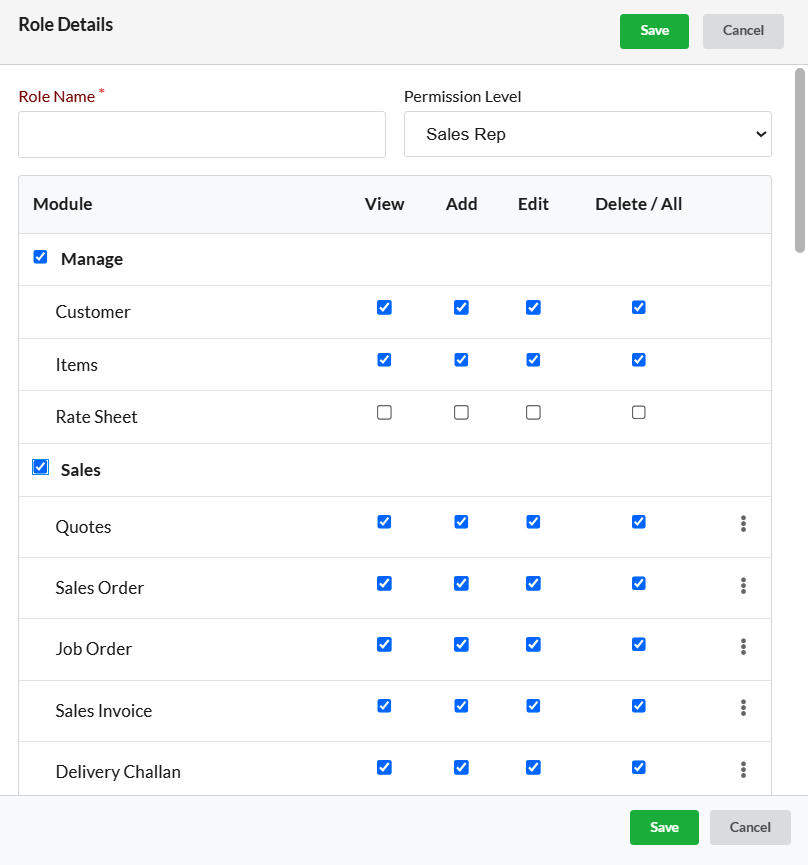
The below image illustrates the permission level for the Sales rep. You can customize the permission level by creating a new role and assign that to them.
Thus, you can integrate the Sales Rep module in Output Books.