Sales Form
Customize your Sales Invoices form under Settings > Sales.
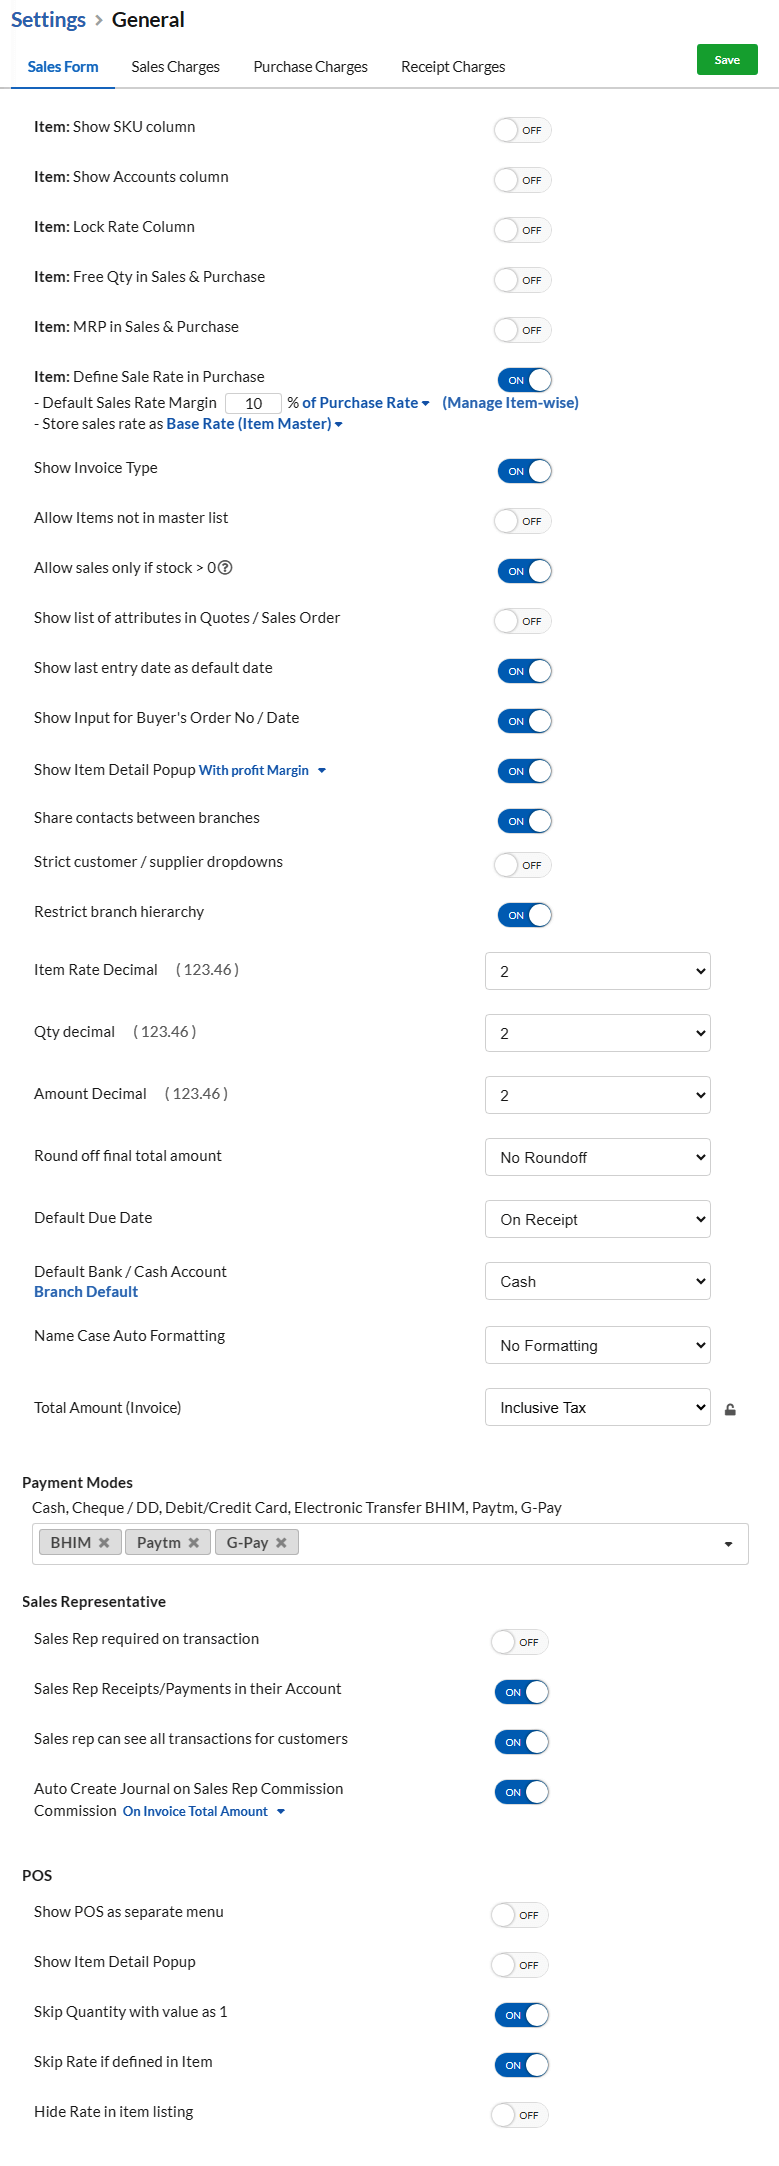
1. Item: Show SKU Column – It will display SKU column in your transaction item grid.
2. Item: Show Accounts Column – Displays Accounts Column in your transaction item grid.
3. Item: Lock Rate Column – Locks Rate Column in your transaction item grid so that rate cannot be edited while creating transactions.
4. Free Qty in Sales and Purchase : This will display Free Quantity column in the item grid of Sales and Purchase.
5. MRP in Purchases & Sales : This shows the MRP column in the item grid of Purchase and Sales.
6. Define Sale Rate in Purchase : This will display Sale Rate of item in Item grid in Purchase transactions.
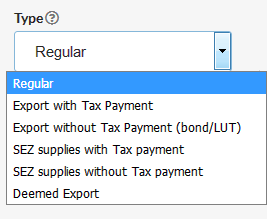
7. Show Invoice Type : Invoice type dropdown will be displayed in the invoice if this setting is enabled.
8. Allow items not in master list : Enable this option to permit your users to add the items that are not in master list.
9. Show List of Attributes in Sales Order : Displays item attributes list in Sales Order Transaction.
10. Free Qty in Sales and Purchase : This will display Free Quantity column in the item grid of Sales and Purchase.
11. Show last entry date as default date : If this option is enabled then the last entry date will fill for new invoices.
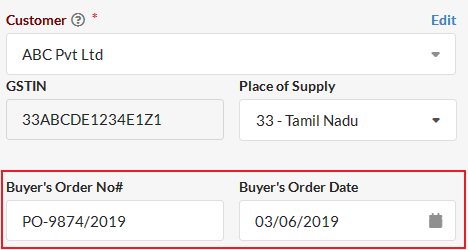
12. Show Input for Buyer’s Order No / Date: Enabling this option will ask input for Buyer’s Order number and Buyer’s Order Date in all invoices.
13. Show Item Detail Popup : This will show Item Details in a Popup while you record Sales. You can either choose to display pop up – With Profit Margin or Without Profit Margin.
14. Share contacts between branches : This will make contacts saved in one branch to show up in all other branches as contacts.
15. Strict customer/supplier dropdown : This will display only customers lists in Sales transactions & only suppliers list in purchase transactions.
16. Show POS as separate menu : This will display POS as separate menu in the left panel making it easy to access.
17. Restrict Branch Hierarchy : This will display branches list without any hierarchy.
18. Item Rate Decimal : You can set default decimal range for Item rate here.
19. Amount Decimal : You can set default decimal range for transaction amount here.
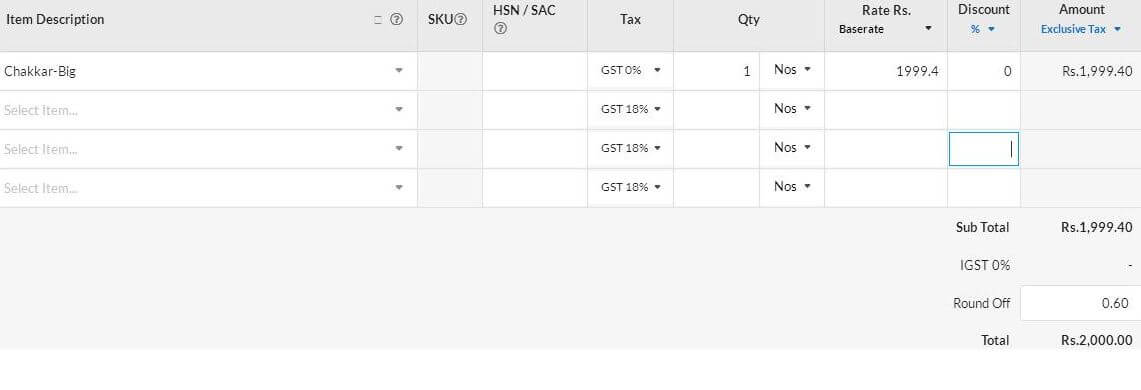
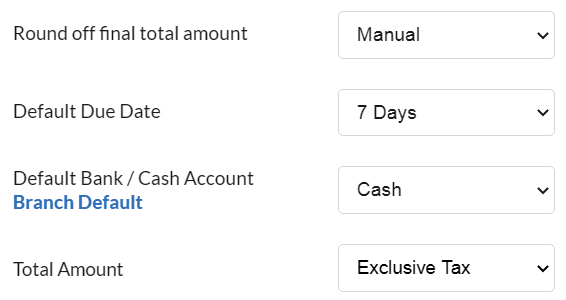
20. Round off Total Final amount: You can round up the total amount manually or automatically.
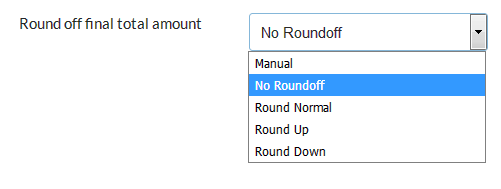
20.1. Manual : Need to input amount manually
20.2 No Round Off : Round off option will not be displayed
20.3. Round Normal : Round to near integer. Ex: 2.50 to 3.00; 2.40 to 2.00
20.4. Round Up : Round to next integer. Ex: 2.10 to 3.00
20.5. Round Down : Round to down integer ignoring decimal. Ex: 2.90 to 2.00
21. Default Due Date: The time duration for due date chosen here will automatically set in the Invoice creation.
22. Default Bank Account: Choose the bank account that you use the most. The chosen bank account will appear when you create an invoice. You can change it at the time of the invoice.
23. Total Amount(Invoice) : Set either Exclusive or Inclusive tax for your Total Amount in Sales Transactions.
24. Stock Value Based on:
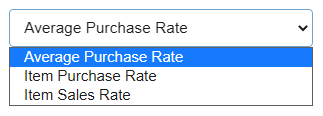
- Average Purchase Rate – To consider the the average of your purchase rate as Stock value.
- Item Purchase Rate – To consider the last purchased rate of the item as it’s Stock value.
- Item Sales Rate – To consider the sales rate of the item as it’s Stock value.
Payment Mode
Enter the Payment mode other than Cash, Cheque / DD, Debit/Credit Card, Electronic Transfer here to use it in Transaction payments.
Sales Representative
Set config for Sales Rep here:
- Sales Rep required on transaction – Enable this to set Sales rep selection mandatory for each sales transaction.
- Sales Rep Receipts/Payments in their Account – Enable this to assign Sales Rep’s receipts or payments to their(Sales Rep’s) account.
- Sales Rep can see all transactions of customers – Enable this to allow Sales rep to view all transactions of customers.
- Auto create Commission Journal for Sales– Enable this and set sales commission percentage for Sales Rep and auto generate sales commission journal.
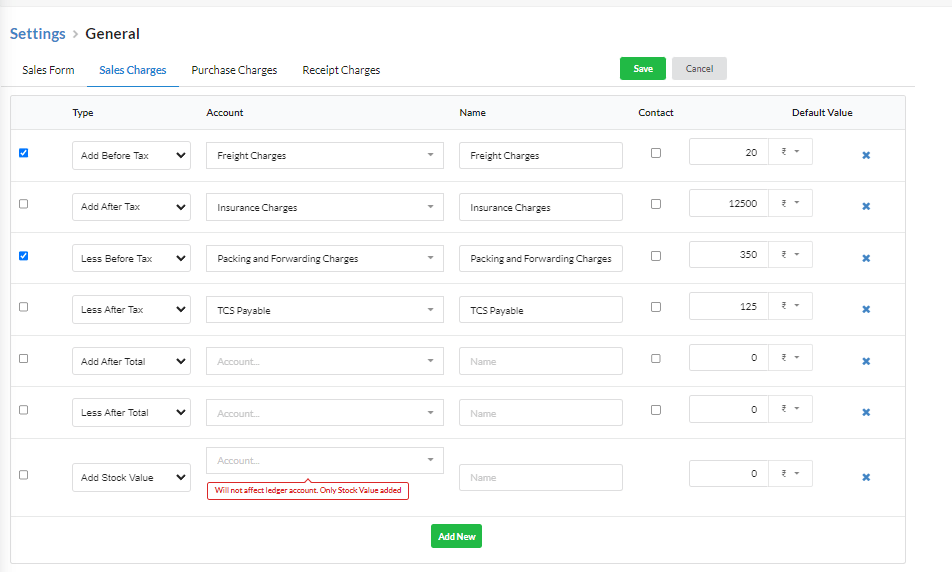
Sales Charges
- Choose the type of the sales charge.
- Choose the Account for the sales charge to be accounted for.
- Enter the display name for the sales charge.
- You can enter default value for each sales charge in % or Rupees.
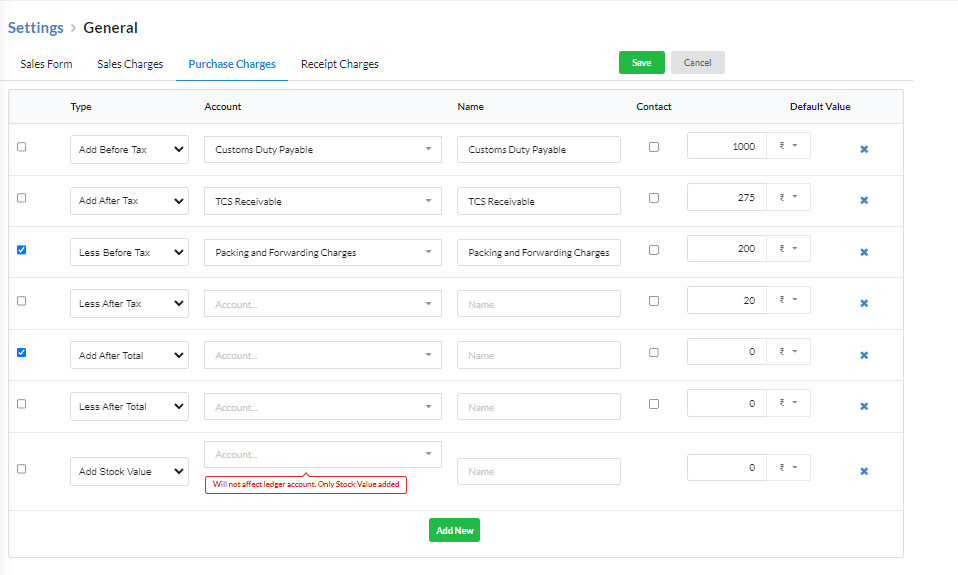
Purchase Charges
- Choose the type of the purchase charge.
- Choose the Account for the purchase charge to be accounted for.
- Enter the display name for the purchase charge.
- You can enter default value for each purchase charge in % or Rupees.
If you want this purchase charge to be reflected in stock value, kindly refer Steps to include Purchase Charges in Item’s Cost Price.
Receipt Charges
- Choose Payment mode for Receipt charge.
- Choose the Account for the receipt charge to be accounted for.
- Choose the vendor name(optional).

