Page Contents
What is Inventory Serialization?
Inventory serialization is tracking of individual units of stock using serial numbers. Most commonly, it is used on high-value goods for more precise tracking or for warranty claims.
E.g. Smartphones are tracked using a special type of serial numbers called the IMEI. Even when the models are the same, no two smartphones have the same IMEI number. Serialized inventory allows identifying individual pieces of inventory.
Steps to apply Inventory Serialization in Output Books
Let us explain this with mobile IMEI number.
- Create Categories
- Create Attribute and associate to Categories.
- Assign Category for Items
- Record Purchase
- Create Invoice
- Manual Stock Adjustments
1. Create Categories
- Go to Manage > Items
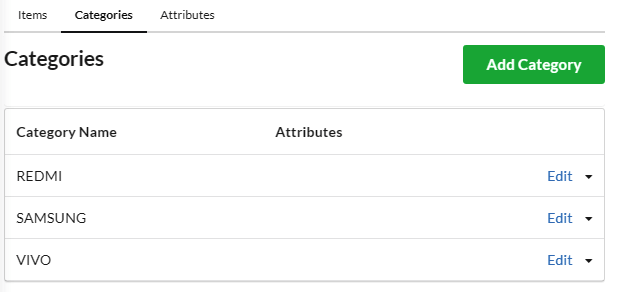
- Click Categories tab
- Click Add Category button and create required categories
2. Create Attribute and associate to Categories
- Go to Manage > Items
- Click Attributes tab
- Click Add Attribute button
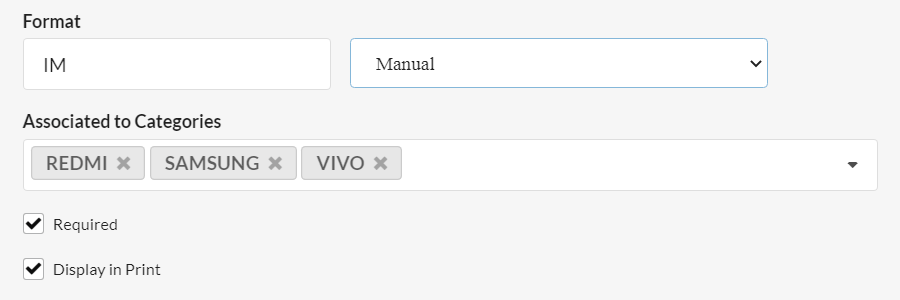
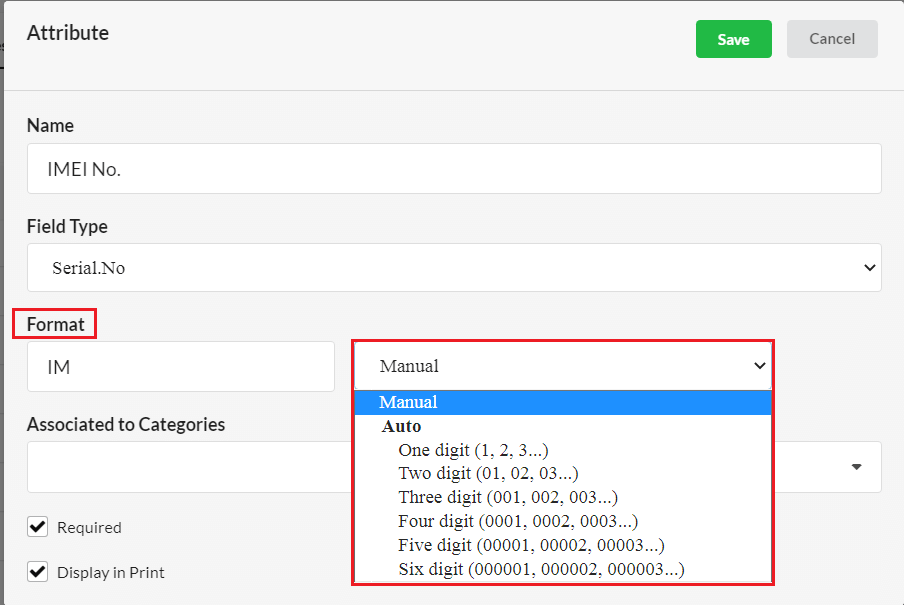
- Type IMEI No. in Name and select Serial No. in Field Type
- Enter the serial format(prefix for serial).
- Choose the mode of serial number generation. Choose Manual or Auto mode. If Auto, choose one digit/two digit, three digit/four digit, etc as per your desire.
- Select all associated categories
- Click Save
3. Assign Category for Items
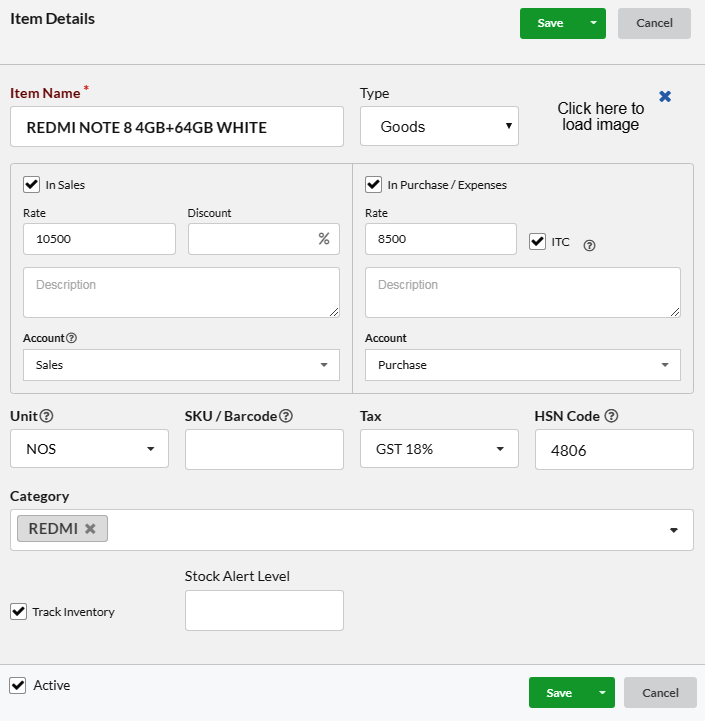
While creating items, assign the corresponding categories to that item. Doing so, the serial number is automatically assigned to that item.
4. Record Purchase
To create a purchase bill,
- Go to Purchase > Purchase Bill
- Click New Purchase Bill
- Select Supplier from the Supplier dropdown.
- Select an item and scan its corresponding code
- Provide quantity based on the codes scanning on a row.
- Click Save
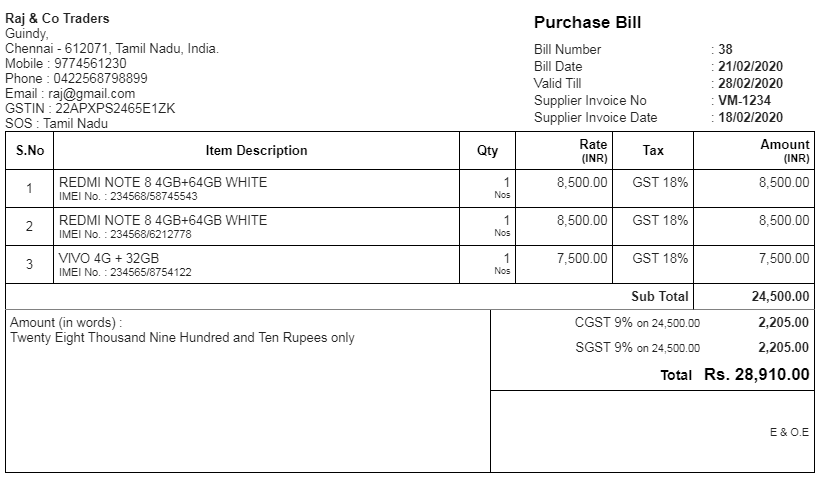
In this example, for the first row item, we scanned two codes. So the quantity given is 2. If we scan three codes in a row item, you should give 3 in quantity box. Likewise, you can record all your purchase following this procedure. Stock gets inward for each code.
Here you can see the preview of the purchase bill.
5. Create Invoice
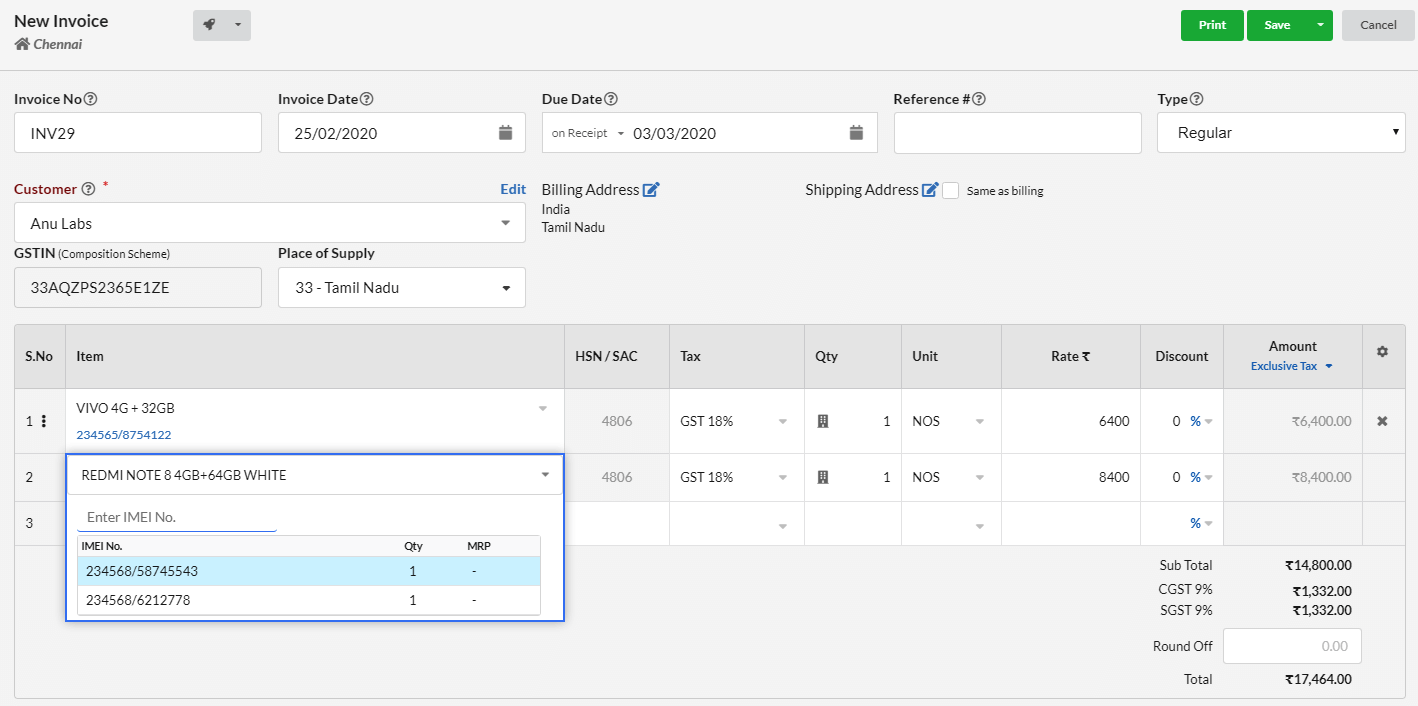
Using barcode scanner, you can generate an invoice within seconds. To create invoice,
- Go to Sales > Invoice
- Click New Invoice
- Select customer from the Customer drop down
- Place cursor in the Item Column and scan the code
- It will populate all other details automatically.
- Click Save.
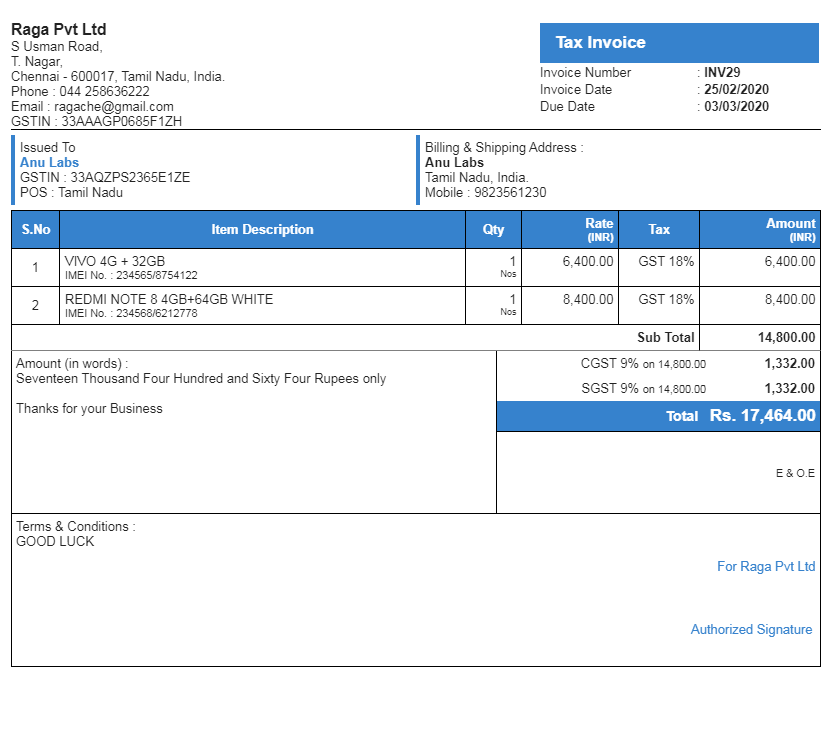
As shown in the image, if we enter an item name, a pop-up shows the corresponding stock details. We can pick from there too. In Invoice, we can print item name along with the code number as below.
6. Manual Stock Adjustments
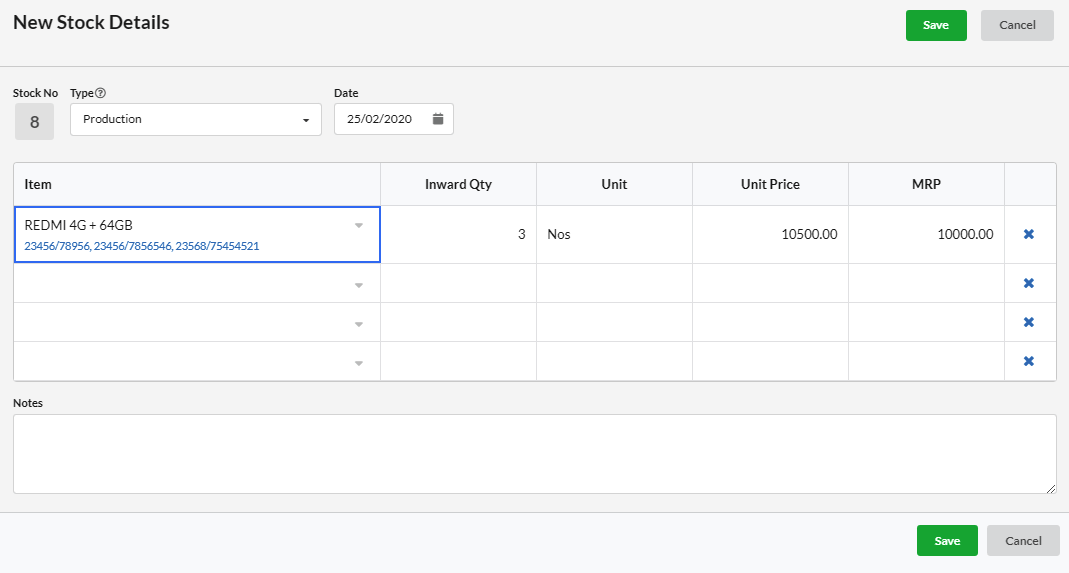
You can manually enter stock for the serialized item inventory.
- Go to Manage > Stock
- Click Add New
- Select Item from the dropdown
- Scan corresponding codes of the items
- Provide Quantity which counts the number of codes scanned.
- Enter Unit Price and MRP
- Click Save
In this way, you can inward all your inventory in Output Books manually.
Note : If the sales and purchase rate is not given in the Item master, Unit Price and MRP provided here will be considered as the purchase rate and sales rate respectively.
