Page Contents
1. Manage User Roles
Output Books offers a powerful and flexible way to manage User Roles, allowing administrators to control access to specific modules and features based on each user’s responsibilities. This ensures data security, operational efficiency, and clear accountability within your organization.
You can:
- Create new roles
- Assign specific module-level access
- Edit or delete custom roles (System-defined roles cannot be modified)
1.1. Default System Roles
- Administrator
- Accountant
- Sales & Purchase
- Sales
- Sales Rep
- Stock Keeper
- E-Commerce.
Note: These system roles are fixed and cannot be edited or deleted.

1.2. Add User Role
To create a custom user role:
- Go to Settings > Users
- Click on the User Roles tab
- Click the Add Role button
- Enter a unique Role Name
- Select a Permission Level
- Choose the Modules and enable required actions (View, Add, Edit, Delete)
- Click Save
Once saved, the new role will appear in the User Roles list.
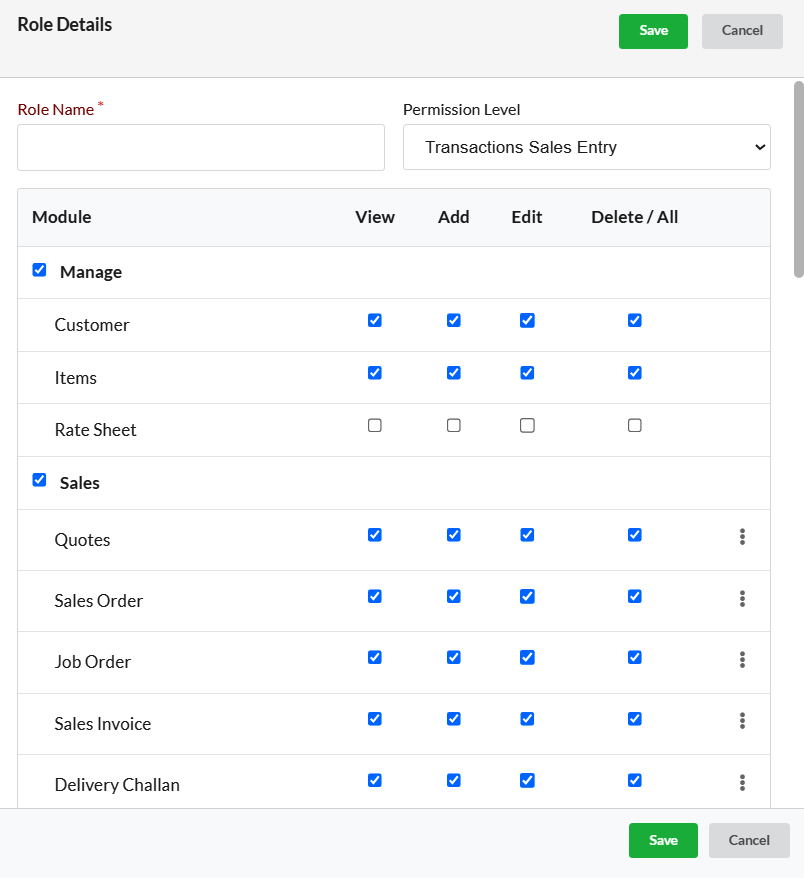
 1.3. Advanced Role Restrictions
Fine-tune access by applying advanced restrictions to specific modules. Use the three-dot menu (⋮) to access advanced settings.
Available Restrictions:
- Block Discount – Prevents the user from applying discounts
- Block Rate/Amount – Hides or locks the rate and amount fields
- Block FreeQty – Prevents users from entering free quantities
- Block Ratesheet – Disables access to rate sheets
- Block Edit Rate – Restricts editing of item rates
- Only Draft Status – Allows saving only in draft mode; prevents final submission
- Display Rate/Amount for Internal Transfer – Shows rates only during internal transfers
These controls are helpful for limiting access for trainees, junior staff, or specific departments.

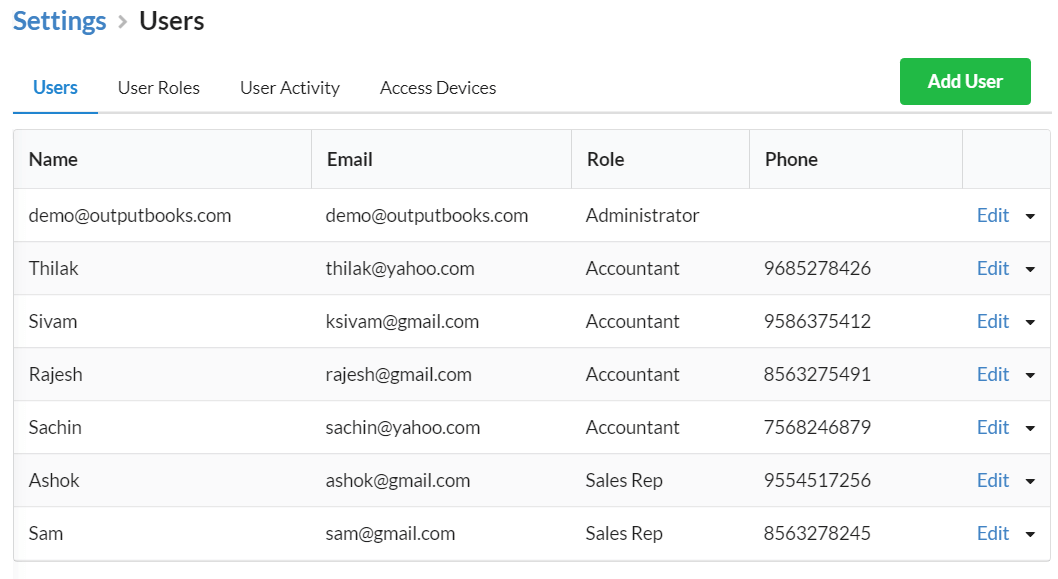
2. User Management
To manage users, navigate to Settings > Users > Users Tab.
You can:
- Add new users
- Delete users
- Activate or deactivate users based on need
2.1. Add New User
- Go to Settings > Users
- Click the Add Users button
- Fill in the required user details
- Click Save
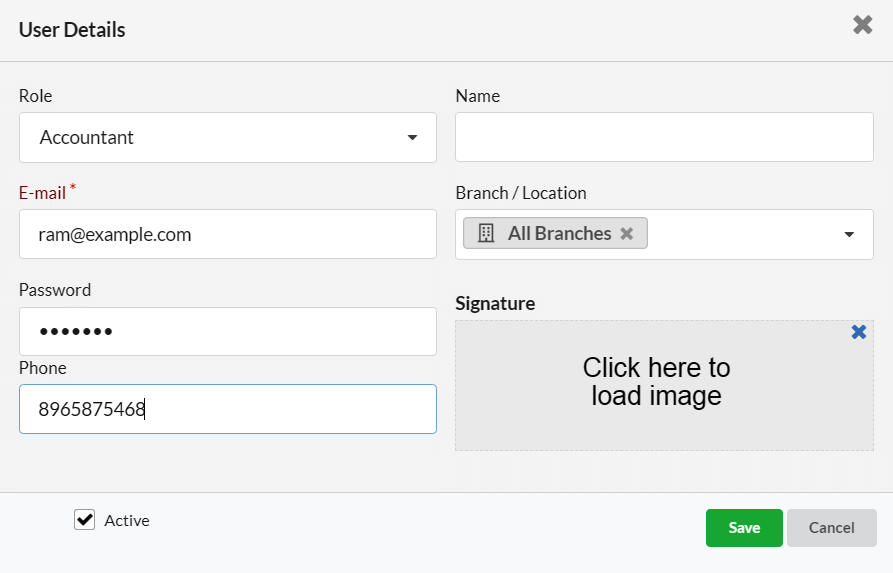
Field Description
| Fields | Description |
|---|---|
| Enter a valid email address of the user | |
| Name | Enter the user’s name |
| Password | Set a password for the user |
| Role | Assign the appropriate user role |
| Phone | (Optional) Enter the user’s phone number |
| Signature | Upload the user’s signature image, if available |
| Active | Enable this to allow login; disable to restrict system access. |
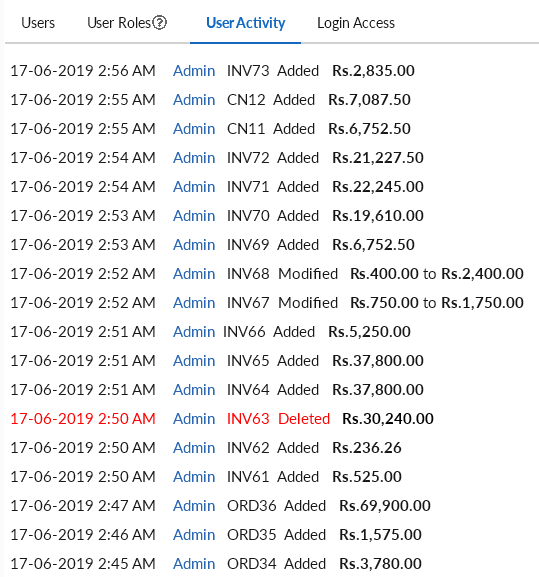
3. User Activity Log
Track all user actions such as:
- Date and Time
- User Name
- Transaction Number
- Operation performed
- Transaction Amount
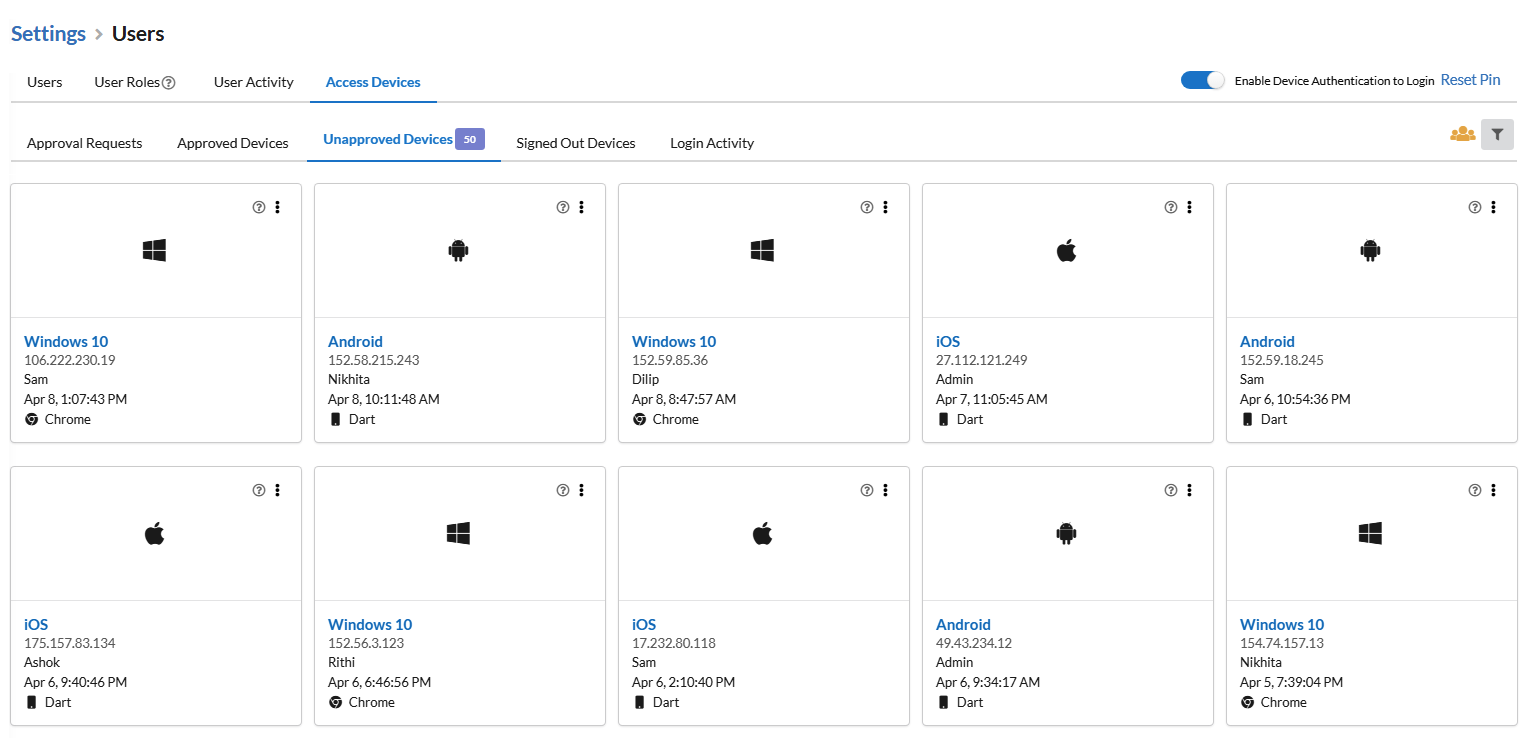
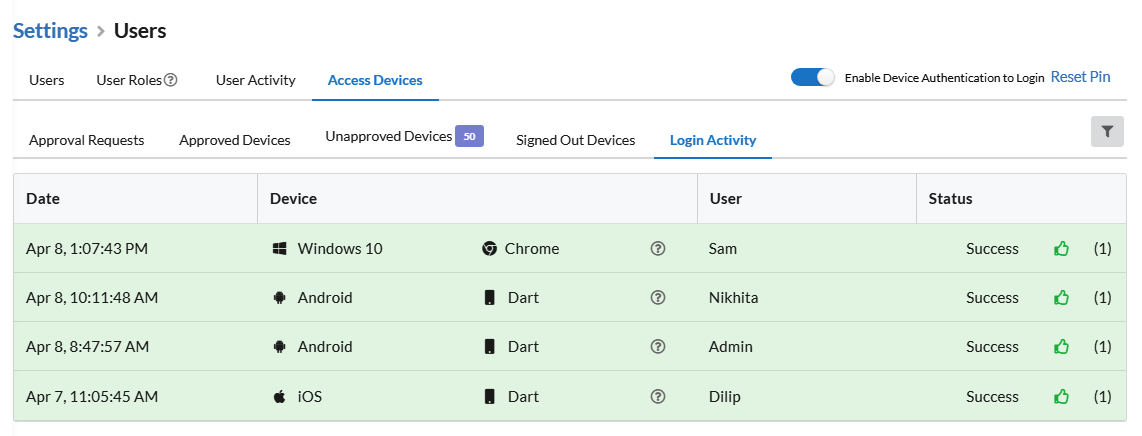
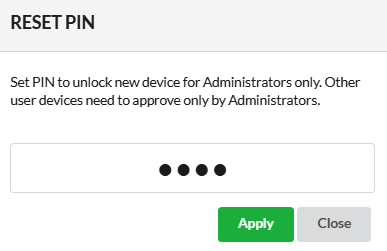
4. Access Devices & Login Security
You can enable Device Authentication to secure logins.
- Toggle Enable Device Authentication to Login
- Set a secure PIN
- The system will prompt for this PIN when logging in from any new device
Once enabled, you can monitor:
- Approval Requests – Devices waiting for authentication
- Approved Devices – Devices that successfully logged in
- Unapproved Devices – Devices that were denied or not approved
- Signed Out Devices – Logged-out devices
- Login Activity – Full history of login attempts, showing Date, Device, User, and Status