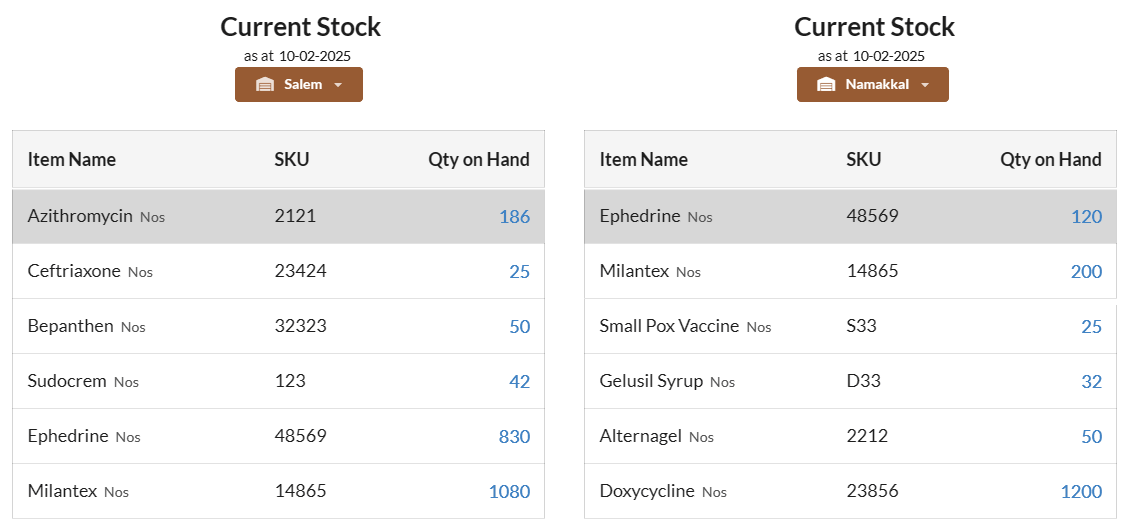
Let us see how to manage warehouse inventory in detailed steps.
Page Contents
Enable Branches/Warehouses module
Before we start creating warehouses, it is mandatory to enable the Branches/Warehouse module.
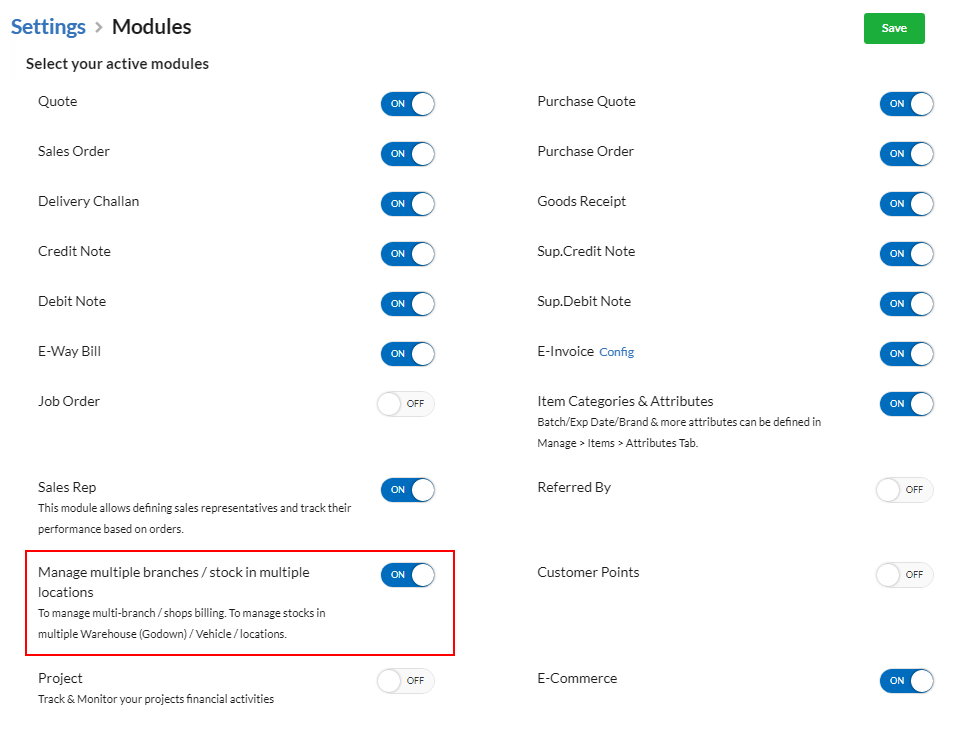
- Go to Settings > Modules.
- Toggle-On the Manage multiple branches / stock in multiple locations option and hit Save.
Create Warehouses
After enabling the Branch/Warehouse module, you can start creating warehouses.
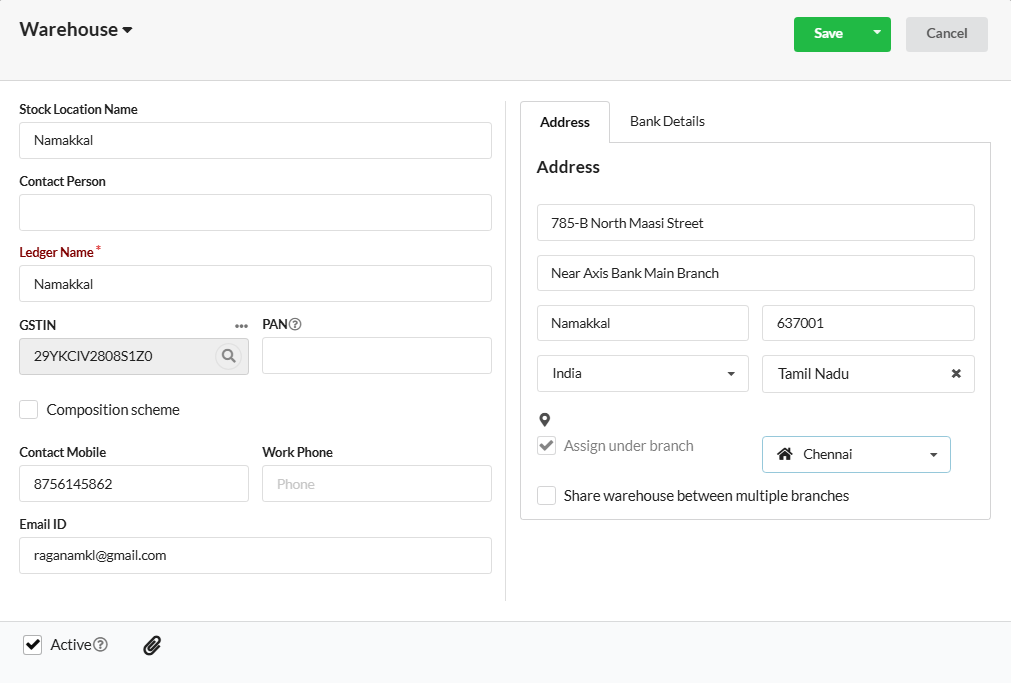
- Under Settings > Branches/Warehouses/Franchise option, switch to Warehouses tab.
- Click on the Add Warehouse button and fill the details in the pop-up that appears.
- Enable the Assign under branch checkbox in the pop-up and choose the branch under which you want to assign the respective warehouse(if needed).
Creating Users for Warehouse
- Under Settings > Users and switch to the User Roles tab.
- Click on the Add Role button and create a new user role Eg: W.Stocker(Warehouse Stocker).
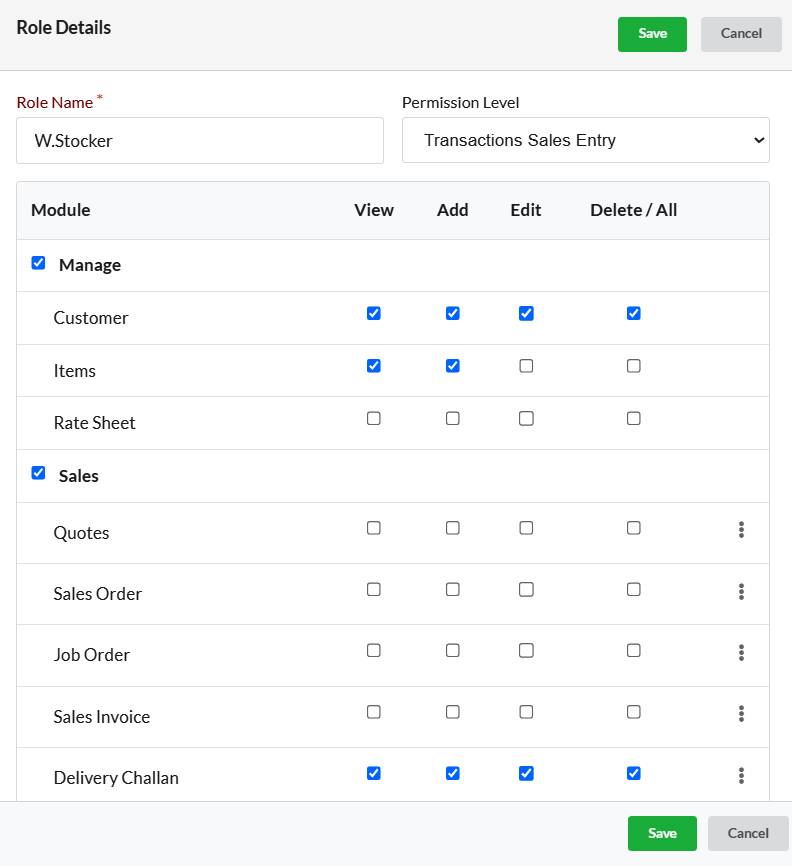
- Select the permission level and set the view/add/edit/delete permissions and hit Save.
- Move to the Users tab now and create a new user for your Warehouse with user role W.Stocker.
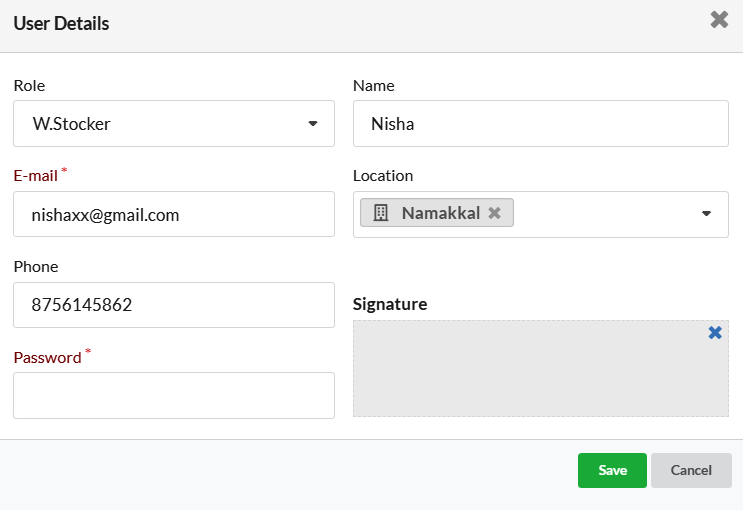
The warehouse stocker can login with the username and password created for him.
How to record Inward Stock in Main Branch>
You can either create Purchase Bill or Goods Receipt for Inward stock in your Main branch account.
Creating Purchase Bill
In your Main branch account, go to Purchase > Purchase Bill and create a new Purchase Bill.
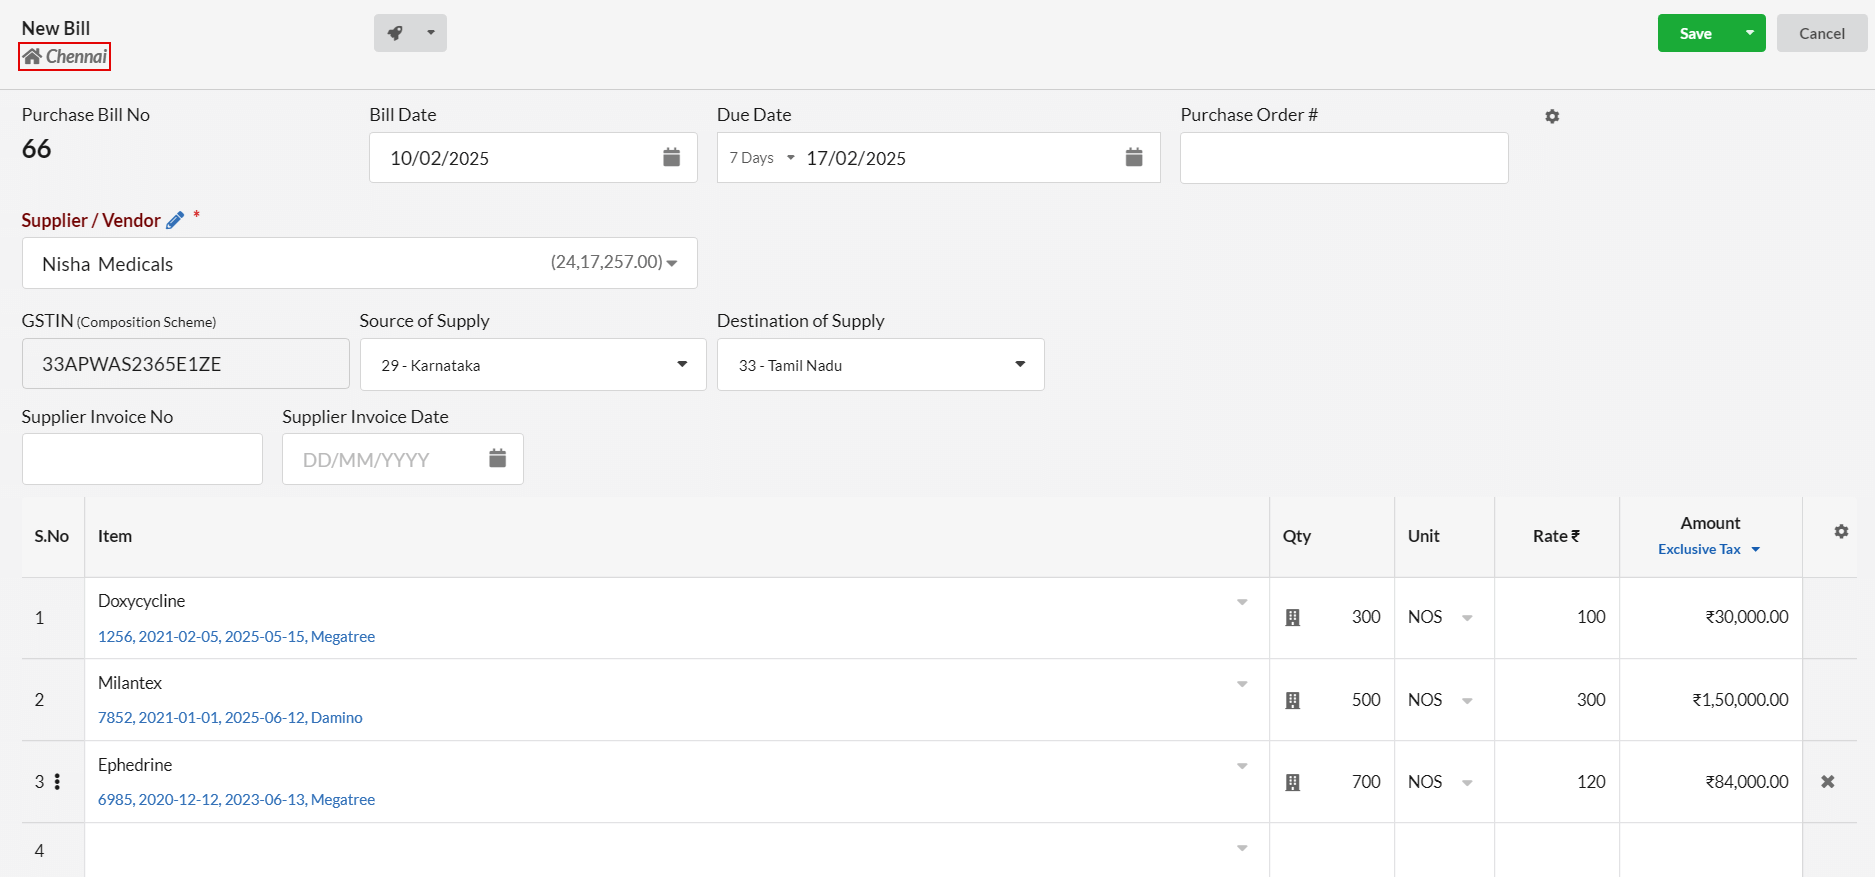
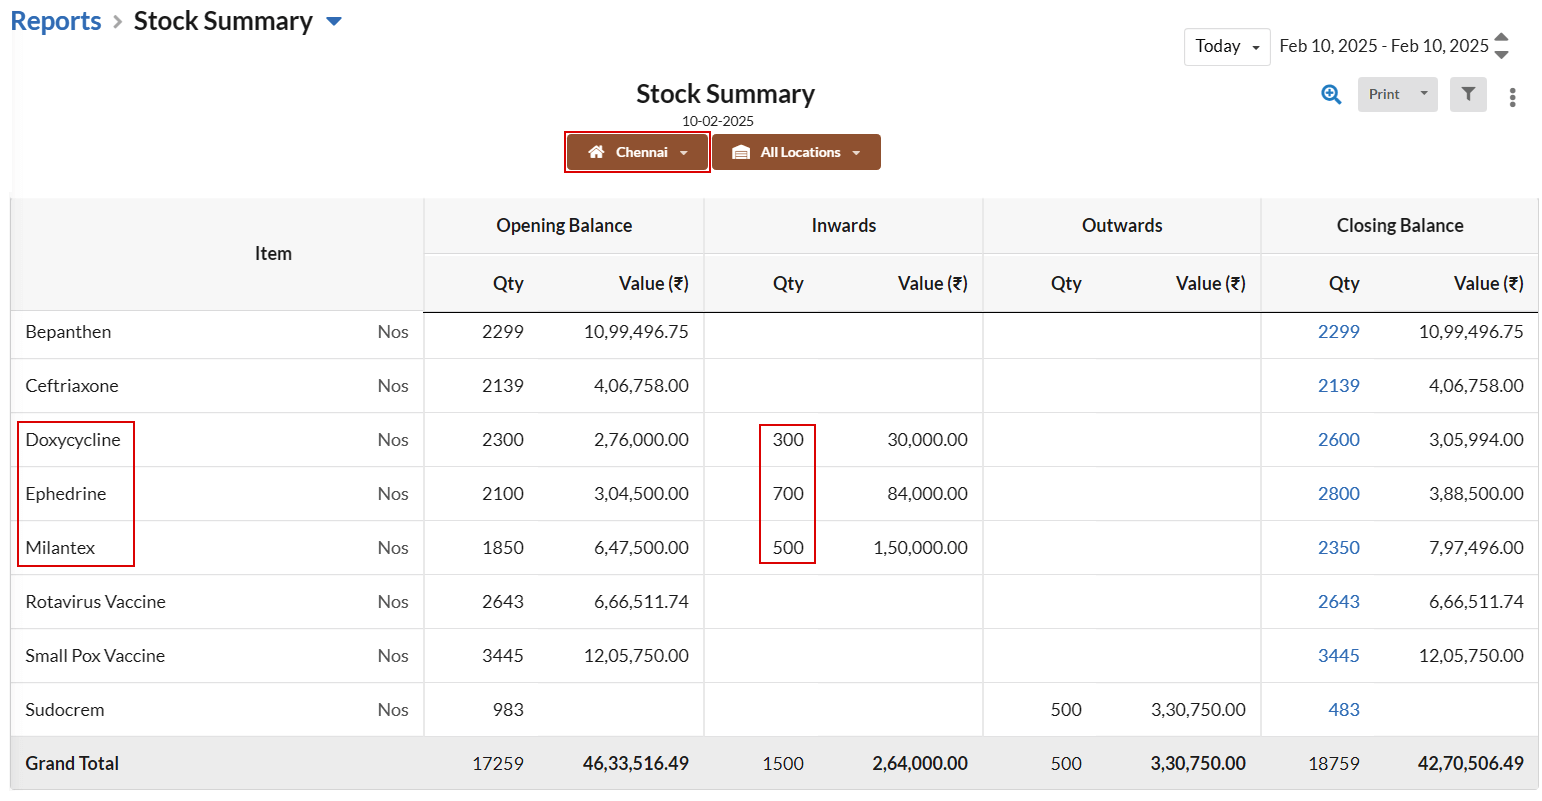
The items in purchase bill will get reflected as Inward Stock in Reports > Stock Summary.
(or)
Creating Goods Receipt
In your Main branch account, go to Purchase > Goods Receipt and create a new Goods Receipt.
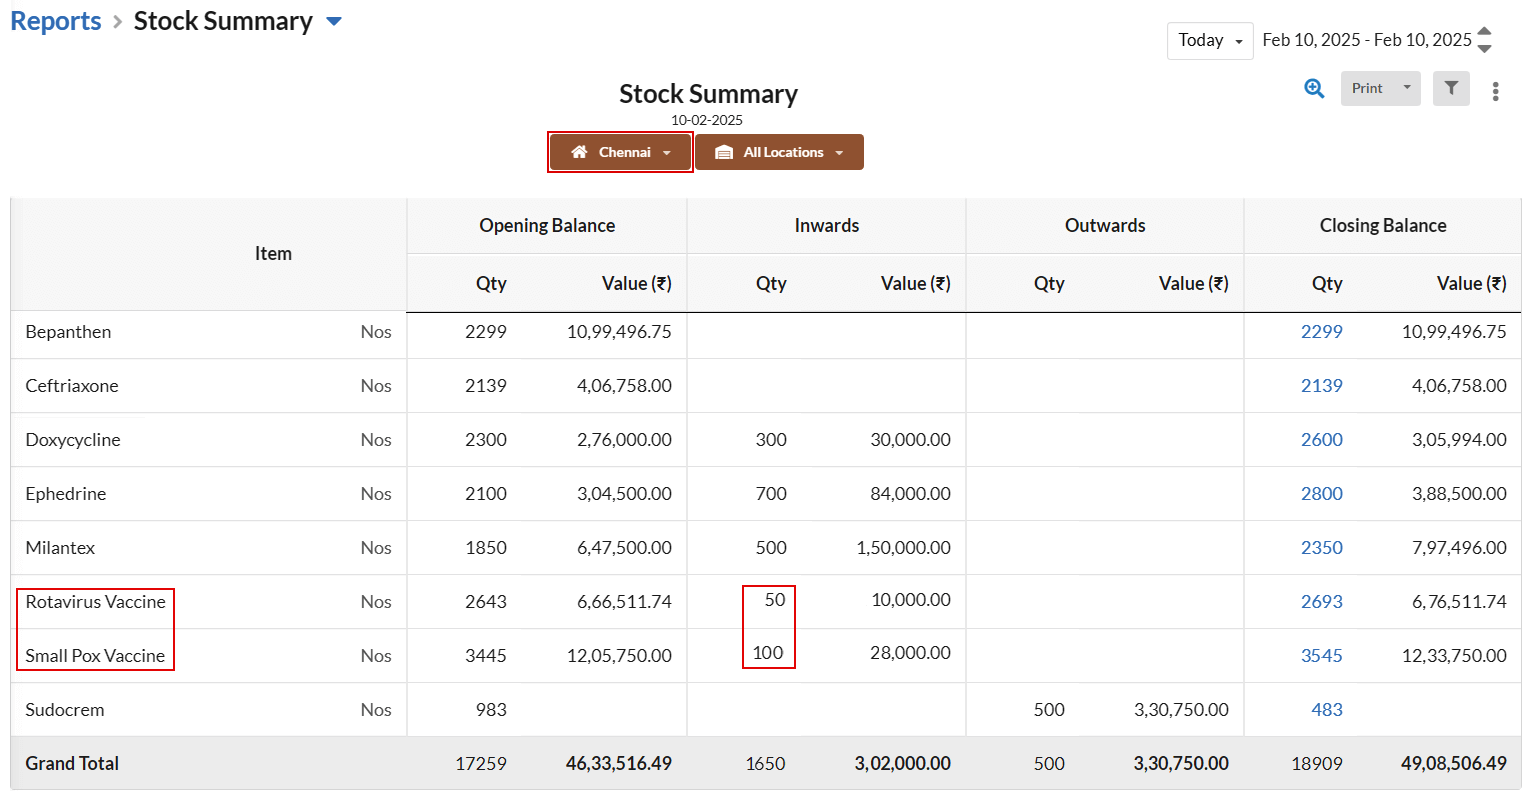
It will also be recorded as Inward Stock.
Internal Stock Transfer
At times, you will be transferring stock within your warehouse units for instance from Unit 1 to Unit 2 which may be located within 10 or 12 km distance. For such cases, you can record stocks easily.
- Go to Manage > Stock Journal and click Add Stock.
- On the New Stock window, choose the type as Transfer between locations., set date. “From” location will default be the warehouse in which you are logged in . Choose the To location for stock transfer.
- Enter the Item details, outward quantity, unit price, sale rate and mrp.
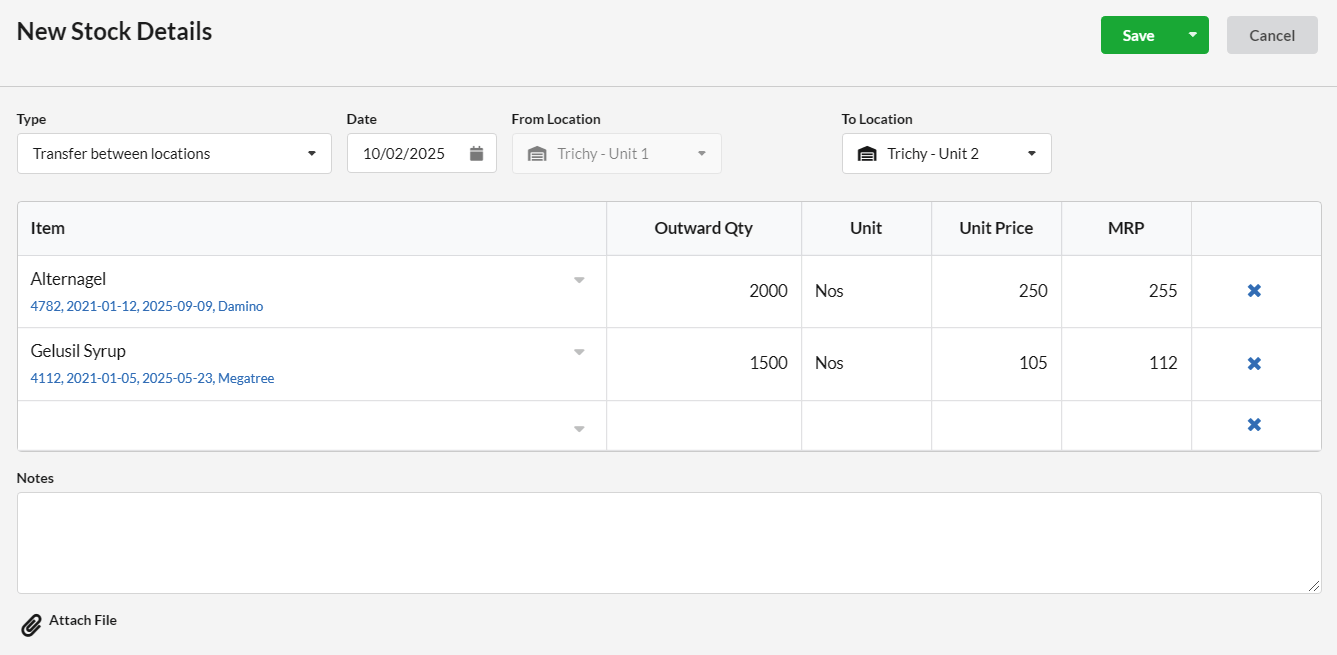
Now the Internal stock transfer is recorded.
External Stock Transfer – Delivery Challan & Goods Receipt
To record the transfer of stock to warehouse at distant location, you can use Delivery Challan and Goods Receipt. For instance, we can transfer the stock from Warehouse Salem to Namakkal.
Creating Delivery Challan for Outward Stock
From Salem warehouse, go to Sales > Delivery Challan and create a new Delivery Challan. Choose the warehouse(Namakkal) for which you are going to transfer stock in the Customer field.
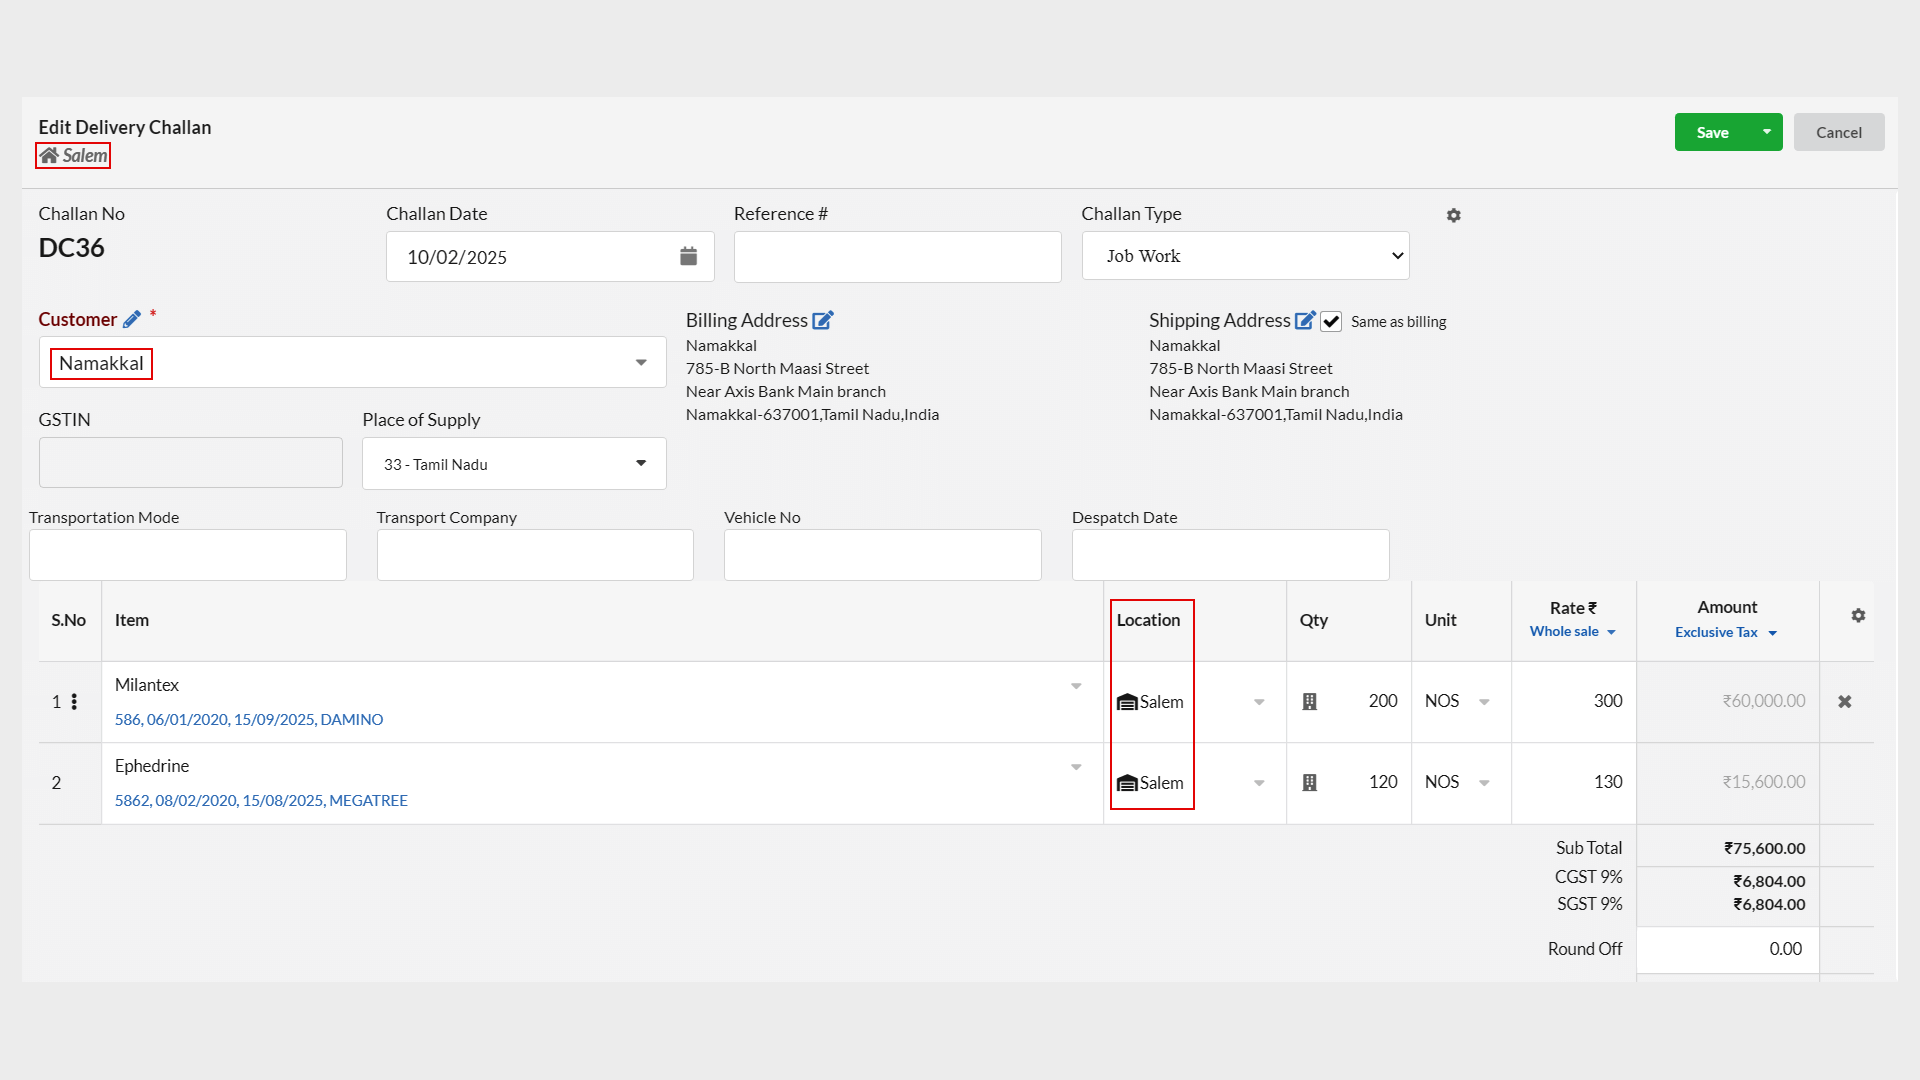
Enter the Items along with quantity, rate.
This way stock will get deducted as Outward stock in Salem Warehouse.
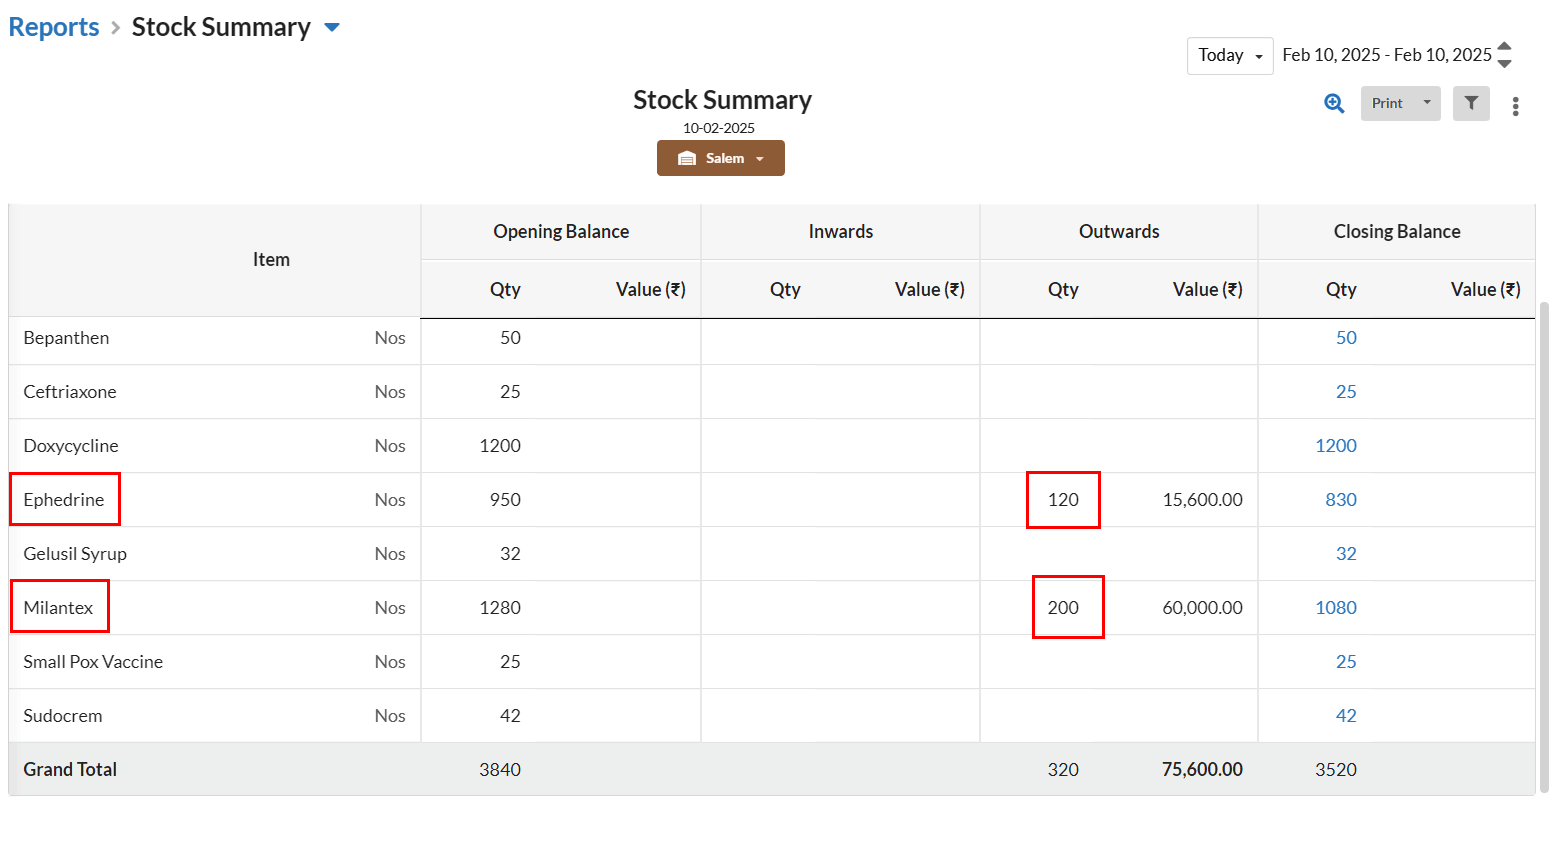
Creating Goods Receipt for Inward Stock
From Namakkal warehouse, go to Purchase > Goods Receipt and create a new Goods Receipt. Choose the warehouse(Salem) from which you received new stock in the Customer field.Enter the Items along with quantity, rate.
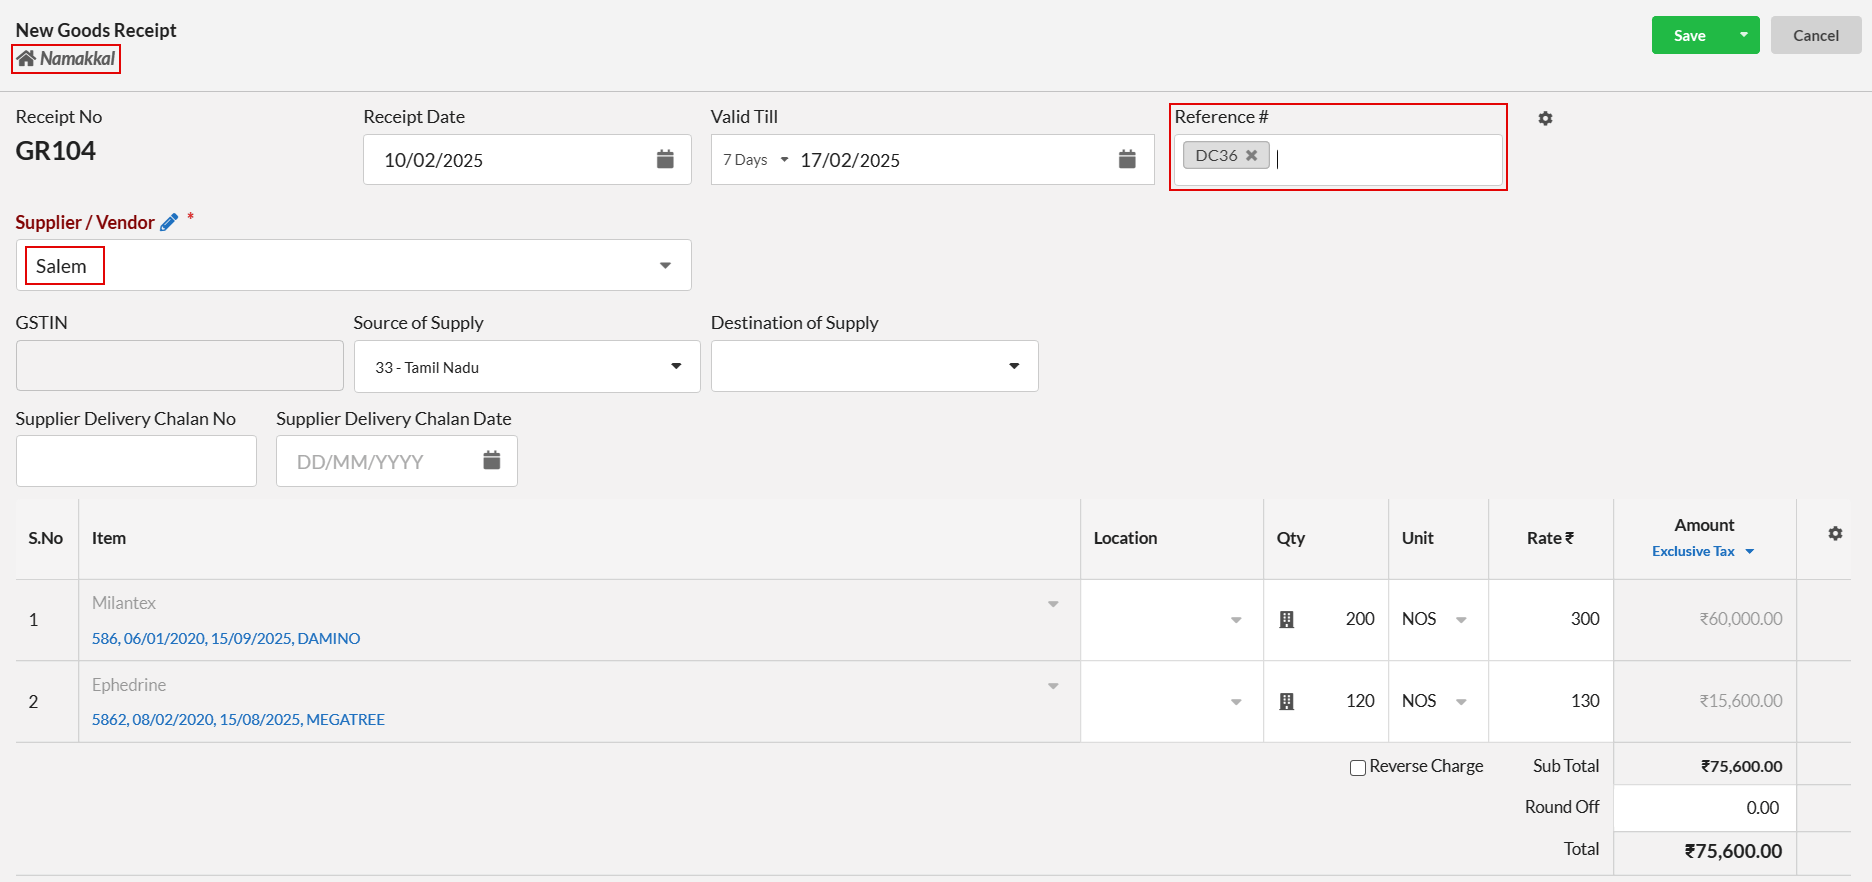
This way stock will get added as Inward Stock in Namakkal warehouse.

Stock Reports
Warehouse users can access the stock reports such as Stock Summary, Current Stock, Stock Ledger, Stock Expiry etc and view the stock reports of their own warehouse.
