Auto Batch automatically creates and assigns batch numbers to items based on each inward transaction. This helps in tracking the source of an item at any time.
For Example: When entering a purchase bill for an item with the Auto Batch attribute, a unique batch number will be assigned to the item quantities. This batch number can also be printed on the barcode label. At any time, scanning this batch number allows you to trace back key details such as the supplier, purchase rate, date of purchase, and more.
Let’s see how to use this feature:
Page Contents
1. Assigning a Category
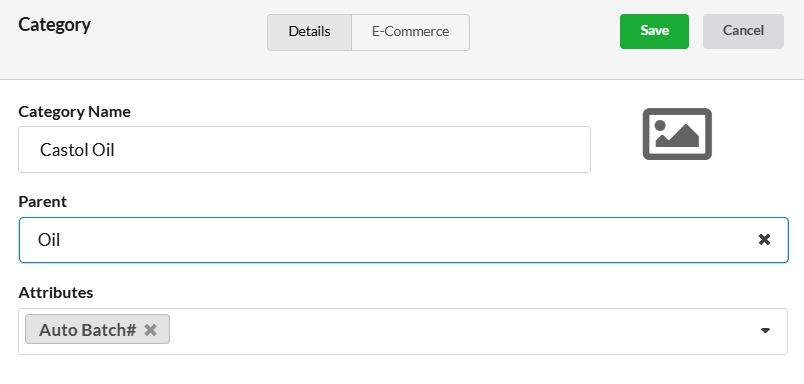
- Go to Categories and select Add Category.
- Enter the Category Name and select the appropriate Parent Category.
- Under Attributes, select Auto Batch# as an attribute.
Auto Batch is a system-defined attribute.
2. Auto Batch Generation in Purchase Bill
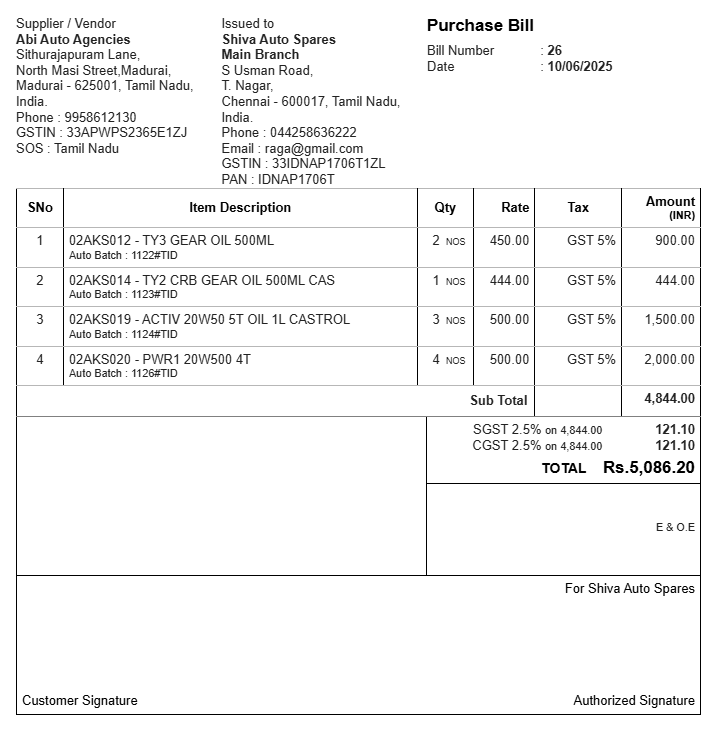
- When a purchase bill is created, an Auto Batch ID is automatically generated for each item.
- If an item has multiple quantities, the same Batch ID is assigned to all quantities of that item
- The Batch ID will also be displayed in the print of the purchase bill
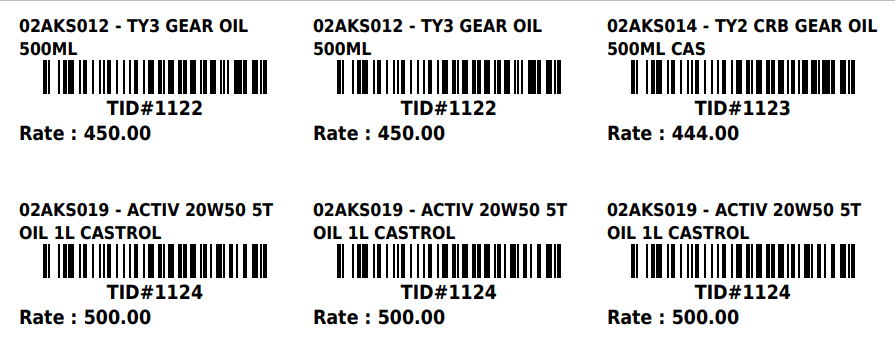
3. Barcode Printing from Purchase Bill
A barcode can be printed from the Purchase Bill by selecting Action > Print Barcode. The barcode will be printed along with the Batch ID.
4. Auto Batch in Manufacturing Journal
When creating a Manufacturing Journal, Auto Batch IDs are automatically generated for the production items.
The Batch ID can be used as the SKU. A barcode can be printed from the Manufacturing Journal by selecting Action > Print Barcode.
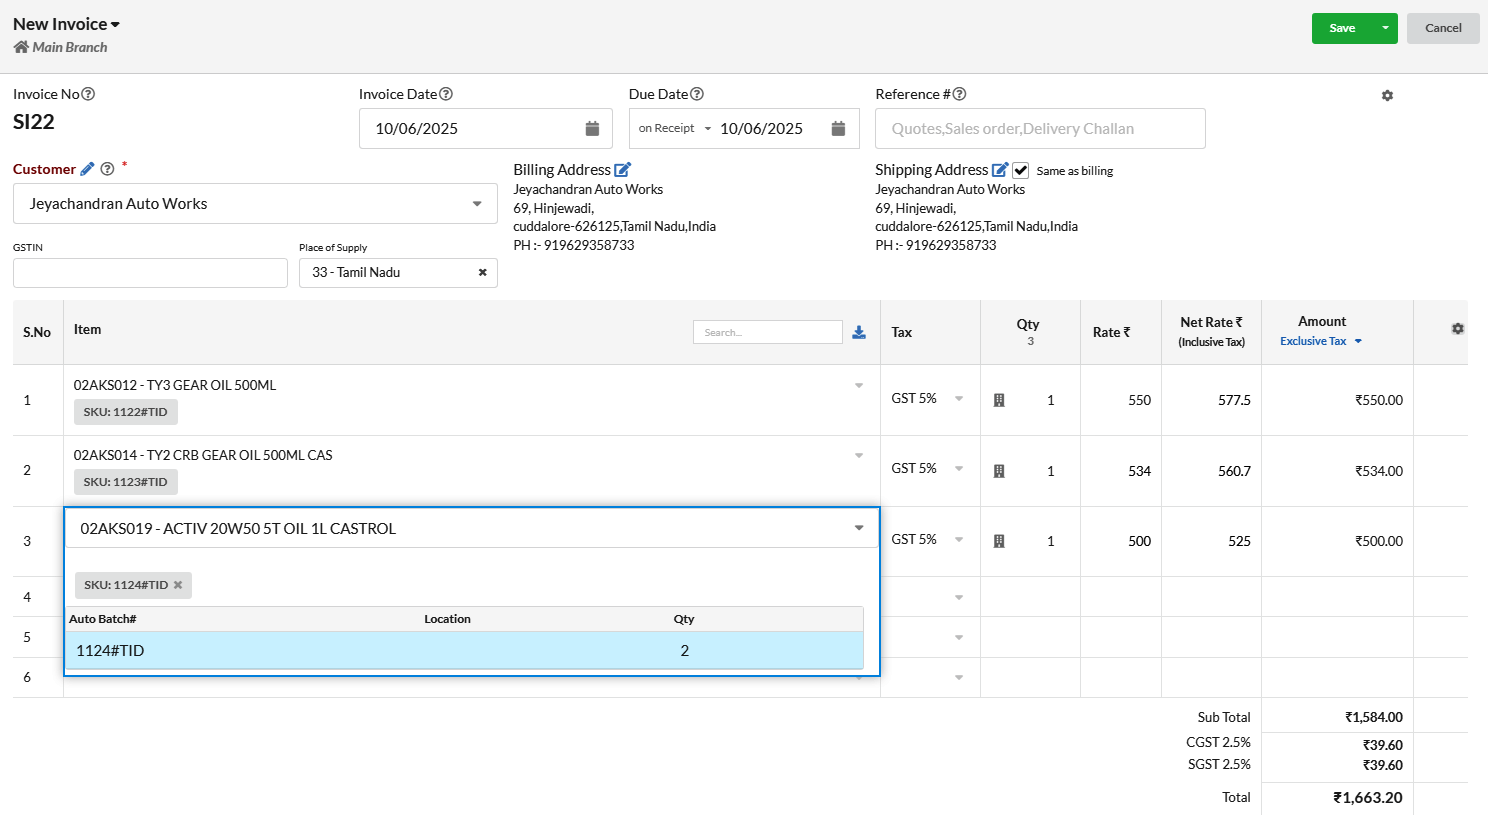
5. Creating an Invoice
In the Invoice module, items can be quickly added by scanning SKU barcodes.
6. Current Stock Report
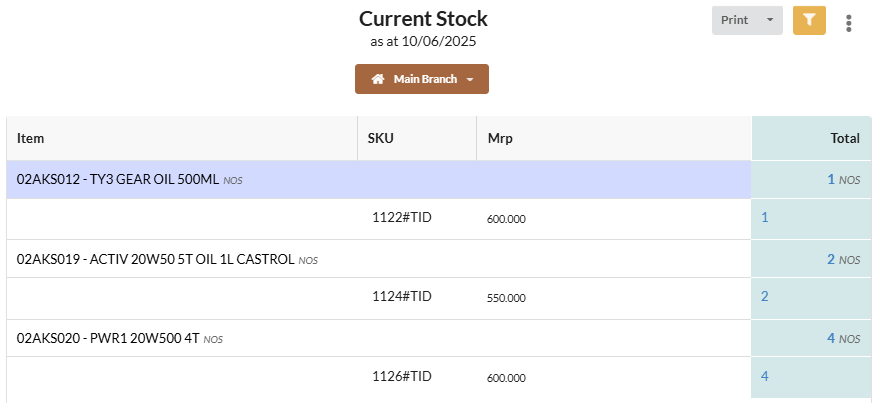
The current stock report displays stock quantities and includes filter options by category, item, and supplier. The SKU column shows the Batch ID, and the MRP is also visible.
Users can view stock details by location, and the report can be exported in PDF, XLS, or CSV formats.
