A key function of inventory management is keeping a detailed record of each new or returned item as it enters or leaves a warehouse or point of sale. This process can be complex for large organizations. To simplify it, Output Books introduces Categories, Attributes, and Brands to classify items, which helps improve inventory management.
Page Contents
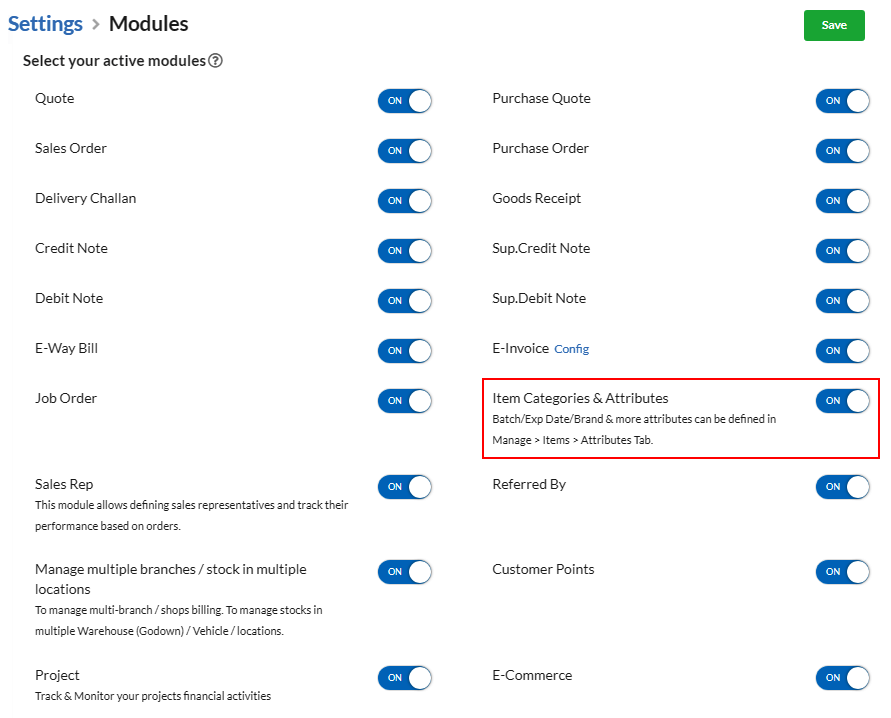
1. Enable Item Categories and Attributes
- Click Settings in the left menu.
- Select Modules
- Edit Select your active modules
- Check the box for Item Categories, Attributes & Brand in Item Master.
- Click Save.
2. Create Categories and Attributes
- By enabling Item Categories & Attributes, Tabs for Categories and Attributes will get displayed in Manage > Items page.
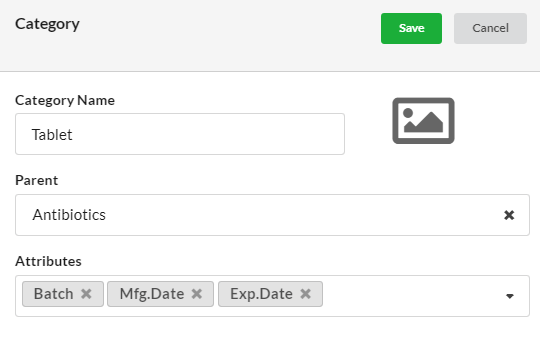
- Click Categories tab and create new category.
| Field | Description |
|---|---|
| Category Name | Provide the name of the category |
| Parent | Select the related parent category |
| Attribute | Select all related attributes from the dropdown. Batch, Mfg. Date and Exp. Date are default system attributes. |
Similarly,
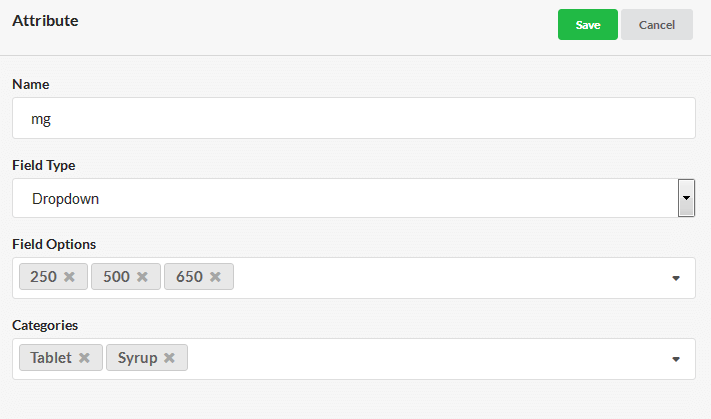
- Select Attributes tab
- Create New Attributes
3. Create Brand
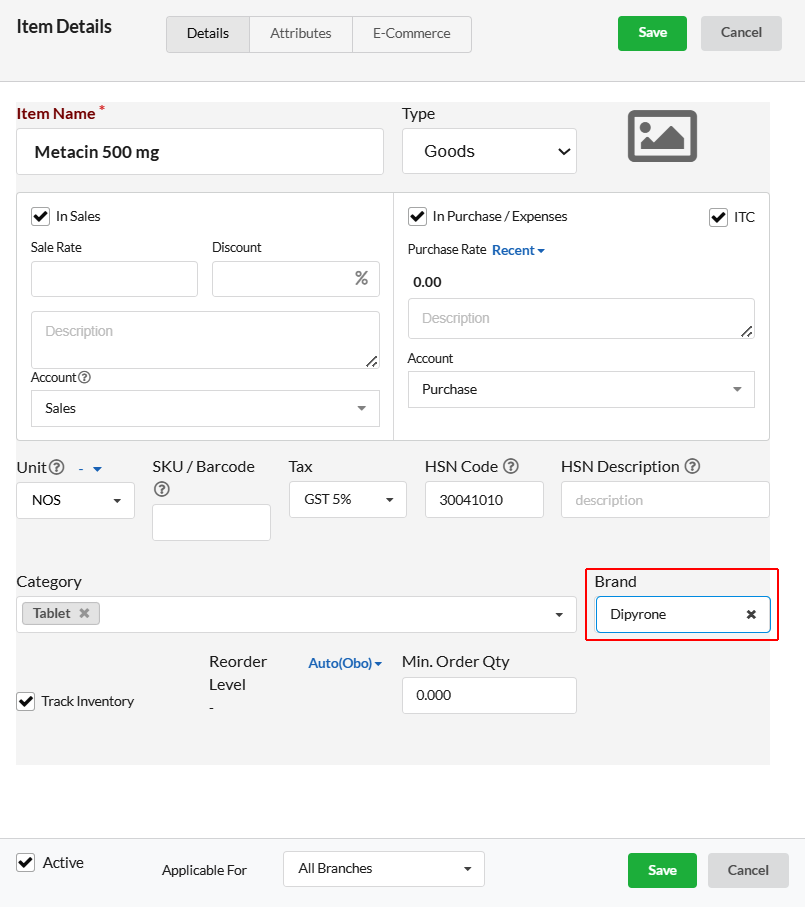
Brands refer to the manufacturer or company that produces the item. Organizing inventory by brand can provide insights into supplier relationships, stock levels, and product performance.

Choose the brand name from the list in the item details section.
4. Assign Category for Items
- Navigate Manage > Items > New Item
- Select one or more categories from the drop-down
- Save the item
5. Generate Purchase Bill
- Generate purchase bill, providing all the attribute values.
- Click Purchase > Purchase Bill > New Purchase Bill.
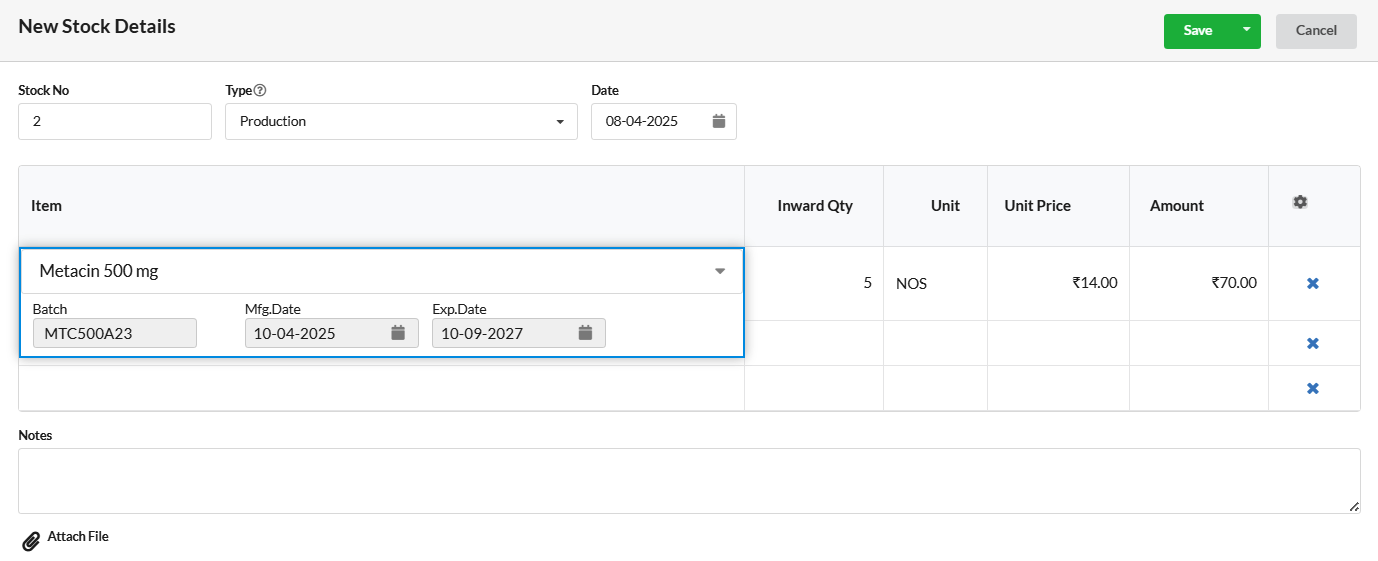
- For instance, select the Item Metacin 500 mg.
- It asks value for the attribute Batch.
- After entering the value for the batch, click ENTER.
- Likewise, provide all the values for the remaining attributes. (i.e.: Mfg. Date, Exp. Date)
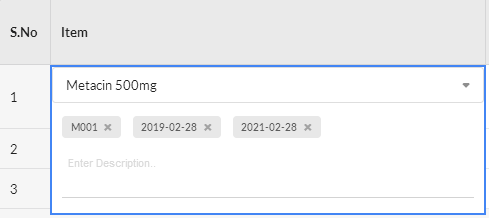 In order to edit any details, click the attributes list shown below the Item name and make the changes.
Manage Stock manually
You can also update stock for Items having attributes in Manage > Stock.
6. Make Invoice
- Create Invoice by navigating through Sales > Invoice > New Invoice.
- Type the Item name in the Item grid.
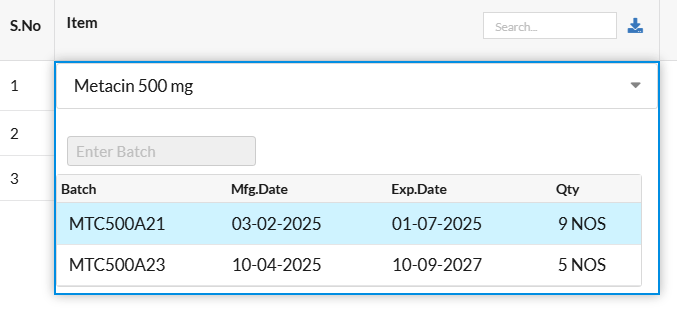
- Corresponding attributes are listed under the item name.
- Either you can select anyone from the list or you can provide new attribute values for that item.
While printing the invoice, attribute values are shown as below.
