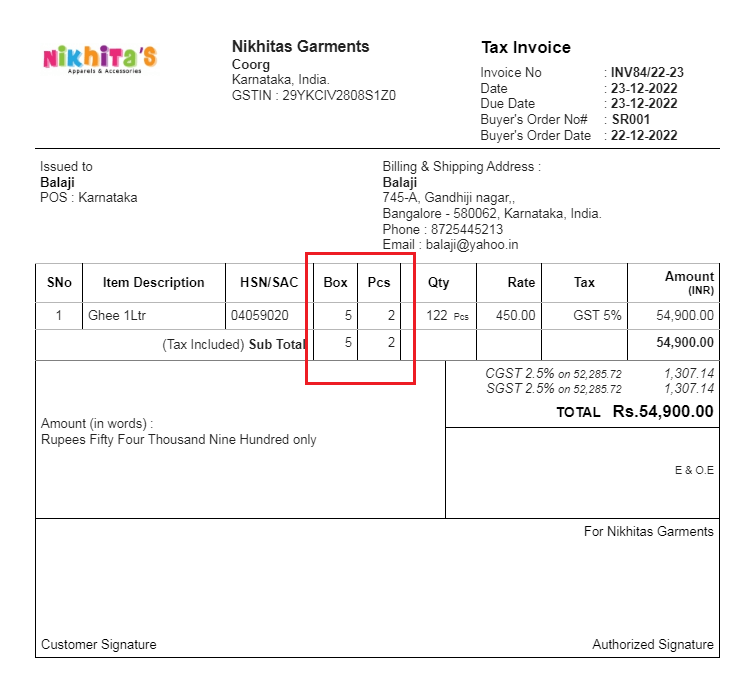
In Output Books, we can specify multiple units for items in Sales & Purchase transactions. When you purchase an item as bulk in Boxes, it may happen to sell it in either pieces or box. In such case, we can create multiple units for an item and configure in item master as below
Page Contents
Steps to create multiple units and how to use in transactions
Let us see with an example. We purchase “Ghee 1L” in boxes and sold in either box or pieces. As we maintain stock in pieces, we set PCS as the Primary unit and BOX as the relative unit.
1. Create Units
- Go to Settings > Units > Add Unit
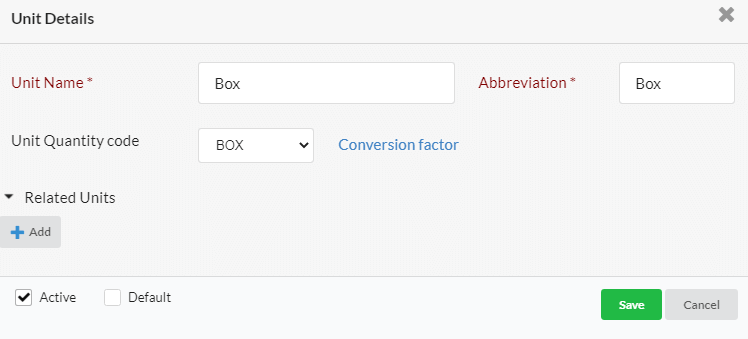
- Create relative unit Box as below
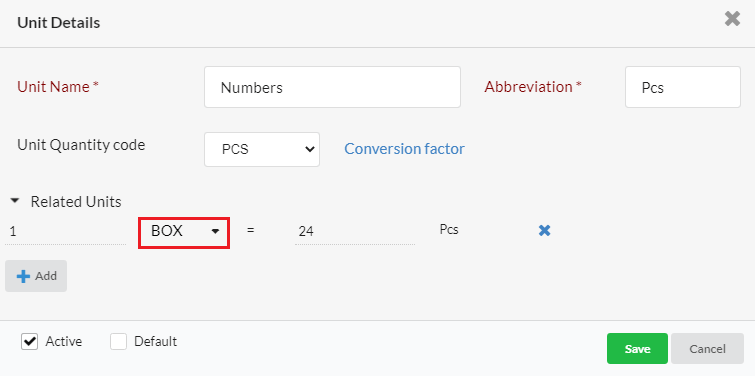
- Create the primary unit PCS and add related unit as BOX
- Enter the default conversion rate of unit(here 1 BOX = 24 pcs is default)
2. Enable relative units in Item master
- Go to Manage > Items > Add Item
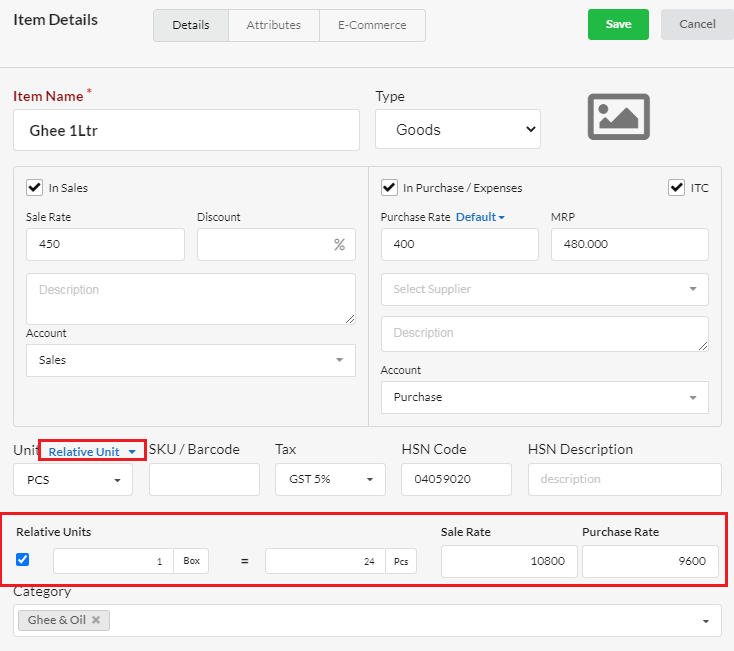
- Provide item details and select primary unit as PCS
- Enable Relative Unit and the default conversion rate will be loaded automatically.
- You can change the conversion rate of unit based on the item
- Sale & Purchase rate for the relative unit will be calculated automatically
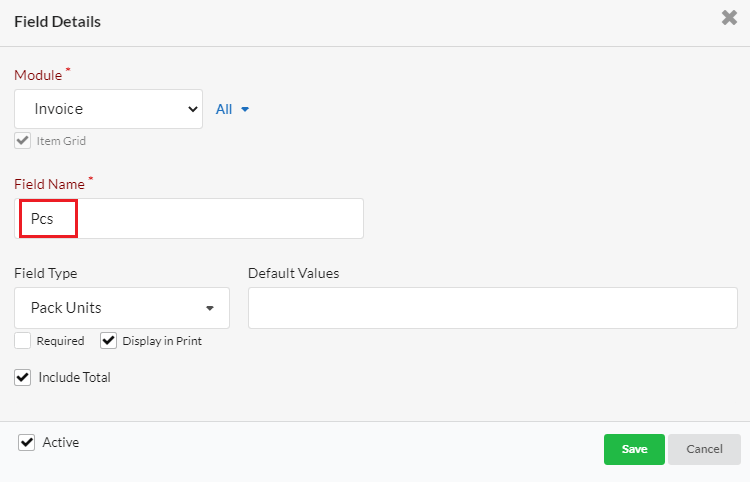
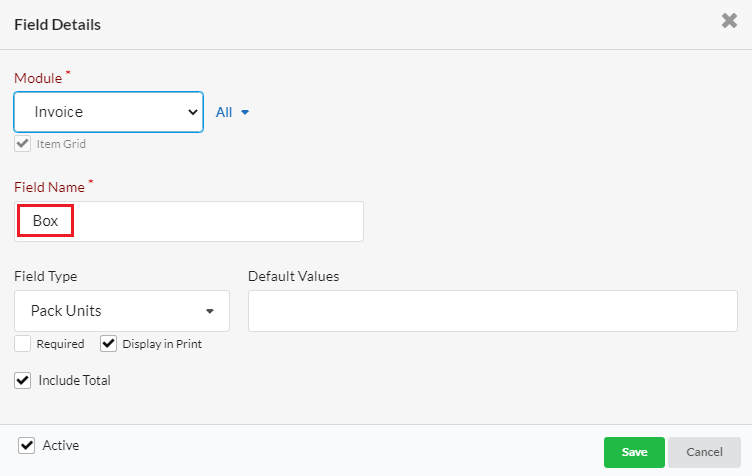
3. Create Custom fields
- Go to Settings > Custom Fields > Add Item.
- Select Invoice in module.
- Important : Field name should be as same as the relative unit name.
- Select Pack Units in Field type.
- If needed, enable “Display in Print” & “Include Total”
Note : You can also create custom fields for required modules in the same way.
4. Multiple Units entry in Sales transactions
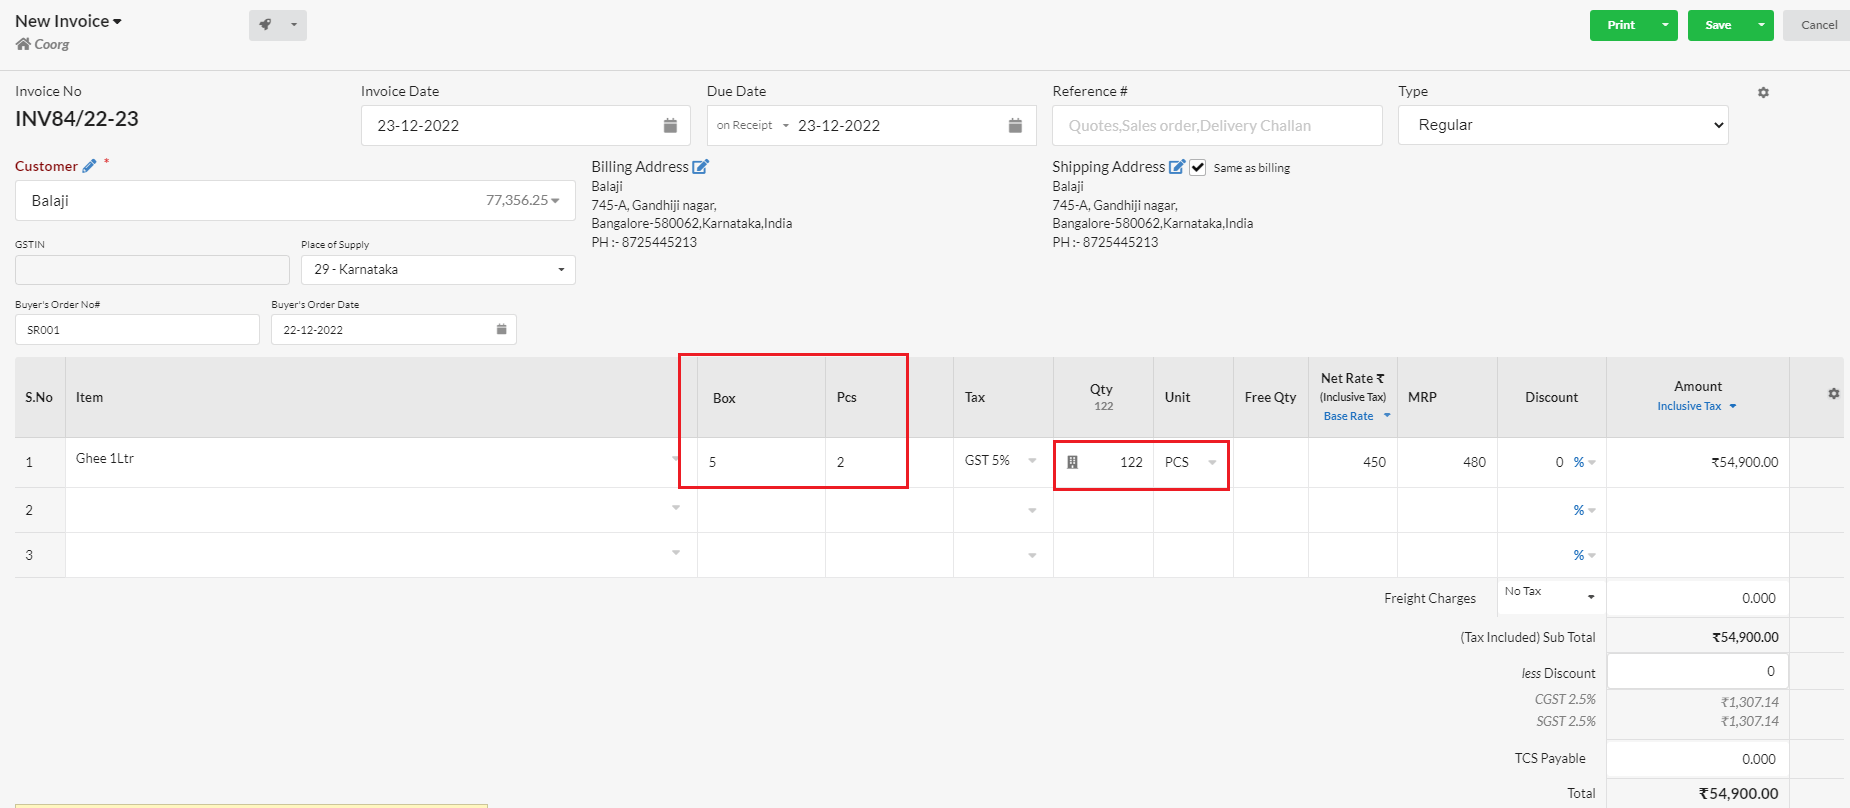
In Sales > Invoice, Create Invoice where you can input either in Pcs/box or both. Then Qty will be calculated automatically based on the conversion unit(here, 1 box = 24 pcs => 5 * 24 + 2 = 122) as below.
In print, you can get the quantity in both units
