Overview
Output Books Windows Standalone Server Installer allows you to install and run Output Books on a Windows PC without setting up a separate web server. The required web server and database services run directly from the extracted installation folder. This makes installation and server management easier.
Before You Begin
- Sign up for an Output Books On-Premises account. You will receive an email containing your 30-day trial license key and the download links.
- Keep your license key ready. You will need it during the installation wizard.
- Use a Windows PC that does not have a web server installed.
Part 1: Download and Start Output Books Server
Step1: Download and Extract the installer
- Open the email received from Output Books.
- Download the Windows Standalone Server Installer ZIP package using the download link provided.
- Locate the downloaded ZIP file on your computer.
- Right-click the ZIP file and select Extract All.
- Choose a folder where you want to extract the installer files.
Step2: Run the Output Books Server Manager
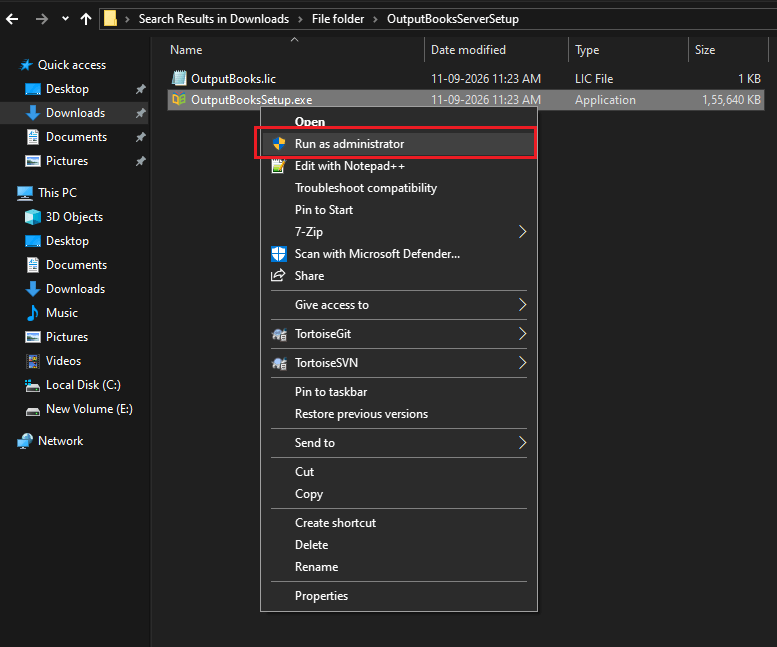
- Open the extracted installation folder.
- Locate and run
OutputBooksSetup.exe. - Follow the prompts on the screen.
- Output Books Server Manager window will open.
Step3: Install .NET Runtime (if prompted)
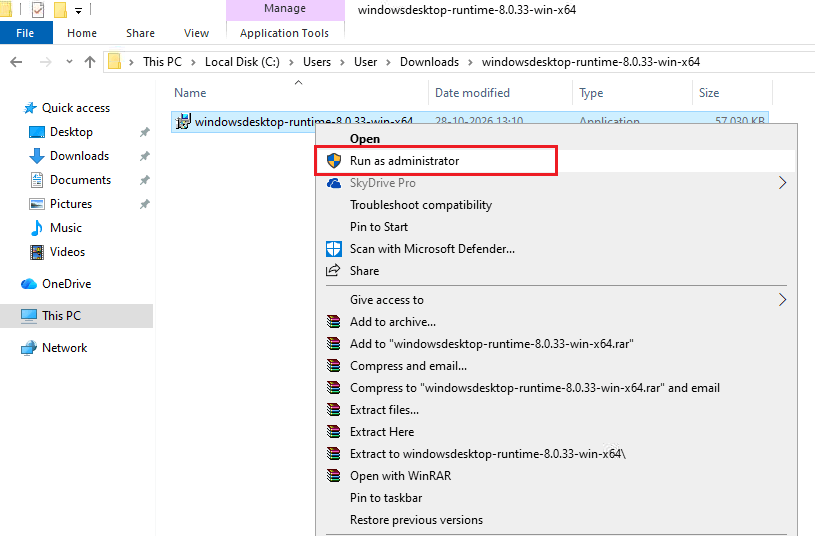
If the installer prompts you to install the .NET Runtime, follow these instructions:
- Click the official Microsoft download link below.
Download .NET Runtime 8.0.26 – Windows x64 Installer - Run the downloaded installer.
- Follow the on-screen instructions to complete the installation.
- Once the installation is complete, return to the Output Books installer and continue.
If you are not prompted to install .NET Runtime, continue with the next step.
Step4: Install Microsoft Visual C++ Redistributable x64 (if prompted)
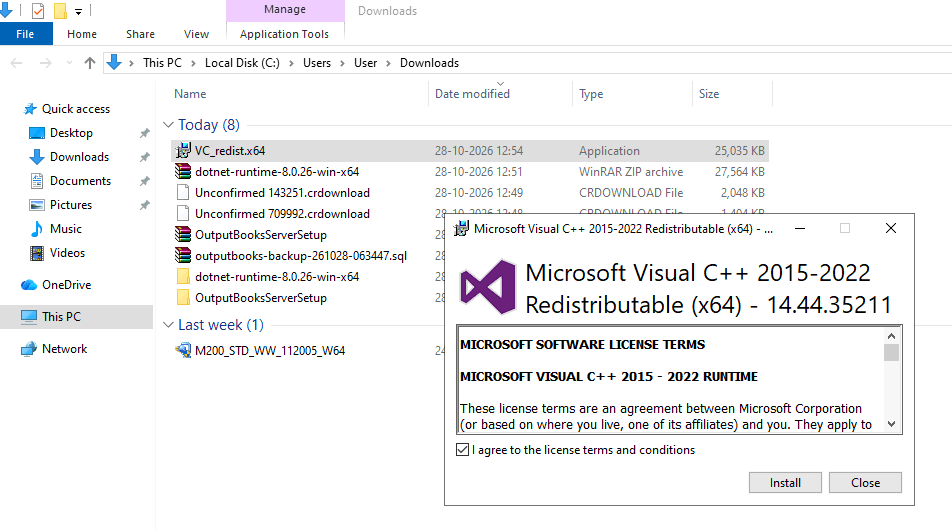
If the installer prompts you to install Microsoft Visual C++ Redistributable x64:
- Click the official Microsoft download link below.
Download Microsoft Visual C++ Redistributable x64 - Run the downloaded installer.
- Follow the on-screen instructions to complete the installation.
- Once the installation is complete, return to the Output Books installer and continue.
If you are not prompted to install Microsoft Visual C++ Redistributable, proceed to the next step.
Step5: Start the Output Books Server
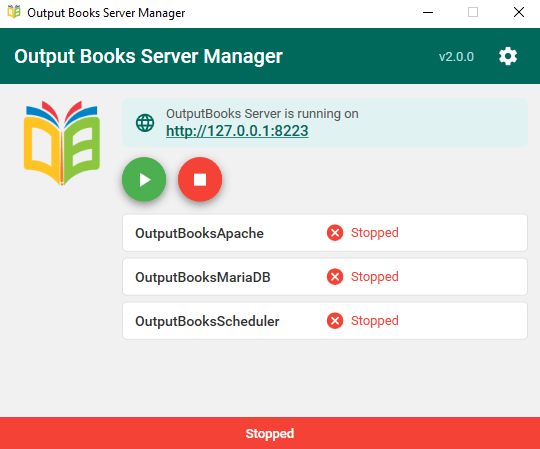
The Output Books Server Manager displays the server address and the status of the following three services:
- OutputBooksApache – Web server service.
- OutputBooksMariaDB – Database service.
- OutputBooksScheduler – Scheduler service.
When the server has not been started, all three services show Stopped.
To start the server:
- Open the Output Books Server Manager.
- Click the green Start (Play) button.
- Wait until all three services show the status Running.
To stop the server later, click the red Stop button.
Step 6: Open the Installation Wizard
- Open a web browser on the server computer.
- Enter the following address in the browser’s address bar: http://127.0.0.1:8223/
- Press Enter to open the Output Books Installation Wizard.
Accessing Output Books from another computer:
To access Output Books from another computer connected to the same local network:
- Find the server computer’s LAN URL in the Info tab of Server Manager Settings.
- Open a web browser on the other computer.
- Enter the server’s LAN IP address and port number. Example:
http://192.168.2.184:8223/
Replace 192.168.2.184 with the actual LAN IP address of your server computer.
Part 2: Complete the Installation Wizard
The Output Books Installation Wizard has four steps. The step number is shown at the top of each screen (for example, 1/4).
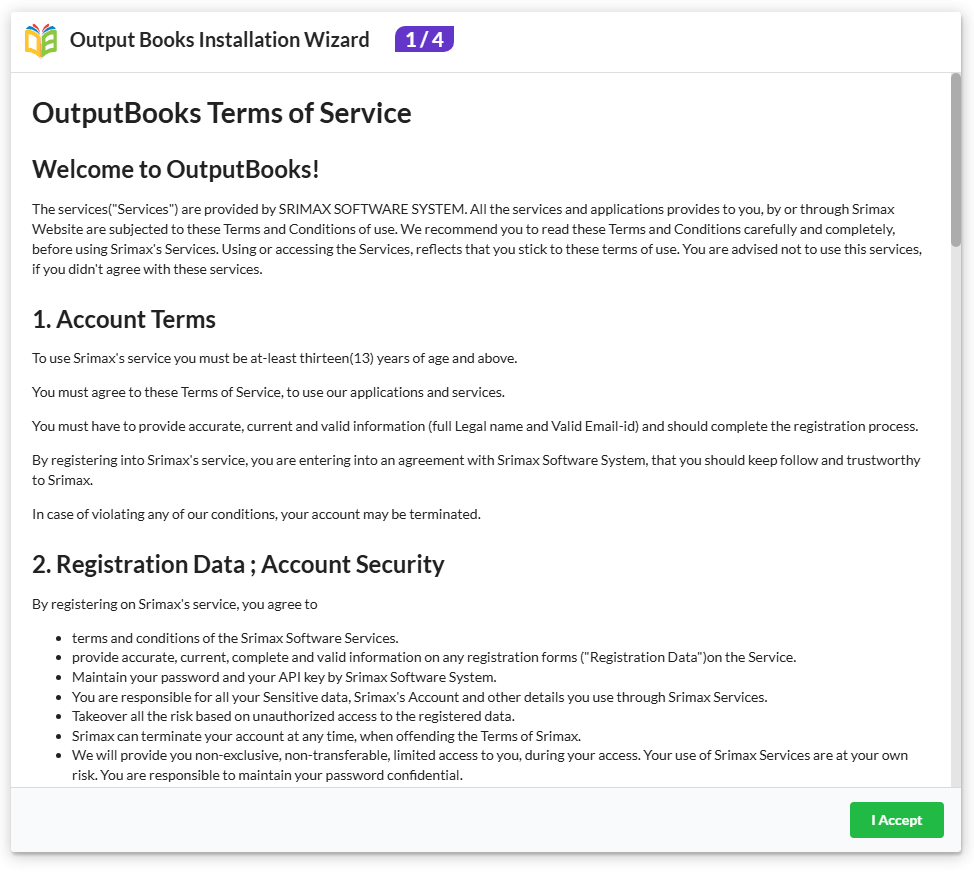
Wizard Step 1 of 4: Accept the Terms of Service
- Read the Terms of Service.
- Click I Accept to proceed to the next step.
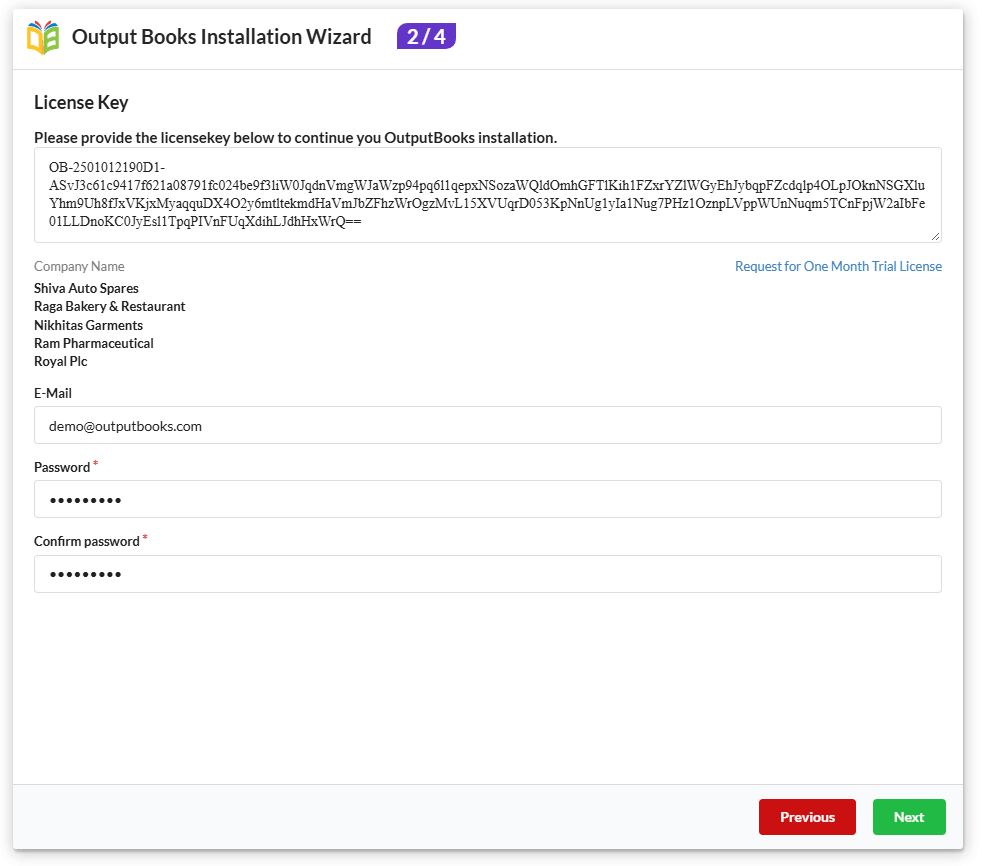
Wizard Step 2 of 4: Enter the License Key and Administrator Details
Enter your license and administrator information as follows:
- License Key: Enter the license key received through email. This field is mandatory.
- Company Name: Check the company list displayed. It shows the companies included in your license.
- Administrator E-Mail: Enter the email address you want to use for logging in to Output Books.
- Password: Enter a secure password.
- Confirm Password: Re-enter the password to confirm it.
- Click Next. To go back to the previous screen, click Previous.
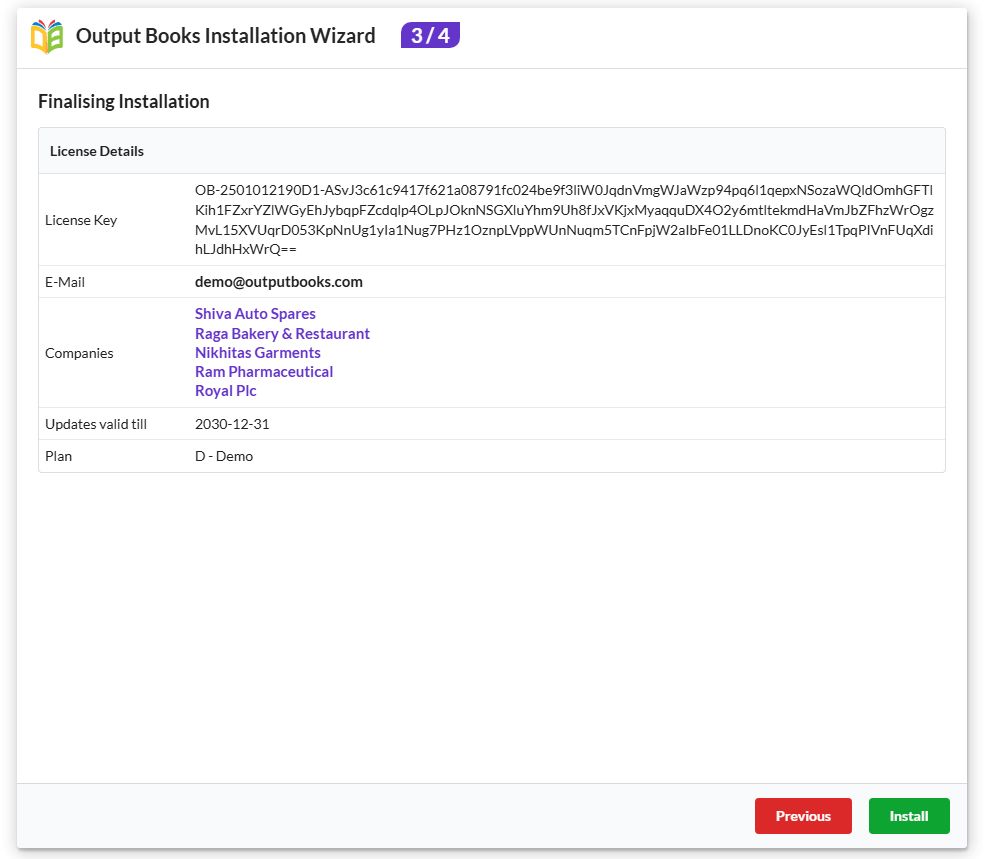
Wizard Step 3 of 4: Review and Install
- On the Finalising Installation screen, check the License Details: License Key, E-Mail, Companies, Updates valid till, and Plan.
- If anything is wrong, click Previous and correct it.
- If everything is correct, click Install.
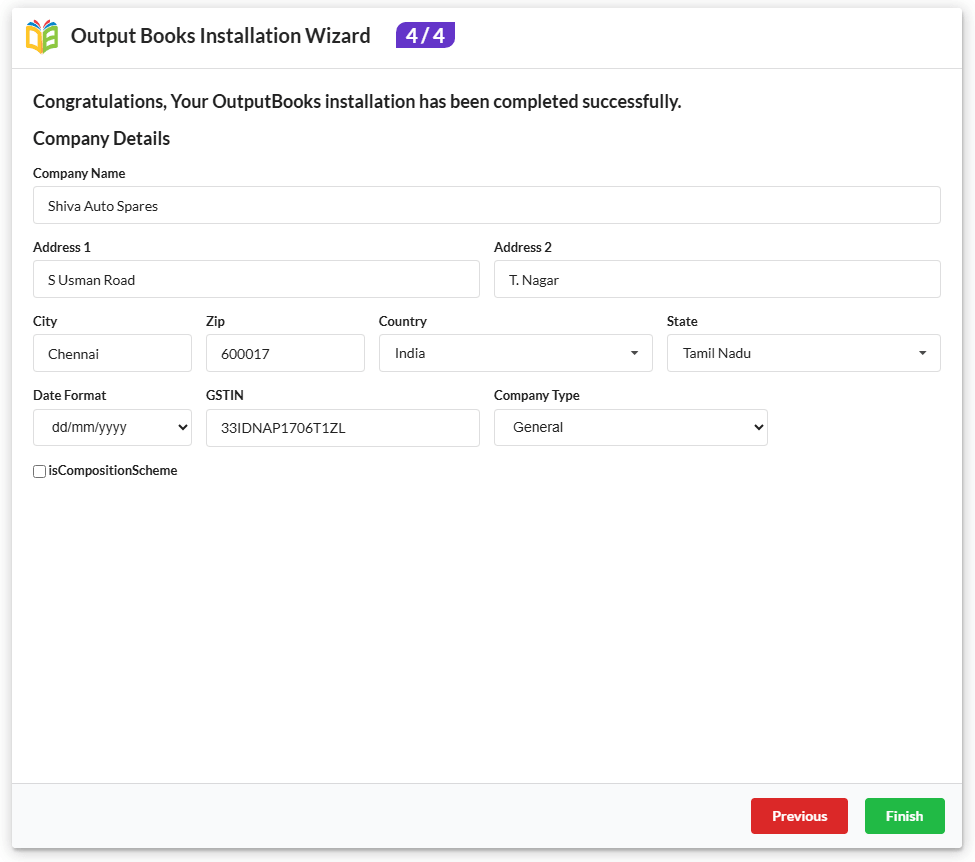
Wizard Step 4 of 4: Enter Company Details and Finish
Once the installation is completed successfully, the wizard displays the following confirmation message:
“Congratulations, Your OutputBooks installation has been completed successfully.”
You will then be asked to enter your company details.
Fill in or verify the following information:
| Field | Description |
|---|---|
| Company Name | Enter your registered or business name. |
| Address 1 | Enter the primary company address. |
| Address 2 | Enter additional address details, if applicable. |
| City | Enter your city. |
| Zip | Enter your postal/PIN code. |
| Country | Select your country. |
| State | Select your state. |
| Date Format | Select your preferred date format (for example, dd/mm/yyyy). |
| GSTIN | Enter your GST Identification Number, if applicable. |
| Company Type | Select the appropriate company type (for example, General). |
| isCompositionScheme | Select this checkbox only if your company is registered under the GST Composition Scheme. |
After entering the required details, click Finish to open the Output Books application.
Part 3: Log In to Output Books
After clicking Finish, the Output Books login page will open.
- Enter the Administrator E-Mail you provided in Wizard Step.
- Enter the corresponding Password.
- Click the login button.
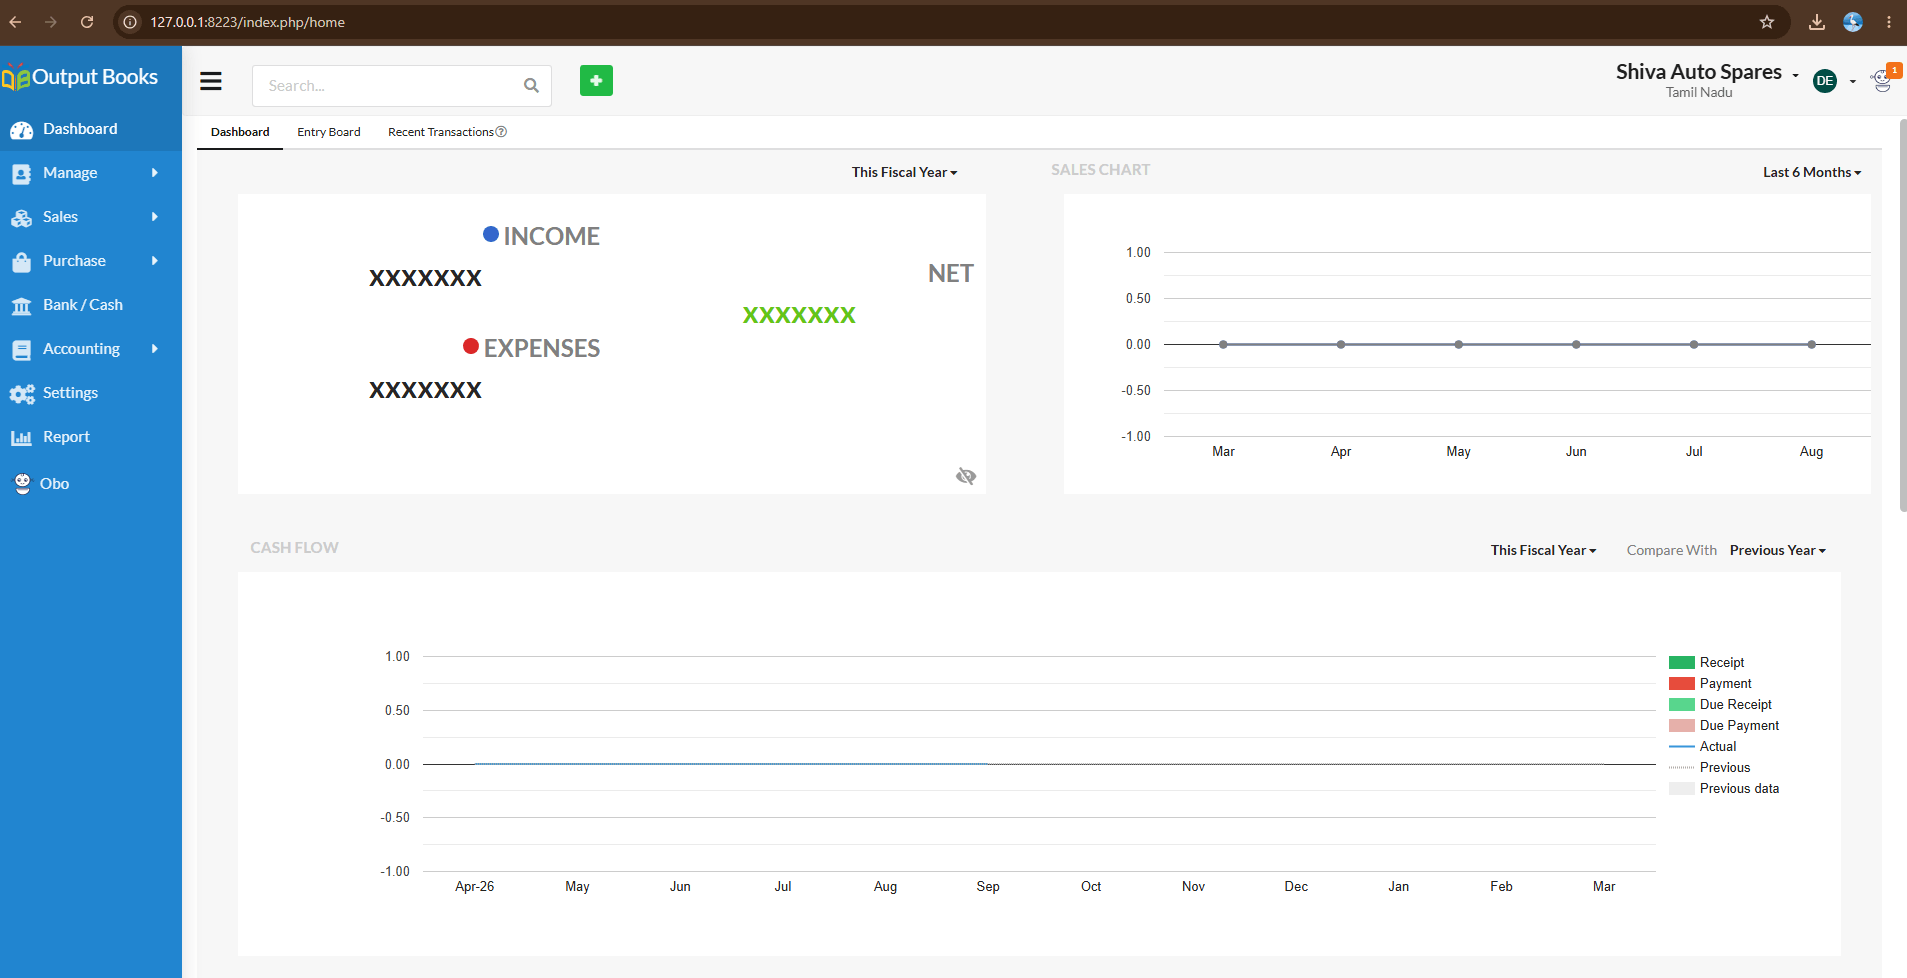
After successful login, the Output Books Dashboard will open.
Your Output Books installation is now ready to use.
Part 4 : Configure Output Books Server Manager Settings
Output Books Server Manager provides options to manage server configuration, reset user passwords and schedule automatic backups.
- To open Server Manager Settings:
- Open the Output Books Server Manager.
- Click the Gear (Settings) icon in the top-right corner.
The Settings window displays four tabs:
- Info
- Server
- Reset Password
- Backup
1. Info Tab
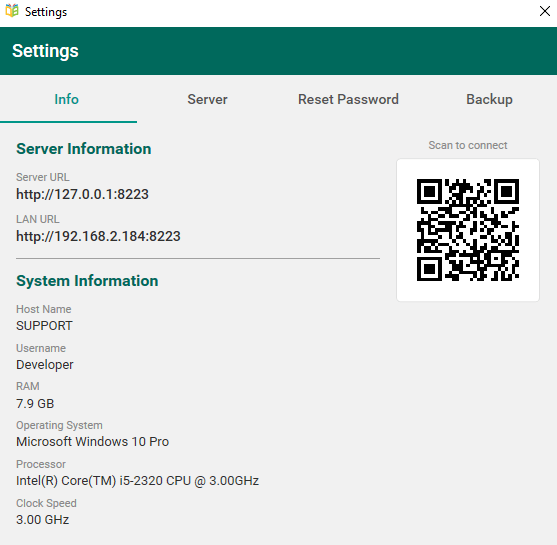
The Info tab displays important server and computer information.
Server Information:
- Server URL
- LAN URL
- Scan to Connect QR Code
System Information:
- Host Name
- Username
- RAM
- Operating System
- Processor
- Clock Speed
Accessing from other computers:
Use the LAN URL displayed in this tab to access Output Books from other computers connected to the same local network.
2. Server Tab
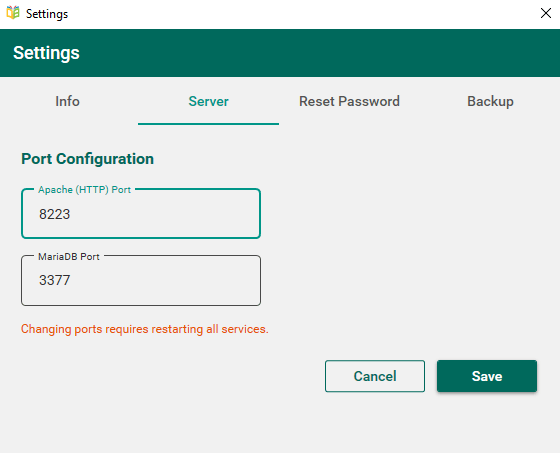
Server tab allows you to change the server port numbers under Port Configuration.
The default port numbers are:
- Apache (HTTP) Port: 8223
- MariaDB Port: 3377
To change a port number:
- Open the Server tab.
- Enter the required port number.
- Click Save to apply the changes.
- Click Cancel if you want to discard the changes.
3. Reset Password Tab
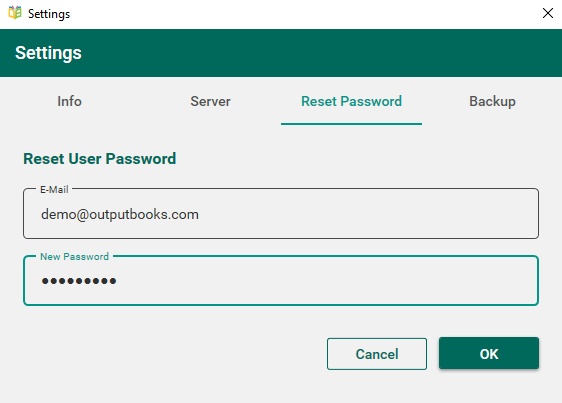
Use this option to reset an existing user’s password.
Follow these steps:
- Open the Reset Password tab.
- Enter the user’s registered E-Mail address.
- Enter the New Password.
- Click OK to proceed with the password reset.
Click Cancel to close the window without making changes.
4. Backup Tab – Configure Automatic Backups
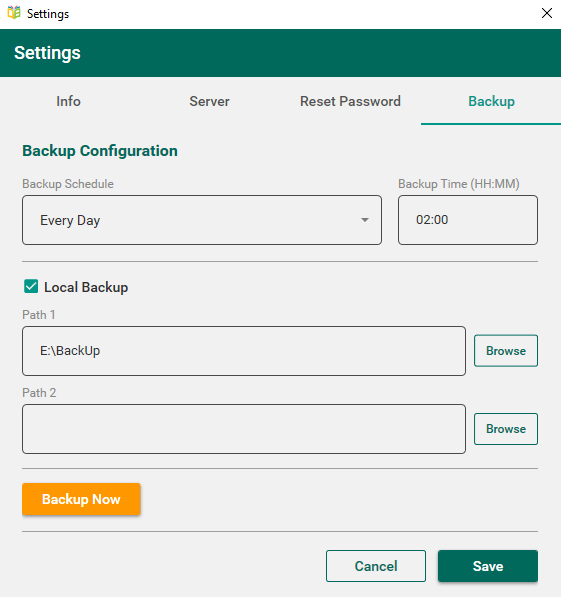
The Backup tab allows you to schedule automatic backups and select where the backup files should be stored.
Configure the Backup Schedule
- Open the Backup tab.
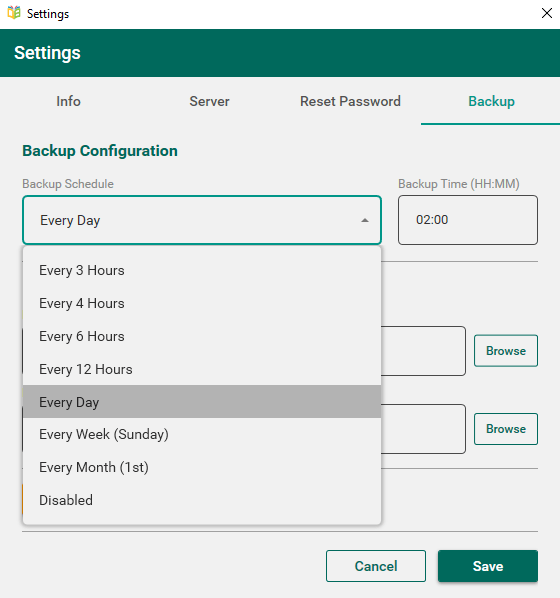
- Select the required Backup Schedule.
- Enter the preferred Backup Time in HH format.
Configure Local Backup Location
- Select the Local Backup option to save backups on your computer.
- Click Browse next to Path 1 and select the folder where you want to store the backup files.
- If required, select a second backup location using Path 2.
Take an Immediate Backup
To take a backup immediately without waiting for the scheduled time, click Backup Now.
Save Backup Settings
- Click Save to save the backup configuration.
- Click Cancel to discard the changes.
The Backup Schedule list offers these options:
- Every 3 Hours
- Every 4 Hours
- Every 6 Hours
- Every 12 Hours
- Every Day
- Every Week (Sunday)
- Every Month (1st)
- Disabled
Backup Recommendation: We recommend configuring automatic backups regularly and selecting a suitable backup location. Where possible, maintain an additional copy of important backups in a separate storage location.
Frequently Asked Questions
1. Can I install Output Books without installing a separate web server?
Yes. The Windows Standalone Server Installer includes the required web server and database components. They run from the extracted installation folder.
2. Which address should I use to open Output Books on the server computer?
Use: http://127.0.0.1:8223/
3. How can I access Output Books from another computer?
Use the LAN URL displayed in the Info tab of Server Manager Settings. Both computers should be connected to the same local network.
4. What should I do if the server services are stopped?
Open Output Books Server Manager and click the green Start button. Wait until all three services show Running.
5. What are the default server port numbers?
- Apache (HTTP): 8223
- MariaDB: 3377
6. Can I change the server port numbers?
Yes. Open Server Manager Settings → Server, change the required port numbers and click Save. Restart all services to apply the changes.
7. Can I take a backup manually?
Yes. Open Server Manager Settings → Backup and click Backup Now.
8. Can I schedule automatic backups?
Yes. Select a backup frequency, enter the backup time, configure the backup location and click Save.
9. Which login credentials should I use after installation?
Use the Administrator E-Mail and Password entered during Wizard Step 2.
Need Help?
If you need assistance with installing or configuring Output Books, please contact the Srimax Software Technology Support Team.


