You can manage items under Manage > Items.
Page Contents
List Items
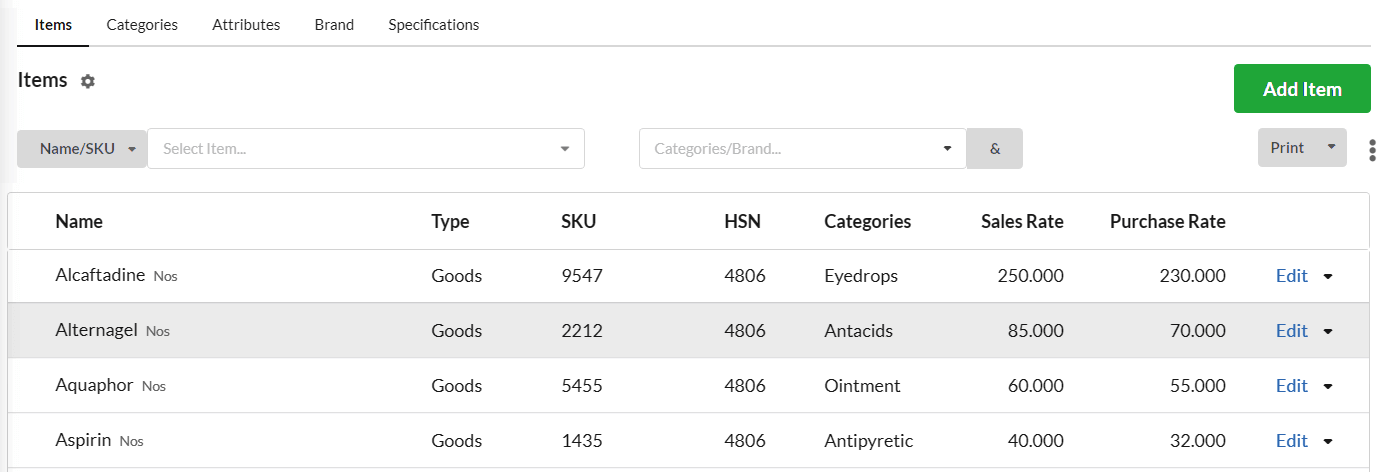
Items that are ready for sale or items that are purchased can be managed here. Items can be listed under the fields such as name, type, SKU code, HSN/SAC code, Sales Rate, Purchase rate under Manage > Items.
Add Items
To add items,
- Click on Add Items button on the top right corner.
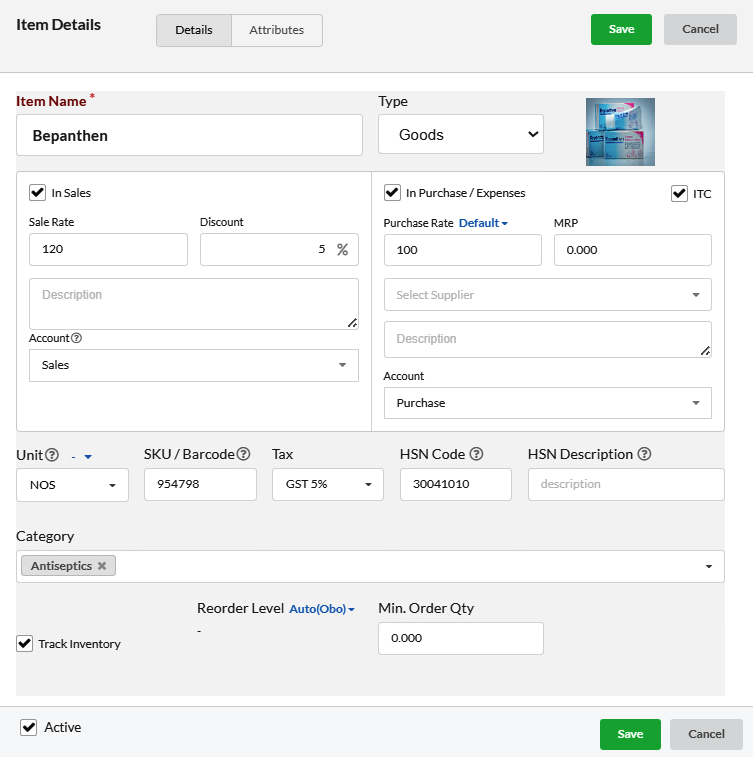
- Provide the relevant/required details.
- Hit Save.
| Fields | Description |
|---|---|
| Item Name | Provide the name of the item to be added[mandatory] |
| Type | Choose the category Goods or services for the item to be added[mandatory] |
| In Sales | Enable this option to add the items/goods under sales category.Then, provide the rate,discount of the item entered. Choose the Account for this item in which you want to record the Sales transactions from the chart of accounts listorSales Account by default. |
| In Purchase | Enable this option to add the items/goods in purchase list. Then, provide its rate and select Input Tax Credit if it is applicable. Choose the Account for this item in which you want to record the Purchase transactions from the chart of accounts list or Purchase Account by default. |
| Units | Select the unit of measurement for the item which is to be displayed in invoices and quotes |
| SKU Code | Provide the Stock Identification Code to identify the product. |
| Tax | Choose the Tax Rate for the item. |
| HSN Code / SAC Code | For Goods category, provide the HSN code. For Services category, provide the SAC code. |
| Category | Choose the Category under which the Item is to be included. |
| Track Inventory | Enable this option to manage the availability of stock for production, sales and delivery and services of a business effectively |
| Opening Stock | Enter the opening quantity of stock for the particular item here |
| Opening Stock Rate/Unit | The unit rate for the opening stock for the particular item can be given here. |
| Active | Enable this option to include the item in transactions or Invoicing. |
Add Item Categories & Attributes
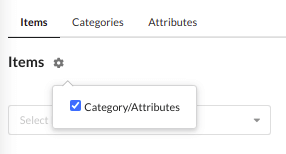
Click on the Settings icon present in the Items page & enable Categories/Attributes option to enable the Item categories & attributes option. So that, you can start creating categories & attributes & assign items under it.
(or)
Go to Settings > Modules and enable the Item Categories & Attributes option.
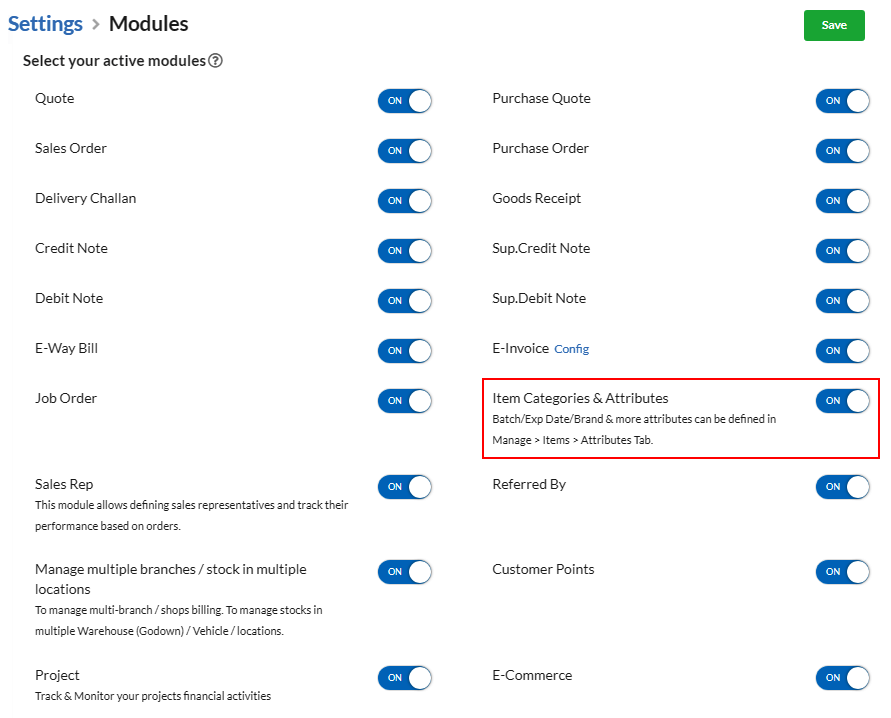
Then go to Manage > Items > Category/Attribute > New Category/Attribute and add category/attribute respectively.
Click here to know more on Item Categories & Attributes.
Filter Items & Item Categories
To Filter Items:
Click on the Select Item drop-down & choose the item which you want to filter out from the list of items.

To Filter Item Categories:
Click on the Categories drop-down & choose the item category you wish to filter. All the items under the chosen category alone will be displayed.
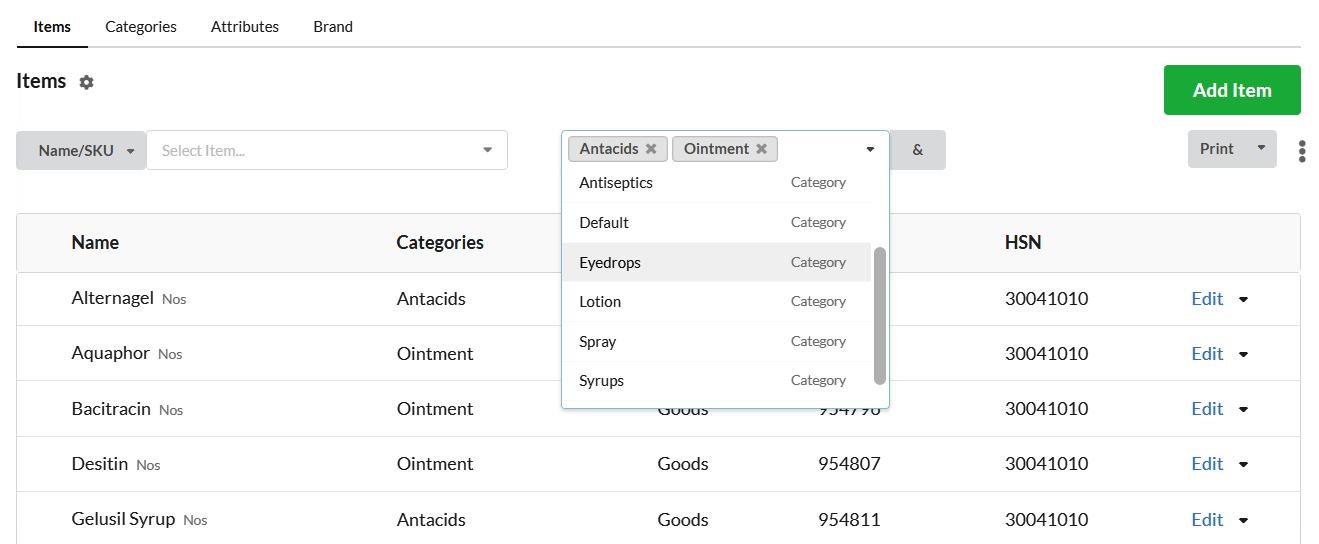
You can choose multiple item categories & filter.
How to edit an item?
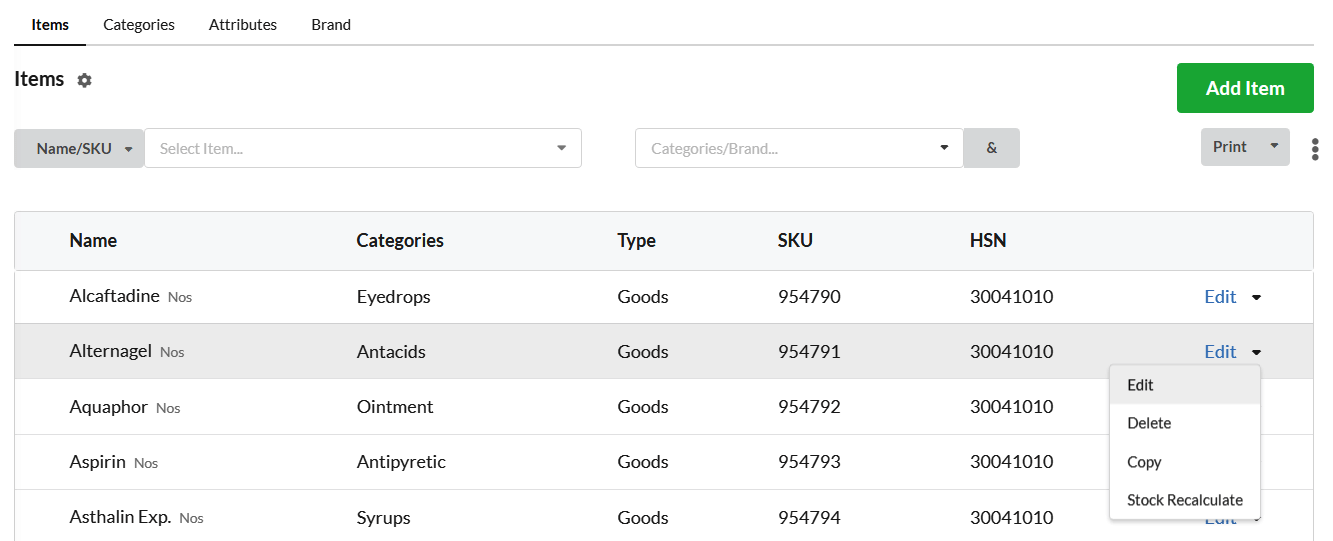
To edit an item, hit on the Edit option stuck with each item.
Do the necessary changes and hit save.
How to Delete/Archive Items ?
Click on the Delete option associated with each item.
Note: The items that are used in transactions can’t be deleted.You will be displayed with a alert pop-up like this:
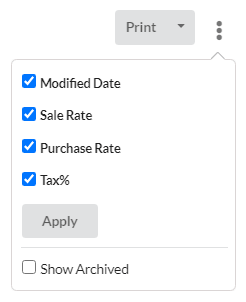
Deleted items will be stored as Archived items. You can view the archived items by enabling the Show Archived option present under the three dots(vertical) icon.
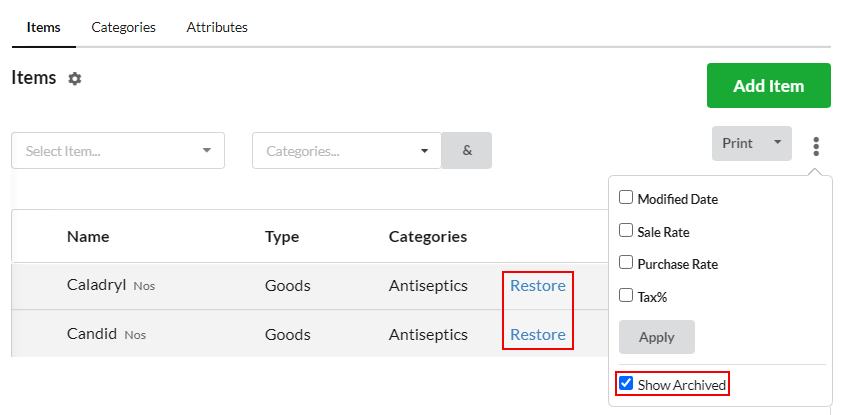
To restore deleted/archived items back into Items list, click on the Restore present near each of the archived item.
How to permanently delete unused Items from Item master?
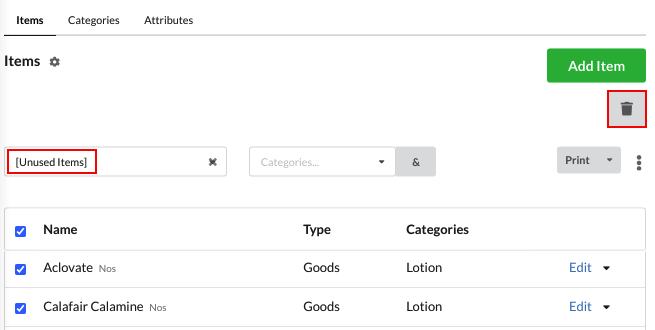
The items that are not used in any transaction can be deleted permanently from Output Books. To delete the unused items, click on the Select Item drop-down and click Unused Items.
From there, choose the items that are to be permanently deleted and click on the Delete icon present at the top right of the Items window.
Export/Import Items
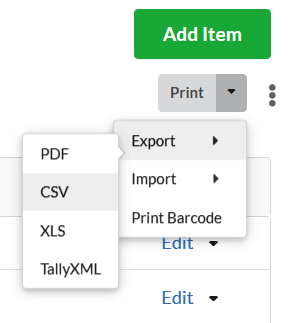
Export CSV
You can export all the items in a csv file with their respective details. When click on “Export csv” button all items will get exported in a csv file & downloaded.
Export PDF
All the items can be exported as a PDF file with its respective details.
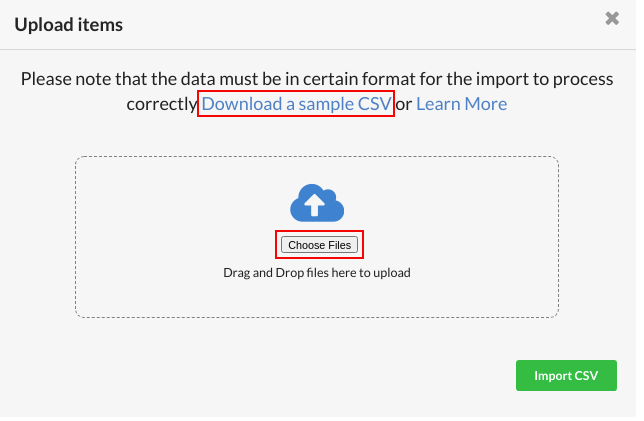
Import CSV
You can download the Sample csv from from the pop-up that appears & fill it with your stock items & import it in Output Books.
Import from Tally
Directly import Items from your Tally environment into Output Books with ease.
Import from Tally XML
You can download your Items list as XML file from tally & import it directly in Output Books.
Print Barcode
Click here to know how to print barcode for Items.
Additional Options
Click on the three dot (vertical icon) at the top-right corner. You can find the ‘Modified Date’, ‘Sale Rate’ , ‘Purchase Rate’ , ‘Tax %’ options. Enable the options so that they get displayed in the Items listing page.
